Biological Safety Cabinet Classes: Class I, Class II, and Class III Explained

Biological safety cabinets (BSCs) are enclosed, ventilated workspaces used in laboratories. They are engineered to protect the user, the work product, and the environment from hazardous biological materials. This protection is achieved through specialized airflow patterns and high-efficiency particulate air (HEPA) filters.

Choosing the correct BSC is critical for lab safety and research integrity. The decision depends on the specific biological agents, chemicals, and procedures used in your lab. Understanding the differences between the biological safety cabinet classes is the first step toward a safer, more compliant facility.


Key Takeaways

  • Class I cabinets protect the user and the environment but not the product inside. They are for low-to-moderate risk agents where sterility is not needed.
  • Class II cabinets protect the user, product, and environment. They are the most common type, with subtypes (A2, B1, B2) for different chemical use scenarios.
  • Class III cabinets provide the highest level of containment. They are fully sealed gas-tight enclosures for work with high-risk BSL-4 agents.

Class I Biological Safety Cabinets

A diagram illustrating the airflow pattern inside a Class I biological safety cabinet.

A Class I BSC is the simplest type of cabinet. Its primary function is to protect the user and the surrounding lab environment from hazardous aerosols generated during a procedure.

The airflow is straightforward. Room air is drawn into the cabinet through the front opening, flows across the work surface, and is then exhausted through a HEPA filter. This inward airflow prevents contaminated air from escaping the cabinet.

However, a Class I cabinet offers no product protection. Unfiltered room air constantly flows over the samples. This makes it unsuitable for work that requires a sterile environment, such as cell culture. What Class I protects is the operator, making it useful for enclosing equipment like centrifuges or for procedures with low-risk agents where sterility is not a concern.

Class II Biological Safety Cabinets

A scientist in a lab coat and gloves working inside a Class II biological safety cabinet.

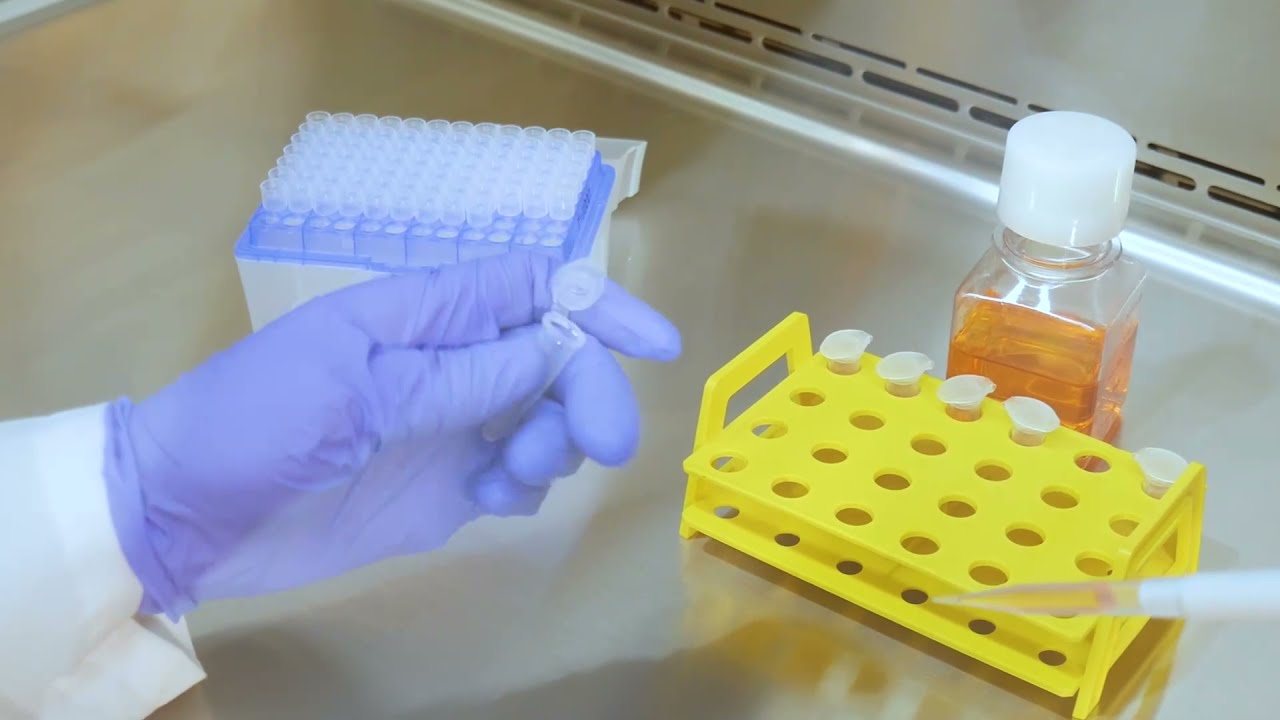
alt=’A lab technician carefully pipettes a sample inside a well-lit Class II A2 biological safety cabinet with the sash closed.’

Class II cabinets are the most common type of BSC found in clinical and research labs. They provide protection for the user, the product, and the environment. This three-way protection makes them the workhorse for most biological research.

These cabinets create an air curtain at the front opening to protect the operator. At the same time, HEPA-filtered air flows downward over the work surface to protect the samples from contamination. All exhausted air is also HEPA-filtered to protect the environment. There are several subtypes of Class II cabinets, with A2 and B2 being the most common. The main difference lies in how they handle airflow and chemical vapors. Our popular Airstream biological safety cabinet line includes these advanced options.

Class II, Type A2

The Class II A2 airflow and applications are suited for most standard microbiological work. In a Type A2 cabinet, about 70% of the air is recirculated back into the work area through a HEPA filter. The other 30% is exhausted through another HEPA filter, either back into the lab or through a thimble connection to the building’s exhaust system.

These cabinets are designed for work with biological agents in the absence of volatile or toxic chemicals. Only trace amounts of chemicals can be used, as the recirculated air could expose the user to chemical fumes.

Class II, Type B2

A Type B2 cabinet is often called a “total exhaust” cabinet. It is hard-ducted directly to an external exhaust system and vents 100% of the air outside after HEPA filtration. No air is recirculated within the cabinet or the lab.

This design makes it the proper choice when a B2 cabinet makes sense: for work involving both biological agents and significant amounts of hazardous or volatile chemicals. The total exhaust system ensures that no chemical vapors are returned to the workspace, protecting the user. Understanding the differences between a BSC and a chemical fume hood is key to making this distinction.

Class III Biological Safety Cabinets

A scientist wearing full protective gear operates within a Class III biological safety cabinet, handling materials through attached gloves.

alt=’A user manipulates materials inside a sealed Class III glovebox, wearing heavy-duty arm-length gloves attached to the unit.’

For work with the highest-risk pathogens (Biosafety Level 4), a Class III cabinet is required. These units provide the maximum level of containment. A Class III BSC is a completely sealed, gas-tight enclosure maintained under negative pressure.

The operator works through heavy-duty gloves attached to ports on the cabinet, providing Class III glovebox level containment. This creates a total physical barrier between the user and the hazardous agent. All air entering the cabinet is HEPA-filtered, and all exhausted air passes through two HEPA filters in series before being discharged outside. This design is similar to a glovebox fume hood but is built specifically for biological hazards.

Comparison of Biological Safety Cabinet Classes

This table provides a side-by-side comparison of the key features, applications, and considerations for each BSC class.

Feature Class I Class II, Type A2 Class II, Type B2 Class III
Airflow Pattern Inward flow, no recirculation. 70% recirculated, 30% exhausted. 0% recirculated, 100% exhausted. Sealed system under negative pressure.
Product Protection No Yes Yes Yes (Maximum)
Personnel Protection Yes Yes Yes Yes (Maximum)
Typical CFM & Filtration Single HEPA on exhaust. CFM varies. HEPA on supply and exhaust. Thimble option. HEPA on supply and exhaust. Hard ducted. Double HEPA on exhaust. Hard ducted.
Best Applications Housing equipment, procedures with non-sterile agents. Cell culture, microbiology with no volatile chemicals. Work with biologicals and volatile toxic chemicals. Work with BSL-4 agents (e.g., Ebola virus).
Considerations Does not protect the sample from contamination. Not for use with significant amounts of chemicals. Requires dedicated building exhaust system. Complex setup, limited user mobility.

How to Choose the Right BSC Class: A 5-Step Checklist

Selecting the right BSC is a critical safety decision. Follow this step-by-step checklist to ensure your choice aligns with your lab’s specific needs.

  1. Assess Biological Risk: First, identify the Biosafety Level (BSL) of every agent you will handle. BSL-1 agents require basic containment, while BSL-4 agents demand a Class III cabinet. This assessment is the foundation of your decision.
  2. Determine Need for Product Protection: Next, decide if your work requires a sterile environment. If you are working with cell cultures or other sensitive materials, you need product protection. This immediately rules out Class I cabinets.
  3. Evaluate Chemical Use: Then, list all chemicals you plan to use inside the cabinet. If your protocol involves volatile toxic chemicals or radionuclides, a Class II, Type A2 cabinet is not appropriate. You must select a Class II, Type B2 or Class III cabinet.
  4. Review Facility Requirements: After that, analyze your lab’s infrastructure. Does your HVAC system support the exhaust requirements of a ducted B2 cabinet? Confirm available space, power, and utility connections before making a purchase.
  5. Consult with EHS and Biosafety Officer: Finally, always consult with your institution’s Environmental Health and Safety (EHS) department. They must review and approve your choice to ensure it meets all safety regulations and institutional policies.

5 Common Scenarios for Selecting a BSC

  • Scenario 1: University Cell Culture Core Facility.
    • Workflow: Researchers work with non-infectious human and animal cell lines (BSL-2). No volatile chemicals are used.
    • Decision: A Class II, Type A2 cabinet is the standard choice. It provides the necessary product protection to prevent contamination and protects users from potential biohazards.
  • Scenario 2: Clinical Microbiology Lab.
    • Workflow: Technicians identify bacterial and fungal cultures from patient samples (BSL-2).
    • Decision: A Class II, Type A2 is also ideal here. It protects staff from infectious aerosols and maintains the sterility of the cultures.
  • Scenario 3: Pharmaceutical Quality Control Lab.
    • Workflow: A procedure requires handling a BSL-2 agent while using small, defined quantities of a volatile solvent like methanol.
    • Decision: This workflow requires a Class II, Type B2 cabinet. The total exhaust system is necessary to protect the operator from inhaling chemical fumes.
  • Scenario 4: Animal Research Facility.
    • Workflow: Staff are changing cages for rodents housed in a BSL-2 containment suite. The goal is to contain allergens and potential pathogens.
    • Decision: A Class I cabinet is often used for this task. Product protection is not needed, but personnel and environmental protection from allergens and aerosols are crucial.
  • Scenario 5: High-Containment Government Lab.
    • Workflow: Scientists are researching emerging infectious viruses like Ebola or Marburg (BSL-4).
    • Decision: This work mandates a Class III cabinet. The gas-tight, sealed environment provides the absolute highest level of protection against deadly pathogens.

Installation, Maintenance, and Certification

Proper installation is essential for a BSC to function correctly. The cabinet must be placed away from high-traffic areas, doors, and air vents to avoid disrupting its protective air curtain. Ducted cabinets, like the Class II B2, require professional integration with the building’s HVAC system. Casework, benches, and service utilities must be planned to ensure ergonomic access and safe operation.

Regular maintenance and certification are mandatory. A certified technician must test and verify the cabinet’s performance at least annually. This includes checking airflow velocities, HEPA filter integrity, and alarm functions. Keeping detailed records is a critical part of lab compliance. Following a proper BSC certification and annual testing schedule ensures the cabinet provides consistent protection.

Frequently Asked Questions (FAQs)

1. What is the main difference between a Class I and Class II BSC?
The main difference is product protection. A Class I BSC protects the user but not the sample. A Class II BSC protects the user, the sample, and the environment.

2. Can I use a Bunsen burner inside a BSC?
It is strongly discouraged. The open flame disrupts the cabinet’s internal airflow, which can compromise both user and product protection. The heat can also damage the HEPA filters.

3. How often do HEPA filters need to be changed?
HEPA filters typically last for several years but should be changed based on the results of annual certification tests. A technician will perform a test to determine if the filter has become too loaded with particles to maintain proper airflow.

4. What is the difference between a HEPA and a ULPA filter?
A HEPA filter is at least 99.97% efficient at removing particles of 0.3 microns. An ULPA (Ultra-Low Particulate Air) filter is even more efficient, removing 99.999% of particles 0.12 microns in size. ULPA filters are often used in Class III cabinets or cleanrooms.

5. What does BSC certification involve?
Certification is a series of tests performed by a qualified technician to verify that a BSC is working correctly. It includes measuring airflow velocity, checking for HEPA filter leaks, and ensuring alarms are functional. It should be done upon installation and at least once a year after that.

6. Do I need a Class II A2 or B2 cabinet?
Choose a Type A2 if you only work with biological agents. Choose a Type B2 if your work involves both biological agents and more than trace amounts of volatile toxic chemicals. Always confirm with your safety officer.

Find the Right Biological Safety Cabinet for Your Lab

Choosing the correct biological safety cabinet class is a fundamental step in designing a safe and efficient laboratory. By carefully assessing your biological agents, chemical use, and facility capabilities, you can select a unit that provides the right level of protection for your team and your research. Each class, from I to III, is engineered for a specific set of risks and applications.

At Labs USA, we provide a wide selection of lab furniture, workstations, and containment solutions to meet your needs. Our team can help you navigate the options and plan a layout that works for you.

Explore our full range of biological safety cabinets to compare models and find the best fit for your facility.

Ready to take the next step? Request a quote today to get pricing and check current availability on our quick-ship options.

Frequently Asked Questions

Which biological safety cabinet class do I need?

Class I cabinets work for low-to-moderate risk agents when sample protection is not needed. Class II cabinets are the most common and protect both the user and the sample. Class III is required for Biosafety Level 4 agents.

How often should a biological safety cabinet be certified?

Annual certification is the minimum requirement per NSF/ANSI 49. Cabinets should also be recertified after being moved, repaired, or having HEPA filters replaced.

Need Help Designing Your Lab?

Our laboratory design specialists provide free consultations, 3D lab layouts, and competitive pricing on all laboratory furniture and equipment.

Request a Free Consultation → | Call (801) 999-8277

Who This Is For

Our biological safety cabinet classes solutions are ideal for:

  • Laboratory directors
  • Facility architects
  • University science departments
  • Pharma/biotech companies
  • Hospital labs
  • Government research facilities

A Guide to Lab Safety Cabinets

A Complete Guide to Lab Safety Cabinets

For any lab manager, safety officer, or facilities team member, proper chemical storage is a critical responsibility. It is more than just keeping a space organized. It is an essential engineering control that prevents fires, toxic reactions, and serious accidents. The right lab safety cabinets are your first line of defense, ensuring hazardous materials are properly contained and segregated to protect personnel and your facility.

This article is for anyone involved in lab safety, including EHS staff, lab managers, and facilities teams. Safe chemical storage is a daily commitment, not a one-time task. Improper storage creates unacceptable risks such as fires, explosions, and dangerous exposures. Understanding the specific roles of different safety cabinets is necessary for safety and compliance.

This guide will explain the crucial differences between cabinets built for flammable liquids and those designed for acids and corrosives. These two types of cabinets are not interchangeable. Using the wrong one is a major hazard. By understanding what each cabinet is built for, you can prevent dangerous reactions, protect flammable liquids from ignition sources, and meet strict standards from organizations like OSHA and the NFPA.

5 Steps to Choosing the Right Lab Safety Cabinet

Selecting the correct lab safety cabinets is a methodical process. Following a clear checklist ensures you invest in your lab’s safety and compliance. This five-step plan will guide you through assessment, planning, and selection for a confident, informed decision.

Step 1: Identify and Group Your Chemicals by Hazard Class

The first step is to create a complete inventory of every hazardous chemical in your facility. You cannot choose the right cabinet without knowing exactly what you need to store. Once you have a list, group the chemicals by their primary hazard class and compatibility. The Safety Data Sheet (SDS) for each substance provides specific storage requirements.

  • Flammables: Includes chemicals like ethanol, acetone, and other solvents.
  • Acids: Segregate strong acids such as sulfuric or nitric acid.
  • Bases: Keep corrosive bases like sodium hydroxide separate from acids.
  • Oxidizers: These require special storage and must not be stored near flammables.

Step 2: Estimate Storage Volume and Container Sizes

Next, calculate the total volume of chemicals you need to store for each hazard class. Consider both your current inventory and any expected growth. It is better to have extra space than to run out. Also, note the container sizes you use, from small bottles to five-gallon drums. This detail will determine the shelf depth and height you need. The total volume for each group gives you the minimum cabinet capacity, measured in gallons, to look for.

Step 3: Decide Cabinet Location and Placement

Where you put your cabinets is as important as which ones you choose. The location must support your daily workflow while also being safe in an emergency. Cabinets should be located near work areas but must never block emergency exits, hallways, or access to safety equipment. Keep flammable storage cabinets far from ignition sources like open flames or electrical equipment. Measure the available space to ensure the cabinet’s footprint fits without creating an obstacle.

Step 4: Choose Cabinet Size and Interior Options

Now you can select specific cabinet features. The main decisions involve size and interior options. Choose between one-door and two-door models based on your available space and storage volume. A compact one-door cabinet works well in smaller labs, while a wider two-door cabinet is better for higher volumes. Ensure the shelves are appropriate for the chemicals you are storing. For example, acid cabinets need corrosion-resistant shelves.

Step 5: Plan Labeling, Inventory, and Inspection Practices

Your selection process is not complete until you have a plan for long-term use and maintenance. A cabinet’s safety depends on the procedures you build around it. Establish clear protocols for labeling each cabinet with its contents, such as “Flammable – Keep Fire Away.” Maintain an up-to-date inventory log for what is inside each cabinet. Finally, create a simple checklist for routine inspections of doors, latches, and the interior sump for any signs of wear or spills.

Flammable Cabinets Versus Acid and Corrosive Cabinets

Choosing the wrong storage cabinet is a common but dangerous mistake. Flammable cabinets and acid or corrosive cabinets may look similar, but they are engineered for different hazards. Using one for the other’s job negates its safety features. Flammable cabinets are designed to protect their contents from an external fire, while acid and corrosive cabinets are built to resist chemical corrosion from the inside.

Benefits of Flammable Safety Cabinets

A flammable safety cabinet acts as a protective shield. Its purpose is to protect volatile liquids inside from an external fire. The cabinet is designed to keep the internal temperature from rising too quickly, giving personnel a crucial window of about 10 minutes to evacuate before chemicals can auto-ignite. These cabinets are made with double-wall 18-gauge steel and have a 1.5-inch insulating air gap. They often feature self-closing doors and a three-point self-latching system to ensure a tight seal. Flammable cabinets are typically painted safety yellow for easy identification.

Benefits of Acid and Corrosive Cabinets

An acid and corrosive cabinet is like a specialized containment unit. Its job is to withstand the aggressive chemicals stored inside it. Vapors from acids can quickly corrode standard steel, leading to structural failure and leaks. To prevent this, these cabinets are lined with corrosion-resistant polyethylene. Their shelves are also coated or made from non-metal materials to handle spills without degrading. These cabinets are usually blue or white to signal they are intended for corrosives. The key benefit is that even if a container leaks, the cabinet itself will not be compromised.

Comparison Table: Flammable vs. Acid and Corrosive Cabinets

This table breaks down the key differences to help you choose the right cabinet for the job.

Feature Flammable Safety Cabinets Acid and Corrosive Cabinets
Hazard Class Stored Flammable and combustible liquids Corrosive liquids like acids and bases
Primary Safety Goal Protect contents from external fire Protect cabinet from internal corrosion
Interior and Finish Type Powder-coated steel Polyethylene liners and coated shelves
Typical Color and Labeling Safety yellow with “Flammable” warning Safety blue or white with “Corrosive” warning
Recommended Use Cases Storing ethanol, acetone, and other solvents Storing sulfuric acid and sodium hydroxide
Key Benefits in a Lab Environment Fire resistance, secure latching, vapor containment Corrosion resistance, spill containment, long-term durability

Choosing Between One-Door and Two-Door Cabinet Designs

The choice between single-door and double-door cabinets depends on your lab’s space, storage capacity needs, and workflow. Both designs offer excellent protection when used correctly.

One-Door vs. Two-Door Flammable Cabinets

A compact, single-door flammable cabinet is ideal for labs with limited floor space or smaller quantities of flammable liquids. They can fit easily into corners or alongside workstations. A wider, two-door flammable cabinet provides greater storage capacity and easier access to contents, making it a good choice for shared labs or facilities with higher volumes of flammable materials.

One door yellow flammable safety cabinet for storing small quantities of flammable liquids in a lab.
One door flammable safety cabinets are a compact option for labs with limited space and smaller flammable liquid volumes.
Two door yellow flammable safety cabinet for storing larger quantities of flammable liquids in a shared lab space.
Two door flammable safety cabinets provide greater storage capacity and easier access for labs with higher volumes of flammable liquids.

One-Door vs. Two-Door Acid and Corrosive Cabinets

Similarly, a one-door acid and corrosive cabinet is a practical choice for storing smaller amounts of corrosive chemicals without taking up much space. For labs that use larger quantities or a wider variety of acids and bases, a two-door model offers more organized storage and helps keep incompatible corrosives segregated on different shelves. The wider access makes inventory management simpler.

One door blue acid and corrosive cabinet for safe storage of corrosive chemicals in a small lab.
One door acid and corrosive cabinets offer a space-saving solution for storing small amounts of corrosive materials safely.
Two door blue acid and corrosive cabinet with ample storage for larger quantities of acids and bases.
Two door acid and corrosive cabinets allow for organized storage of larger volumes and help separate different types of corrosives.

Integrating Cabinets Into Your Overall Lab Safety Plan

A safety cabinet is an active part of your lab’s entire safety program. Proper integration connects your physical storage with your safety policies. They are critical engineering controls that support your facility’s safety culture and compliance efforts.

The primary role of chemical storage cabinets is to enforce chemical segregation rules. By dedicating specific cabinets to different hazard classes, you create physical barriers that make accidental mixing of incompatible chemicals nearly impossible. This practice is a cornerstone of any chemical hygiene plan.

Smart cabinet placement is also a vital part of your emergency response plan. Cabinets must be located where they will not block exit routes or access to emergency equipment. In addition, correct use of safety cabinets helps ensure regulatory compliance with standards from OSHA and the NFPA, which have specific rules for storing hazardous materials.

Maintenance, Accessibility, and Lifecycle

Proper upkeep ensures your safety cabinets function as designed for years. A consistent maintenance routine is the best way to protect your investment. This includes regular cleaning, inspection, and planning for eventual replacement.

For cleaning, always consult the SDS for the chemicals stored inside to select an appropriate cleaning agent that will not damage the cabinet’s protective coatings. Perform regular inspections of door hardware, self-closing mechanisms, labels, and the containment sump. A weekly visual check and a detailed annual inspection are recommended.

Accessibility is also a key consideration. Place cabinets at a height that allows for safe access to all shelves. Ensure there is clear floor space in front of the doors for easy opening. Labels and hazard markings must be clearly visible. For users with visual impairments, descriptive labels are critical. For example, good alternative text for an image might be: “A row of three yellow, two-door flammable safety cabinets with large red ‘Flammable’ warning labels, located against a laboratory wall.”

Frequently Asked Questions About Lab Safety Cabinets

When does a lab need separate flammable and acid cabinets?

A lab needs separate cabinets whenever both flammable liquids and corrosive acids or bases are stored. Storing these hazard classes together is unsafe because their storage requirements are opposite. Flammable cabinets are made of steel to resist fire, but this steel will be destroyed by corrosive vapors. Acid cabinets use plastic linings that resist corrosion but offer no fire protection. You must use separate, dedicated cabinets for each hazard class.

How full can a safety cabinet be loaded?

There is no specific percentage rule from regulatory bodies, but best practices suggest avoiding overfilling. Cabinets should not be so full that containers block the doors from closing and latching securely. Leave enough space between containers to allow for safe removal and to promote air circulation. Stacking containers is generally not recommended unless they are designed for it.

Are safety cabinets required to be vented?

Venting is generally not required and is often discouraged for flammable cabinets. An improper vent can compromise the cabinet’s fire rating by creating a pathway for fire to enter. Venting should only be done if a risk assessment determines it is necessary to control toxic vapors and must comply strictly with local codes. For acid cabinets, venting is more common to manage corrosive fumes, but it must still follow all applicable regulations.

How do I decide between one-door and two-door cabinet sizes?

The decision depends on your available space and storage volume. One-door cabinets have a smaller footprint and are ideal for labs with limited space or small inventories. Two-door cabinets offer greater capacity and wider access, making them suitable for larger labs or areas with higher chemical throughput.

How often should safety cabinets be inspected?

A visual inspection should be performed weekly to check for obvious issues. A more thorough, documented inspection should be conducted at least annually. This detailed check should include the door mechanisms, latches, labels, and the interior sump for any signs of spills or corrosion.

How do lab safety cabinets support regulatory compliance?

Lab safety cabinets are engineered to meet specific standards set by organizations like OSHA and the NFPA. Using compliant cabinets for flammable liquids and corrosives is a direct way to meet the requirements of standards like OSHA 29 CFR 1910.106. Proper use of these cabinets demonstrates a commitment to safety and helps avoid citations during inspections.

Conclusion: Your Next Step to a Safer Lab

Choosing and placing the right lab safety cabinets is fundamental to creating a safe and compliant laboratory environment. Flammable and acid or corrosive cabinets play distinct and non-interchangeable roles in protecting your personnel and facility. By understanding their differences and integrating them into a comprehensive safety plan, you establish a strong foundation for chemical safety.

Labs USA offers a wide range of high-quality laboratory safety cabinets to meet your specific needs. Our team can assist with cabinet selection, hazard class reviews, and layout planning. We offer quick quotes and have quick ship options available to help you upgrade your storage solutions promptly.

Explore our selection of flammable and acid storage cabinets today to find the perfect fit for your lab. For personalized assistance or to get a quote, contact our experts.

Contact Labs USA

If you need help with lab safety cabinet selection, chemical storage planning, or safety upgrades, our team is ready to assist. We provide expert guidance to laboratories, hospitals, universities, and industrial facilities across the United States.

Reach out to us through the Labs USA contact page for a quote or to discuss your project requirements with one of our specialists.

Who This Is For

Our lab safety cabinets solutions are ideal for:

  • Laboratory directors
  • Facility architects
  • University science departments
  • Pharma/biotech companies
  • Hospital labs
  • Government research facilities

Your Guide to Finding a Ductless Fume Hood For Sale

A ductless fume hood is a self-contained safety station. It protects lab workers from hazardous fumes without needing external ductwork. A traditional hood vents air outside, which often requires cutting a hole in a wall. A ductless model, however, cleans the air inside the lab. It uses carbon or HEPA filters to trap contaminants. Then, it recirculates the clean air back into the room.

This "plug-and-play" design makes it a flexible and cost-effective option for many modern laboratories.


TL;DR: Key Takeaways

  • What It Is: A self-contained, filtered enclosure that cleans and recirculates air.
  • Key Benefits: Easy installation, mobility, energy efficiency, and lower upfront costs.
  • Best For: Routine tasks, known chemicals, teaching labs, and spaces where ductwork is not possible.
  • Not For: Highly toxic substances, unknown chemical reactions, or radioactive materials.
  • How to Choose: Assess your chemicals, verify filter compatibility, select the right size, check safety features, and plan for maintenance.

Understanding Ductless Fume Hoods

A scientist in a lab coat working at a modern ductless fume hood in a laboratory.

A ductless fume hood works like a powerful air purifier designed for laboratory chemicals. The unit’s fan draws contaminated air from the workspace. It then pushes that air through a series of filters and releases clean air back into the lab. This simple design means you do not need expensive ductwork or major construction.

The filtration system is the most important part. Depending on the chemicals or particles you work with, the hood will use an activated carbon filter, a HEPA filter, or a combination of both. The ability to match the filter to the hazard makes these units effective.

Key Benefits of Ductless Systems

The global ductless fume hood market was valued at $250 million in 2023. It is expected to reach $450 million by 2032. This growth shows that labs recognize the need for adaptable safety equipment. Learn more about the ductless fume hood market trends.

What is driving this trend? It comes down to a few key advantages:

  • Mobility and Flexibility: These units are not permanently installed. You can move them between rooms or rearrange your lab as projects change.
  • Simple Installation: Since there is no need to connect to the building’s HVAC system, installation is fast, often taking only a few hours.
  • Energy Efficiency: Traditional hoods pump conditioned air outside. Ductless hoods clean and recirculate that air, which reduces energy use and lowers utility bills.
  • Lower Initial Costs: When you eliminate complex ductwork, the upfront investment is often much lower.

These systems are a modern solution to lab ventilation problems. To see how they compare to other options, you can explore all types of laboratory fume hoods to get a full view.

Comparing Ducted and Ductless Fume Hoods

Two types of laboratory fume hoods, ducted and ductless, shown in a clean lab environment.

Choosing the right fume hood means understanding the two main types: ducted and ductless systems. This is a critical decision.

A ducted hood is a permanent fixture plumbed into the building’s HVAC system. It sucks contaminated air from the workspace and vents it directly outside. It provides a one way path for fumes out of your building.

A ductless hood is a self contained, often mobile unit. Instead of venting air out, it pulls air through a filter system. Then, it recirculates the clean air back into the room. This section provides a side by side look at both options to help you before you look for a ductless fume hood for sale.

Installation and Flexibility

This is where the two types differ most. A ducted fume hood requires a construction project. Installation involves contractors running extensive ductwork through walls and roofs. The process is complex, costly, and time consuming.

Ductless fume hoods are the opposite. They are "plug and play." No major construction is needed, and you can often have one running in a few hours. This offers a level of flexibility that is impossible with ducted systems.

  • Mobility: You can wheel a ductless hood to a new spot. You can even move it to a different building.
  • Adaptability: They are a good fit for spaces where construction is not possible, like leased labs or historic buildings.
  • Scalability: If you need more fume containment, you can add another unit without re-engineering your HVAC system.

Operational Costs and Energy Use

The purchase price is only part of the total cost. Ducted hoods constantly pump your lab's conditioned air outside. Your HVAC system must work harder to replace that air, which can lead to high energy bills.

Ductless systems avoid this problem by cleaning and recirculating the air. You will have to replace filters, but the total cost of ownership is often lower. Ductless models are cheaper to install, do not disrupt lab workflow, and their low energy use leads to savings.

Chemical Handling and Safety

Ducted hoods are best for handling highly toxic materials, unknown substances, or processes that generate a lot of heat. Because they vent everything outdoors, they offer the highest level of protection for hazardous work.

Ductless hoods are very safe but are specialized. Their effectiveness depends on using the right filter for the specific chemicals you work with.

A ductless fume hood is a great choice for work with known chemicals in low to moderate volumes. It is not the right tool for unknown reactions, radioactive materials, or perchloric acid.

Before choosing a ductless unit, you must be sure that a filter exists for every chemical you use. If your work involves a changing list of chemicals, a ducted hood is likely a safer choice. Our team can help you compare various chemical fume hoods to find the best option.

Feature Comparison Table

This table breaks down the key differences between ducted and ductless fume hoods.

Feature Ducted Fume Hood Ductless Fume Hood
Installation Complex, requires ductwork and HVAC connection. Simple, standalone unit with no external venting.
Mobility Permanent, fixed installation. Highly mobile, can be moved as needed.
Upfront Cost High due to construction needs. Lower, with no major construction costs.
Operating Cost High due to energy use to replace vented air. Low, with primary cost being filter replacement.
Chemical Use Suitable for a very broad range of chemicals. Best for known chemicals in moderate volumes.
Best For High-hazard work, unknown reactions, R&D labs. Teaching labs, QC, and routine tasks.

This comparison can help you decide which path is right for your lab. Both are excellent tools, but they are designed for different jobs.

Understanding Fume Hood Filtration

Different types of filters and lab equipment displayed on a white table in a laboratory.

The filtration system is the core of a ductless fume hood. Its performance depends on matching the right filter to your lab work. This is the most critical step to ensure your hood works correctly and keeps your team safe.

This section explains the science behind the two main filter types: activated carbon for chemical vapors and HEPA filters for particles. Knowing how they differ will help you select a unit that provides solid containment.

Activated Carbon Filters for Vapors and Fumes

Activated carbon filters are the main defense against chemical fumes and vapors. The carbon acts like a porous sponge at a microscopic level. This structure gives it a large internal surface area to trap chemical molecules through a process called adsorption.

During adsorption, gas and vapor molecules are physically held on the surface of the carbon. This makes it effective for trapping organic solvents, acids, and other volatile organic compounds (VOCs). It is helpful to understand what VOC testing entails to see how these systems protect you.

However, these filters can become saturated. Over time, all the active sites on the carbon surface fill up, and it can no longer trap new molecules. This is why filter monitoring and a strict replacement schedule are necessary for safety.

HEPA Filters for Particulates

While carbon filters catch invisible fumes, HEPA (High-Efficiency Particulate Air) filters capture physical materials. These include powders, dust, and biological matter. They are made of a dense mat of fine fibers that create a complex path for air.

HEPA filters trap particles using a combination of physical principles.

  • Impaction: Larger, heavier particles cannot make sharp turns and hit the fibers.
  • Interception: Mid-sized particles follow the airflow but get caught as they pass a fiber.
  • Diffusion: The smallest particles move randomly and eventually bump into a fiber and stick.

A HEPA filter must capture 99.97% of particles that are 0.3 micrometers in size. This size is the standard for testing because it is the most difficult to trap. For work with fine powders, a dedicated powder containment hood with HEPA filtration is the best tool.

Combination Filters for Mixed Applications

What if your process creates both chemical fumes and fine powders? You can use a combination or stacked filter system. These setups layer different filter types to provide complete protection.

A typical setup includes a pre-filter to catch large particles, a HEPA filter for fine particulates, and an activated carbon filter for chemical vapors. This multi stage process ensures most hazardous materials are removed from the air.

This layered strategy also helps extend the life of the activated carbon filter. The pre filter and HEPA filter prevent the carbon's pores from getting clogged with dust. This allows it to focus on adsorbing vapors. Choosing the right filter stack is a key decision when you look at any ductless fume hood for sale.

How to Choose the Right Ductless Fume Hood

Selecting the right ductless fume hood requires careful thought. This ensures the unit meets your needs, fits your workflow, and provides a good return on investment. A structured approach is the best way to make the right choice.

This five step checklist will help you find a ductless fume hood that matches your lab’s needs for safety and daily work.

Step 1: Assess Your Chemical Inventory

First, you must list every chemical you plan to use inside the hood. This includes solids, liquids, and gases. Your chemical list is the foundation of your decision.

For each chemical, note its name, form, and the amount you will handle. Also, record how long and how often you will perform these tasks.

A ductless fume hood’s safety depends on its filters. If the filters cannot handle every chemical, it is not the right tool. If you work with unknown compounds or your chemical list changes often, a ducted hood might be the safer choice. Always consult your Safety Data Sheets (SDS) for handling requirements.

Step 2: Verify Filter Compatibility

With your chemical list, the next step is to ensure a filter exists for every substance. Manufacturers provide chemical compatibility charts that match chemicals with the right filter type.

Work closely with your supplier on this step. They can analyze your list, confirm filter effectiveness, and estimate the filter's lifespan based on your use. This is a critical safety check. If no filter is available for even one of your chemicals, you need a different solution. You might explore the full range of hoods and enclosures to see other options.

Step 3: Determine the Right Size and Airflow

Next, consider the physical unit. You need to think about the hood’s size and the equipment you will put inside it. The internal workspace must be large enough to fit your apparatus without clutter, which can disrupt airflow.

  • Internal Dimensions: Measure your largest equipment. Ensure you have enough height, width, and depth to work comfortably.
  • External Dimensions: Measure the lab space where the hood will go. Leave enough clearance on all sides for air circulation and maintenance.
  • Airflow Requirements: The fan must be powerful enough to generate the right face velocity, usually between 80 and 100 feet per minute (FPM). The manufacturer's specs will provide the unit's airflow performance.

Step 4: Evaluate Safety and Compliance Features

A good ductless fume hood will have advanced safety features. These provide real time feedback on the unit's performance and give you peace of mind.

Look for models that include:

  • Airflow Alarms: These systems use audible and visual alerts if the face velocity drops below a safe level.
  • Filter Saturation Sensors: These electronic sensors monitor the carbon filter and alert you when it is near the end of its life.
  • Compliance Certifications: Make sure the hood meets industry standards like SEFA 9 and ASHRAE 110. These certifications are independent proof of performance.

Step 5: Plan for Maintenance and Long-Term Costs

Finally, think about long term use. A ductless fume hood requires regular maintenance to remain safe and effective.

Before you buy, map out the total cost of ownership. This includes the initial price plus recurring expenses. The main costs are filter replacements, annual certification fees, and potential repairs. Planning for these expenses helps you budget correctly and ensure the equipment is maintained.

When to Use a Ductless Fume Hood

A ductless fume hood works well when your chemical workflow is predictable. They are specialists, not generalists. Think of them as ideal for routine processes, not for research with unknown substances. Let's review some common scenarios where a ductless model fits.

Decision Scenarios: Where Ductless Hoods Excel

The main benefit of a ductless fume hood is its adaptability. Here are seven common situations where a ductless fume hood is often the perfect solution.

  1. Educational and Teaching Labs
    University labs usually work with a small, known list of chemicals. A ductless hood provides protection without the high cost of ducted systems. Their mobility also lets instructors rearrange lab layouts easily.

  2. Quality Control and Routine Testing
    QC labs often run the same tests with the same chemicals repeatedly. This predictable work is ideal for ductless filtration. For example, a lab testing samples with specific solvents can use a carbon filter designed for that chemical.

  3. Labs in Leased or Historic Buildings
    Installing ductwork can be difficult, often requiring cuts through walls and roofs. In a leased space or historic building, this may not be allowed. A ductless hood only needs an electrical outlet.

  4. Temporary or Pilot Projects
    Research sometimes involves short term projects. Instead of investing in permanent equipment, a mobile ductless hood can be used for the project’s duration and then stored.

  5. Handling Powders and Particulates
    If you mainly work with airborne powders, a ductless hood with a HEPA filter is an excellent choice. This is common in pharmaceutical labs where weighing fine powders is a daily task.

  6. Supplementing Existing Ventilation
    If your lab has a ducted hood but needs more targeted fume control, a small benchtop ductless unit can be added to capture fumes at the source.

  7. Budget or Timeline Constraints
    Ductless hoods are a practical choice when you need a fast and affordable solution. They avoid the high installation costs and long delays of ducted systems. You can browse our selection of ductless fume hoods to see options for any budget.

When to Avoid a Ductless Fume Hood

It is also important to know when a ductless hood is the wrong tool. Using one in the wrong situation is a serious safety risk.

Critical Safety Note: Never use a ductless fume hood for applications involving unknown chemicals, highly toxic substances, radioactive materials, or perchloric acid. These processes require the full containment of a ducted system.

If your work involves any of these high risk applications, you should compare against traditional fume hoods. Always perform a full risk assessment before you make a final decision.

Installation and Maintenance

Technician in a lab coat and gloves meticulously records data, performing install or maintain procedures on a fume hood.

Smart installation and a solid maintenance routine will help you get the most from your ductless fume hood. Following best practices from day one protects your team and your investment.

A consistent schedule keeps your equipment in top condition and compliant with safety standards. Always check your Safety Data Sheets (SDS) and follow internal Environmental Health and Safety (EHS) rules before you start any work.

Proper Installation and Placement

Where you place your ductless fume hood is very important. Even a small draft can pull fumes out of the containment area.

Follow these simple guidelines for placement:

  • Avoid High-Traffic Areas: Keep the hood away from doorways, busy walkways, and open windows.
  • Steer Clear of HVAC Vents: Do not place the hood directly under or across from air conditioning or heating vents.
  • Ensure Sufficient Clearance: Leave enough space around the back and top for proper air circulation and maintenance access.
  • Use a Level Surface: The hood must sit on a sturdy, level surface to ensure it operates correctly and remains stable.

Creating a Maintenance Schedule

Consistent upkeep is essential for a ductless fume hood. Proactive maintenance prevents equipment failure and protects your team. Understanding what preventive maintenance involves is key to a long equipment life.

A good maintenance plan should include daily, monthly, and annual tasks.

  • Daily Checks: Before use, visually inspect the work area to ensure it is clean and the airflow alarm is working. Wipe down surfaces with a suitable cleaner.
  • Monthly Inspections: Once a month, check that the sash moves smoothly and inspect gaskets for wear. Clean the exterior and check that airflow monitors are accurate.
  • Annual Certification: At least once a year, a certified technician should perform a full performance test. This includes measuring face velocity, testing alarm functions, and certifying that the hood meets safety standards. This is a key part of any fume hood safety program.

Managing your filters is the most critical part of the schedule. Always follow the manufacturer’s guidelines for monitoring and replacing filters to avoid chemical breakthrough.

Frequently Asked Questions

Here are answers to some common questions about ductless fume hoods.

1. Are ductless fume hoods safe?

Yes, they are safe when used correctly. A ductless fume hood is designed for handling known chemicals in moderate amounts. Safety depends on using the correct filter for your specific chemicals and following a strict filter replacement schedule. Modern units are built to meet safety standards like SEFA 9 and ASHRAE 110.

2. How often do I need to replace the filters?

The replacement schedule depends on use. A general guideline is every 6 to 24 months. The filter's lifespan is affected by usage hours, chemical type, and concentration. Many modern hoods have electronic filter saturation alarms that alert you when it is time for a change.

3. What is the long-term cost of a ductless hood?

The total cost of ownership for a ductless fume hood is often lower than a ducted model. While you have the recurring cost of filters, you avoid the high energy bills from ducted systems. The energy savings often cover the cost of new filters.

4. Can I use a ductless hood for any chemical?

No. This is a critical safety rule. Ductless fume hoods should never be used for highly toxic substances, radioactive materials, perchloric acid, or unknown chemical reactions. You must confirm that a compatible filter exists for every chemical you handle before considering a ductless fume hood for sale.

5. What happens if the power goes out?

If the power goes out, the fan stops, and so does your protection. Stop all work immediately, close the sash, and follow your lab's emergency procedures for a power outage.

6. Does a ductless fume hood need professional certification?

Yes. Ductless units should be certified annually by a qualified technician. The certification verifies that the hood is performing correctly and maintaining the proper face velocity to contain fumes. This is a critical part of your lab's safety program.

Conclusion

Choosing the right ventilation is a major decision for any lab. A ductless fume hood offers a flexible, energy efficient, and cost effective solution for many applications. By carefully assessing your chemical use, verifying filter compatibility, and planning for maintenance, you can find a unit that provides reliable protection for your team.

Ready to find the right solution for your laboratory?

Compare Ductless Fume Hood Options

Request a Quote or Plan Your Lab Layout

Need Help Designing Your Lab?

Our laboratory design specialists provide free consultations, 3D lab layouts, and competitive pricing.

Request a Free Consultation → | Call (801) 855-8560

Who This Is For

Our ductless fume hood for sale solutions are ideal for:

  • Laboratory directors
  • Facility architects
  • University science departments
  • Pharma/biotech companies
  • Hospital labs
  • Government research facilities

A Guide to Fume Hoods for Government Labs

Selecting the right fume hoods for government labs is a critical decision. It impacts safety, compliance, and research integrity. Government facilities must follow strict safety and procurement rules, making equipment selection a complex task.

Making the right choice ensures staff safety and protects research. It also keeps your facility compliant with federal and state mandates.

Scientist in lab coat and safety glasses examining data on a tablet near a fume hood.

This guide provides a roadmap for specifying the correct fume hoods. It covers key safety standards, technical details, procurement processes, and maintenance.


TL;DR: Key Takeaways

  • Safety First: Fume hoods are the primary defense against hazardous vapors. Their proper function is non-negotiable for personnel safety in government labs.
  • Compliance is Mandatory: Government labs must adhere to strict standards from OSHA, ASHRAE, and SEFA. These rules dictate performance, testing, and construction.
  • Material Matters: The chemicals you use determine the necessary fume hood material. Choosing the wrong material leads to rapid corrosion and safety risks.
  • HVAC Integration is Crucial: A fume hood is part of a larger building system. It must work with the HVAC to manage exhaust and makeup air, ensuring proper containment.
  • Smart Procurement Saves Time: Using government contracts like GSA Schedules streamlines purchasing. Precise bid specifications prevent delays and ensure you get compliant equipment.

How Fume Hoods Protect Laboratory Personnel

A fume hood is the most important piece of safety equipment in any lab handling hazardous materials. It is essential when working with volatile chemicals, toxic vapors, or powders.

A fume hood is a ventilated enclosure. It pulls contaminated air away from the user, funnels it through an exhaust system, and vents it safely outside. This process protects personnel from dangerous exposure. Proper planning for these systems is important, as installation timelines can be affected by high demand.

A scientist in a white lab coat observes experiments inside a blue fume hood labeled 'CONTAINMENT AT SOURCE'.

The Key Components of Containment

Each part of a fume hood works together to create a stable and protective airflow.

  • Sash: This is the movable front window, usually made of safety glass. It acts as a physical barrier. Keeping the sash as low as practical is a critical fume hood safety practice.
  • Baffles: These are slotted panels on the back wall inside the hood. They guide airflow evenly across the work surface and prevent dead spots where vapors could collect.
  • Airfoil: This is the curved sill at the front of the work surface. The airfoil design promotes a smooth flow of air into the hood, reducing turbulence that could cause fumes to escape.

The Science of Airflow and Capture

A fume hood's performance is measured by its face velocity. This is the speed at which air is pulled into the hood opening. The ideal velocity is fast enough to capture contaminants but not so fast that it creates disruptive air currents.

A steady face velocity is the foundation of fume hood safety. It ensures airborne hazards are drawn away from the user's breathing zone and into the exhaust system.

This focus on containment is driving investment in lab safety. Agencies like OSHA and the NIH are pushing for stricter standards, increasing demand for high-performance equipment. The North America Laboratory Hoods and Enclosure Market is projected to reach USD 804.00 million by 2030, according to Data Bridge Market Research. This growth is largely due to government-funded projects that require reliable and compliant equipment.

Navigating Key Regulatory Standards for Fume Hoods

Specifying fume hoods for government labs involves strict compliance. Unlike private labs, government facilities must follow a rigid framework of standards. These standards cover everything from airflow performance to construction materials.

Understanding these regulations is essential. It helps prevent costly changes, project delays, and the installation of inadequate equipment.

Core Agencies and Their Roles

Four main organizations set the standards for fume hood safety in the U.S. Their rules influence bid specifications and inspection criteria.

  • OSHA (Occupational Safety and Health Administration): OSHA's rules are federal law. Regulation OSHA 1910.1450, the "Lab Standard," requires labs to have a Chemical Hygiene Plan. It also mandates that fume hoods function properly to protect employees.
  • NIOSH (National Institute for Occupational Safety and Health): NIOSH conducts research to inform safety practices. It studies how well fume hoods contain hazardous substances and publishes guidance that shapes industry standards.
  • ASHRAE (American Society of Heating, Refrigerating and Air-Conditioning Engineers): ASHRAE develops technical standards for ventilation systems. Its ASHRAE 110 standard is the industry benchmark for performance testing. It provides a procedure to measure a hood's containment capabilities.
  • SEFA (Scientific Equipment and Furniture Association): SEFA focuses on equipment quality and durability. SEFA 8 outlines performance and construction standards for fume hoods. It is often cited in government procurement documents as a baseline for quality.

Translating Standards Into Practical Requirements

These standards translate directly into fume hood features. For example, OSHA's rule for a hood to "function properly" is verified by the ASHRAE 110 test. This test uses a tracer gas to measure containment with precision.

Similarly, SEFA 8 provides specific benchmarks for materials and construction. This ensures the hood will not corrode when exposed to chemicals. Writing these standards into your bid specifications is crucial for ensuring every vendor bids on the same level of quality.

This table compares the focus of the major regulatory bodies.

Standard/Agency Primary Focus Key Requirement Example
OSHA Workplace Safety (Legal Mandate) Requires fume hoods function properly as part of a Chemical Hygiene Plan.
NIOSH Research and Recommendations Provides guidance on best practices for effective laboratory ventilation.
ASHRAE Performance Testing (Technical) Specifies the ASHRAE 110 tracer gas test to verify fume hood containment.
SEFA Construction and Durability Defines standards for materials, finishes, and construction quality (SEFA 8).

Including these standards in your procurement documents creates clear expectations. This step ensures that every bid you receive is for a compliant, high-performance fume hood for government labs. Addressing these details early helps ensure a smooth and successful installation.

How to Choose the Right Fume Hood Type and Materials

Not all fume hoods are the same. Government labs have diverse needs that require specific solutions. Choosing the right type and material affects safety, energy costs, and the hood's lifespan. Getting this right from the start prevents costly changes and keeps projects on schedule, which is important when installation timelines are tight.

Three material samples (wood, green, black) on a table with a sign that reads "Select Right Hood."

Common Fume Hood Types for Government Labs

Let's review the primary types of laboratory fume hoods and their best uses. The choice often involves a balance between performance and energy efficiency.

  • Conventional (Constant Air Volume) Fume Hoods: These are also known as CAV hoods. They are simple and reliable, pulling a constant volume of air regardless of sash position. However, they are not the most energy-efficient option.
  • Variable Air Volume (VAV) Fume Hoods: VAV systems are ideal for facilities focused on energy savings. They automatically adjust the exhaust volume as the sash moves, reducing the amount of conditioned air removed from the lab.
  • High-Performance Fume Hoods: These hoods are designed to operate safely at a lower face velocity. This design reduces the total volume of exhausted air, leading to significant energy savings without compromising safety.
  • Ductless Fume Hoods: Unlike traditional hoods, ductless fume hoods use carbon or HEPA filters to clean the air before recirculating it into the room. They are suitable for labs with lighter chemical loads or where installing new ductwork is not possible.

Selecting the Right Material of Construction

The chemicals used inside the fume hood dictate the construction material. Using a material that cannot withstand your specific chemicals will lead to rapid deterioration and safety hazards.

Material Best For Considerations
Epoxy-Coated Steel General chemistry, solvents Economical and suitable for moderate chemical use. Not ideal for highly corrosive acids.
Stainless Steel Radiochemicals, biologicals, heat Offers excellent durability and heat resistance. Certain acids can cause pitting.
Phenolic Resin Moderate corrosives, general use Provides high chemical resistance. A cost-effective alternative to stainless steel.
Polypropylene Highly corrosive acids (e.g., HF) Offers superior resistance to strong acids and bases. Not intended for high-temperature use.

5-Step Checklist for Choosing Your Fume Hood

Use this checklist to guide your selection process. Thinking through these points early helps ensure a smooth procurement and installation, which can lead to faster lab operational readiness.

  1. Assess Your Chemical Use: List every chemical you will use, including concentrations and temperatures. This is the most important factor for material selection.
  2. Determine Ventilation Needs: Decide between a ducted or ductless system based on your building's HVAC, chemical use, and EHS team recommendations.
  3. Evaluate Energy Efficiency Goals: Consider the long-term operating costs. A VAV or high-performance hood may cost more initially but can provide significant energy savings over time.
  4. Consider Size and Ergonomics: Ensure the hood dimensions fit your lab space and provide a comfortable work area. Consider sash type and interior depth.
  5. Verify Compliance Requirements: Confirm the chosen hood meets all necessary standards, such as ASHRAE 110 and SEFA 8, as required by your facility.

Integrating Fume Hoods with Your Building HVAC System

A fume hood is part of a larger system: your building's heating, ventilation, and air conditioning (HVAC). Its performance depends on how well it integrates with that system.

Proper integration is essential. It ensures hazardous fumes are safely contained and the hood operates efficiently without disrupting the facility's environment.

Engineer in a hard hat and lab coat reviews data on a tablet, overseeing an industrial HVAC integration system.

Verifying your HVAC capacity early is the best way to avoid major installation delays and expensive system upgrades.

Face Velocity and Exhaust Volume

The primary performance metric is face velocity. It is the speed of air pulled into the hood's opening, measured in feet per minute (FPM). The industry standard for safe containment is between 80-120 FPM.

This airflow speed determines the exhaust volume, measured in cubic feet per minute (CFM). The CFM value indicates how much air the fume hood removes from the lab each minute. Your HVAC system must be able to handle this load.

Makeup Air and Room Pressurization

For every cubic foot of air a fume hood exhausts, the HVAC system must supply an equal amount of fresh "makeup air" back into the room.

If the HVAC system cannot keep up, the lab can become negatively pressurized. This imbalance can cause several problems:

  • Doors may become difficult to open.
  • Air drafts can disrupt sensitive experiments.
  • The fume hood's containment ability can be compromised.

Your building’s supply air system must be sized to handle the full exhaust load of all fume hoods operating simultaneously. Understanding proper ductwork and ventilation is essential for this.

Airflow Monitors and System Alarms

Airflow monitors and alarms are mandatory in most government facilities. These devices constantly measure face velocity. They will sound an alarm if the airflow drops below a safe level, warning users of a potential containment failure.

For smaller, more targeted applications, you might also consider equipment like an exhaust snorkel.

Exhaust Fans and Manifold Systems

There are two primary ways to connect a hood to the building's exhaust system.

  • Dedicated Exhaust Fans: Each fume hood has its own fan on the roof. This provides excellent control over individual hoods but can be more expensive to install and maintain.
  • Manifold Systems: This approach connects multiple fume hoods to a common ductwork system served by one or more large fans. This can be more cost-effective and energy-efficient in labs with many hoods.

The right choice depends on your lab's layout and chemical use. Consult a qualified mechanical engineer to determine the best strategy for your facility.

Streamlining Government Procurement and Installation

Purchasing a fume hood for a government lab is a structured process. Understanding procurement rules and installation logistics keeps a project on track and on budget. Proper planning helps your lab become operational faster, which is beneficial when facing research deadlines.

Mastering the Government Procurement Process

The first step is to create a detailed procurement document. It must be precise so that all bids are compliant and comparable.

Writing clear bid specifications is essential. Your document must list all mandatory requirements, including:

  • Compliance with standards like ASHRAE 110 and SEFA 8.
  • Specific materials of construction.
  • Required face velocity range, such as 80–120 FPM.
  • Inclusion of safety features like airflow monitors.

Vague specifications can lead to bids for equipment that does not meet your needs, causing delays. For more information, you can review resources on how to bid for government contracts.

Leveraging Cooperative Purchasing and State Contracts

Many government agencies use cooperative purchasing agreements to simplify procurement. These are pre-negotiated contracts with vetted suppliers offering competitive pricing.

Using a state contract or a GSA Schedule can reduce the administrative work of a full public bid. It shortens the time from request to delivery. These agreements help your team focus on technical details instead of contract negotiations.

Planning for Installation and Commissioning

After selecting a vendor, you must prepare for installation. This requires coordination between facility managers, the installer, electricians, and HVAC technicians.

Here are the key steps for a smooth installation:

  1. Site Verification: Confirm the location has enough space, the floor can support the weight, and utilities are accessible.
  2. HVAC Coordination: Ensure the building's exhaust and makeup air systems are ready and properly sized for the new hood's CFM requirements.
  3. Utility Rough-In: Have electricians and plumbers run wiring and plumbing before the hood arrives.
  4. Final Commissioning: After installation, a certified technician must perform tests to verify the hood operates safely and meets all specifications. This step is required for documentation and compliance.

FAQs: Fume Hoods for Government Labs

Here are answers to common questions about specifying fume hoods for government labs.

1. What is the difference between a ducted and ductless fume hood?

A ducted fume hood connects to your building's HVAC system. It pulls contaminated air out of the lab and vents it outside. A ductless fume hood uses filters to clean the air and recirculates it back into the room. The choice depends on your chemical use and facility constraints. Always consult your Environmental Health and Safety (EHS) officer to determine the right option.

2. How can we ensure a fume hood meets government energy mandates?

To meet federal energy efficiency goals, specify a high-performance or Variable Air Volume (VAV) fume hood. High-performance hoods operate at a lower face velocity, reducing the volume of exhausted air. VAV systems automatically adjust exhaust volume based on the sash position, significantly cutting energy use and long-term operational costs.

3. What are the annual certification requirements for a federal facility?

Federal facilities generally follow ANSI/AIHA Z9.5 standards, which require professional fume hood certification every year. A qualified technician must test and document the hood's performance, including face velocity and containment. Maintaining detailed records of these certifications is essential for safety audits.

4. Can we use a cooperative purchasing contract to buy a fume hood?

Yes. Using cooperative purchasing vehicles like GSA Schedules or state contracts simplifies the procurement process. These contracts provide access to pre-vetted suppliers and competitive pricing. Always check the contract language to ensure it covers the fume hood, accessories, delivery, and installation services.

5. What is the typical lead time for a government lab fume hood?

Lead times can vary based on customization, manufacturer backlogs, and supply chain conditions. Standard models may ship in a few weeks, while highly customized units can take several months. It is wise to start the procurement process early to avoid delays that could impact project timelines. Planning ahead gives you a better chance of securing a favorable installation schedule.

6. Who is responsible for the final testing and commissioning of the fume hood?

The vendor or a third-party certifier is typically responsible for final testing and commissioning. This process, often called Test and Balance (TAB), ensures the hood meets the performance specifications outlined in your purchase order, including ASHRAE 110 testing. The final report is a critical document for your facility's safety records.

7. What maintenance is required for fume hoods in a government lab?

Regular maintenance includes daily visual inspections by users, cleaning spills immediately, and annual certification. The exhaust fan, belts, and ductwork should also be inspected periodically by facilities staff. For ductless hoods, the filter saturation must be monitored and filters must be changed according to the manufacturer's schedule.

Plan Your Government Lab Project

Specifying the right fume hoods is a detailed process that balances safety, compliance, and budget. By understanding the regulations and technical requirements, you can make informed decisions that protect your personnel and support your mission. Addressing these needs early in your planning process helps ensure a smoother, faster project completion.

Ready to find the right equipment for your facility?

Compare Fume Hood Options

Request a Quote or Plan Your Lab Layout

Or contact us directly at Sales@Labs-USA.com or 801-855-8560.

Frequently Asked Questions

How do I choose the right fume hoods for government labs?

Choosing the right fume hoods for government labs depends on your application, space, and budget. Labs USA provides free expert consultations. Call (801) 855-8560 or request a quote.

What is the lead time for fume hoods for government labs?

Lead times vary by product. Many items ship quickly; custom orders take 4-8 weeks. Call (801) 855-8560 for availability.

Do you offer installation?

Yes. Labs USA provides professional installation across the United States with factory-trained installers.

Can I get a custom configuration?

Absolutely. Our design team provides free layouts, specs, and competitive pricing tailored to your needs.

Who This Is For

Our fume hoods for government labs solutions are ideal for:

  • Laboratory directors
  • Facility architects
  • University science departments
  • Pharma/biotech companies
  • Hospital labs
  • Government research facilities

A Practical Guide to Fume Hoods for Industrial Labs

Fume hoods for industrial labs are key pieces of safety equipment. They are designed to capture and remove hazardous vapors, dust, and fumes from your workspace. A fume hood protects your team from chemical exposure by pulling contaminated air away from them and venting it safely outside.

TL;DR: Key Takeaways

  • Primary Function: A fume hood is an engineering control that protects users from inhaling hazardous substances.
  • Ducted vs. Ductless: Ducted hoods vent air outside and handle a wide range of chemicals. Ductless hoods filter and recirculate air, suitable for specific, known chemicals.
  • Specialized Types: Different tasks require different hoods, such as walk-in hoods for large equipment or powder hoods for weighing fine particles.
  • Safety Standards: Always choose hoods that meet ASHRAE 110 for performance and SEFA standards for durability.
  • Placement is Critical: Install hoods away from doors, high-traffic areas, and HVAC vents to prevent drafts that can compromise safety.
  • Maintenance is Mandatory: Regular cleaning, inspections, and annual professional certification are required to ensure proper function.

Why Fume Hoods Are Critical in Industrial Labs

A man wearing safety gear stands next to a large lab fume hood with a 'LAB AIR SAFETY' sign.

In settings like pharmaceutical manufacturing or chemical processing, a fume hood is a required part of your safety system. Choosing the right one is a direct investment in your team's safety, regulatory compliance, and the quality of your work.

With a growing focus on workplace safety, the demand for these systems has increased. The global market for fume hoods is expected to reach $1.72 billion by 2032. The industrial sector makes up over 42% of that demand. This growth shows that labs see high-performance fume hoods as essential. You can learn more about these market trends to see where the industry is headed.

Understanding the Core Components

To understand how a fume hood works, it helps to know its main parts. Each piece has a specific job in containing and exhausting hazardous materials.

Key components include:

  • The Sash: This is the movable glass window at the front. It acts as a physical shield to protect the user from splashes. Lowering the sash also increases the speed of the air flowing into the hood, which improves fume containment.
  • The Baffle: This slotted panel is at the back of the hood. It helps create a smooth, even airflow. It removes dead spots by making sure air is pulled evenly from the top, middle, and bottom of the hood opening.
  • The Airfoil: This is the curved piece at the bottom front edge of the work surface. The airfoil helps lift the air smoothly into the hood. This stops turbulent air from forming that could let contaminants escape.

The Importance of Proper Airflow

A fume hood is only as good as its airflow. The air speed at the opening of the hood is called face velocity. This is the most important measure of performance. It must be fast enough to capture contaminants but not so fast that it creates turbulence inside the hood.

A properly working fume hood creates a protective zone that separates the user from the chemicals inside. Any disruption to the airflow can weaken this containment. This includes fast movements or placing large equipment near the opening.

The right fume hoods for industrial labs depend on the chemicals you use and the work being done. Understanding these basics is the first step toward making a smart choice. Given current lead times for manufacturing and installation, planning your lab needs in advance can help you avoid project delays.

Choosing Between Ducted and Ductless Fume Hoods

A clean industrial laboratory interior with beige cabinets, black countertops, and green ventilation ductwork.

When you select a fume hood, your first big decision is choosing a ducted or ductless system. This choice will affect your lab's setup, long-term costs, and daily flexibility. Each system has clear advantages and is built for different kinds of lab work.

A ducted fume hood connects to your building’s HVAC system. It pulls hazardous fumes out of the room and vents them outside. This makes it the best choice for labs that handle many different chemicals or high-volume reactions.

A ductless fume hood works more like an air purifier. It draws contaminated air through filters, such as activated carbon or HEPA. Then it recirculates the cleaned air back into the lab. This design offers great mobility and avoids costly ductwork installation.

Key Differences in Functionality

The biggest difference between the two is what they do with contaminated air. A ducted system removes it completely. A ductless system traps it in filters.

This single difference has a large impact on your work. Ducted hoods can handle almost any chemical. Ductless hoods are more specialized. They only work for specific chemicals that their filters can capture. This means you must perform a chemical safety review before you consider a ductless model.

To learn more about their capabilities, you can explore our ductless fume hood options and see their specifications.

Market Trends and Industrial Preferences

Market data shows clear preferences in industrial labs. Ducted units are the leaders, making up 62.45% of projected revenue for 2025. Their ability to handle a wide range of chemicals makes them a trusted solution.

However, ductless hoods are projected to grow at a faster rate, with a 6.65% compound annual growth rate through 2031. This growth comes from labs that need flexible, mobile, and cost-effective solutions. You can read more about fume hood market trends to see a full picture of these industry shifts.

Choosing the right system is not just about the initial price. It is about matching the equipment's abilities to your lab's chemical workflow and long-term safety strategy.

Ducted vs. Ductless Fume Hoods: A Comparison

To make an informed decision, it helps to compare these two systems side-by-side. The right choice depends on your lab's specific needs.

Feature Ducted Fume Hoods Ductless Fume Hoods
Installation Requires complex ductwork and connection to HVAC. No ductwork needed; plugs into an electrical outlet.
Chemical Use Suitable for a wide range of chemicals, including unknowns. Limited to specific, low-volume chemicals compatible with filters.
Mobility Fixed in place; a permanent installation. Mobile and can be relocated easily within the lab.
Upfront Cost High, due to equipment, ductwork, and installation. Lower, as it avoids complex infrastructure work.
Operating Cost High energy use due to exhausting conditioned air. Low energy use; requires periodic filter replacement.
Maintenance Requires inspection of ducts, fans, and mechanical systems. Requires regular monitoring and replacement of filters.

Ducted hoods offer strong protection for diverse work. Ductless hoods provide flexibility and cost-efficiency for more predictable applications.

Matching Fume Hood Types to Industrial Tasks

A row of modern laboratory fume hoods with blue cabinets and a polished floor in a lab.

After you decide between a ducted or ductless system, the next step is to look at specialized models. Not all lab work is the same. Using a general-purpose hood for a specialized task can be unsafe.

It is safer and more effective to use equipment designed for the job. Choosing the right hood aligns your safety gear with your daily workflow. This ensures proper containment for all your processes.

Common Specialized Fume Hoods

Different industrial processes need different containment strategies. For instance, a hood designed for liquid chemicals might fail to contain airborne particles. Understanding these differences is key to a safe lab.

Here are some common specialized fume hoods for industrial labs:

  • Benchtop Fume Hoods: These are common in most general chemistry labs. They sit on a standard lab bench and can handle a wide variety of routine experiments.

  • Walk-In Fume Hoods: When you work with large equipment or drum storage, you need a walk-in hood. These are large, floor-mounted enclosures that provide total containment for bulky items.

  • Powder Weighing Hoods: Handling fine powders requires special care to prevent inhalation. These hoods have unique airflow patterns that reduce turbulence, keeping small particles from getting into the air. You can explore the specs of a powder weighing fume hood.

5 Use Cases for Specialized Industrial Fume Hoods

Matching the right hood to the job is essential for safety and efficiency. Here are five common scenarios in industrial labs and the best fume hood for each.

  1. Scenario: Quality Control Testing

    • Task: A pharmaceutical lab performs routine analysis of liquid samples using solvents like methanol and acetonitrile.
    • Solution: A standard Benchtop Ducted Fume Hood is ideal. It safely vents a wide range of chemical vapors outside, ensuring operator safety during repetitive testing.
  2. Scenario: Pilot-Scale Chemical Reactions

    • Task: A chemical engineering team needs to run a small-scale reaction using a portable glass reactor on a wheeled cart.
    • Solution: A Walk-In Fume Hood provides the necessary space and containment. The team can roll the entire apparatus inside, ensuring any fumes from the reaction are captured.
  3. Scenario: Handling Potent Pharmaceutical Powders

    • Task: A technician must accurately weigh a few milligrams of a potent active pharmaceutical ingredient (API).
    • Solution: A Powder Weighing Hood (or Balance Enclosure) is required. Its specialized design creates gentle, laminar airflow that prevents fine powders from becoming airborne, protecting the technician from inhalation.
  4. Scenario: Acid Digestion of Metal Samples

    • Task: A metallurgy lab uses strong acids like nitric and perchloric acid at high temperatures to dissolve metal samples for analysis.
    • Solution: A Perchloric Acid Fume Hood is necessary. These hoods are built with corrosion-resistant materials and include a wash-down system to prevent the buildup of explosive perchlorate salts in the ductwork.
  5. Scenario: Flexible Workstations for Light-Duty Tasks

    • Task: An electronics lab needs a soldering station that can be moved as production lines change. The soldering process releases fumes from flux.
    • Solution: A Ductless Fume Hood with the appropriate filter is a great fit. It offers mobility, requires no ductwork, and effectively captures the specific contaminants from soldering, providing a flexible and safe workstation.

High-demand labs often need a mix of hood types. Planning ensures that every workspace has the right solution. Given current manufacturing and installation timelines, mapping out your needs early can prevent significant delays.

How to Select the Right Fume Hood in 5 Steps

Choosing the right fume hood for your industrial lab is an important decision. By breaking it down into a clear process, you can find the perfect system for your safety, compliance, and workflow needs.

This 5-step checklist will guide you through everything you need to consider.

Step 1: Analyze Your Chemical Inventory

First, review every chemical you plan to use inside the hood. This audit will guide almost every other decision, from the hood's material to whether you need a ducted or ductless system.

Make a detailed list of all chemicals, their concentrations, and usage amounts. Check the Safety Data Sheets (SDS) for each one to understand the hazards. This information tells you which liner material you need, such as epoxy resin or stainless steel.

Step 2: Evaluate Your Facility and Space

Next, assess your lab space. Measure the available footprint for the fume hood, making sure there is enough clearance on all sides to avoid disrupting airflow.

The hood's location is also important. Keep it away from high-traffic areas, doors, windows, and HVAC vents. Any of these can create cross-drafts that pull contaminants out of the hood. You also need to consider your building's HVAC system. A ducted fume hood removes large volumes of conditioned air, and your HVAC system must be able to replace it.

Step 3: Define Your Primary Lab Applications

What will you be doing in the hood? Your daily tasks will determine if a standard model is enough or if you need one of the more specialized fume hoods for industrial labs.

  • General Chemistry: For most routine work with liquids, a standard benchtop hood works well.
  • Large Equipment: If you need to roll equipment inside, you will need a walk-in fume hood.
  • Powder Handling: Weighing fine powders requires a powder containment hood with specialized airflow.
  • High-Heat Processes: Work involving hot plates may call for a hood with a heat-resistant liner.

Defining your applications upfront ensures you invest in equipment built for your workflow. You can learn more about our range of chemical fume hoods.

Step 4: Review Safety and Compliance Standards

Industrial labs must follow strict safety rules. Your fume hood selection must meet established standards to protect your team and pass inspections.

In the U.S., the key performance standard is ASHRAE 110. This is a rigorous test that proves a fume hood's ability to contain hazardous fumes. Only consider manufacturers who certify that their hoods pass ASHRAE 110 tests. Also, look for compliance with SEFA standards for construction quality.

A fume hood is a critical piece of safety equipment. Verifying its compliance with industry standards is a fundamental step.

Step 5: Consider Long-Term Operational Costs

Finally, look beyond the initial price and think about the total cost of ownership. This includes energy bills, maintenance, and future needs.

Ducted hoods can use a lot of energy. A variable air volume (VAV) system can lower these costs by adjusting airflow based on sash height. Ductless hoods have low energy costs but require regular filter replacements. Think about growth and whether your chemical use might change. Planning for the future can save you from a costly replacement later.

Best Practices for Fume Hood Installation and Maintenance

A technician installs or maintains equipment in an industrial laboratory while writing notes on paper.

A fume hood's performance depends on where you put it and how well you care for it. Proper installation and consistent maintenance are the foundation for long-term safety and reliability.

The process starts with picking the right spot. A fume hood's location has a large impact on its ability to contain contaminants. Placing it in a low-traffic area is critical to keep the airflow stable.

Strategic Installation for Optimal Airflow

The main goal during installation is to create calm, stable air around the hood. Even small drafts can break containment and pull vapors into your lab.

Keep these placement rules in mind:

  • Away from Doors: The rush of air from an opening door can cause turbulence.
  • Avoid High-Traffic Aisles: People walking past a hood can create cross-drafts.
  • Distance from HVAC Vents: Supply air vents should never blow directly at the fume hood.
  • Steer Clear of Windows: An open window is another source of unpredictable drafts.

For more information on safety, our guide to fume hood safety provides additional details.

Routine Maintenance and User Best Practices

Once your hood is installed, it needs regular attention. A simple maintenance schedule can stop small problems from becoming serious safety hazards. This means daily checks by users and annual professional certifications.

Regular maintenance is a proactive safety measure that ensures the equipment functions correctly every day.

For daily work, users must always follow safe practices. Work at least six inches inside the hood to ensure contaminants are captured. Keep the sash as low as possible to maximize face velocity. Do not clutter the inside of the hood, as this blocks airflow. For smaller tasks, an exhaust snorkel can provide targeted containment.

Here is a basic maintenance checklist:

  1. Daily Visual Inspection: Before each use, check the sash for damage and ensure the airflow monitor is working.
  2. Weekly Cleaning: Wipe down interior surfaces, the sash, and the airfoil to remove chemical residue.
  3. Monthly Baffle Check: Make sure the baffle slots are clear of any obstructions.
  4. Annual Certification: A qualified technician must test and certify the fume hood every year.

Proper installation and maintenance ensure your fume hoods for industrial labs provide solid protection for years. With current high demand, planning your equipment needs early helps secure installation timelines and avoids delays.

Frequently Asked Questions About Industrial Fume Hoods

Here are answers to common questions about choosing, installing, and maintaining fume hoods for industrial labs.

1. How do I know if I need a ducted or ductless fume hood?

The choice depends on your chemicals and work volume. A ducted hood is best if you work with a wide variety of chemicals, large volumes, or unknown substances, as it vents all fumes outside. A ductless hood works well if you handle a consistent, known set of chemicals in small amounts and need mobility. You must verify that its filters are compatible with your chemicals.

2. What is the ideal face velocity for a fume hood?

The ideal face velocity for most industrial labs is between 80 and 120 feet per minute (FPM). This speed is fast enough to contain vapors without creating turbulence. Your facility’s Environmental Health and Safety (EHS) officer will specify the exact rate required for your applications.

3. How often does my fume hood need to be certified?

Fume hoods must be professionally tested and certified at least once a year. This is a requirement by OSHA and other regulatory bodies to ensure the hood is functioning correctly and safely containing contaminants.

4. Can I use a fume hood for storing chemicals?

No. A fume hood should never be used as a chemical storage cabinet. Storing items inside disrupts the airflow, creating dead spots and turbulence that can cause hazardous fumes to escape into the lab. Only keep materials you are actively using inside the hood.

5. Why is fume hood placement so important?

Proper placement is critical for safety and performance. The hood should be located away from doorways, windows, high-traffic areas, and HVAC vents. These can create cross-drafts that disturb the air barrier at the face of the hood, allowing contaminants to escape.

6. What are the key market trends for fume hoods?

The global demand for fume hoods is growing. North America currently has the largest market share at 38.5% in 2024, driven by strong pharmaceutical and research sectors. However, the Asia Pacific region is expected to grow the fastest. You can read the full research about laboratory fume hood trends for more details.

7. What is the difference between CAV and VAV fume hoods?

CAV and VAV systems manage airflow differently. Constant Air Volume (CAV) hoods exhaust the same amount of air 24/7, making them simple but less energy-efficient. Variable Air Volume (VAV) hoods use sensors to adjust airflow based on sash height, saving significant energy and reducing operating costs.

A properly chosen fume hood is the cornerstone of a safe lab. If you have other questions, our team can help. Call us at 801-855-8560 or email Sales@Labs-USA.com.

Ready to find the right fume hood for your industrial lab?

Explore our complete range of fume hoods to compare models and specifications.
Compare Fume Hood Options

Need help with a new build or renovation? Contact us for a free quote and layout design.
Request a Quote or Plan Your Lab Layout

Who This Is For

Our fume hoods for industrial labs solutions are ideal for:

  • Laboratory directors
  • Facility architects
  • University science departments
  • Pharma/biotech companies
  • Hospital labs
  • Government research facilities