Not every fume-generating process needs a full fume hood. When you need localized extraction at a specific spot on your bench — for soldering, light chemistry, specimen processing, or laser cutting — an exhaust snorkel provides flexible, point-source fume capture without the cost and space requirements of a fume hood.
Exhaust snorkels (also called snorkel arms, fume extractors, or bench-top extraction arms) are articulating ductwork arms mounted above or beside workstations. They position a capture hood directly at the fume source and connect to the building’s exhaust system.
How Exhaust Snorkels Work
An exhaust snorkel consists of:
Capture hood: A funnel-shaped inlet that draws in contaminated air from the work area
Articulating arm: A jointed, flexible arm that allows the capture hood to be positioned in any direction
Exhaust connection: Connects to ductwork leading to the building’s exhaust fan
The researcher positions the capture hood close to the fume source — ideally within 6–12 inches — and the exhaust system draws contaminated air away through the ductwork.
Types of Exhaust Snorkels
Standard (Original) Snorkels
Made from chrome-plated or powder-coated steel. Suitable for general-purpose fume extraction where chemical exposure is light — soldering, dust collection, odor removal.
Chemical-Resistant Snorkels
Constructed from polypropylene or other chemical-resistant plastics. Required when extracting corrosive acid fumes, solvent vapors, or any chemical that would damage standard steel construction. Essential for chemistry and pharmaceutical labs.
ESD-Safe Snorkels
Made from conductive materials that prevent static buildup. Required in electronics manufacturing, semiconductor labs, and environments with flammable or explosive atmospheres.
Ceiling-mounted: The most common configuration. Arm drops down from ceiling-mounted ductwork.
Wall-mounted: For labs where ceiling mounting isn’t practical.
Bench-mounted: Clamps directly to the workstation. Good for retrofits and portable setups.
Floor-standing: Mobile units with casters. No permanent installation needed.
Exhaust Snorkel vs. Fume Hood
Factor
Exhaust Snorkel
Fume Hood
Cost
$500–$3,000
$3,000–$25,000
Space required
Minimal (ceiling/wall mount)
4–8 feet of bench space
Protection level
Localized capture only
Full enclosure containment
Flexibility
Repositionable to any bench location
Fixed location
Best for
Point-source, intermittent fumes
Continuous chemical work
Important: Exhaust snorkels are NOT a replacement for fume hoods when full containment is required. They’re supplemental extraction for light-duty or intermittent fume sources. For heavy chemical work, always use a chemistry fume hood.
Frequently Asked Questions
How much does an exhaust snorkel cost?
Standard snorkels: $500–$1,200. Chemical-resistant: $800–$2,000. ESD-safe: $700–$1,500. Installation (ductwork connection) adds $500–$2,000 depending on complexity.
Do exhaust snorkels need ductwork?
Yes, for proper fume exhaust. The snorkel arm connects to ductwork routed to the building’s exhaust system. Some applications use carbon-filtered ductless units, but these are limited to specific chemicals.
How far can a snorkel reach?
Standard snorkel arms reach 3–5 feet from the mounting point. The articulating joints allow full 360° positioning within that radius. Longer arms are available for wider coverage.
Shop Exhaust Snorkels
We stock standard, chemical-resistant, and ESD-safe exhaust snorkels from Nederman and other leading manufacturers. Ships fast from our Utah warehouse.
A lab fume extraction arm, also known as an exhaust snorkel, is a vital tool for laboratory safety. It is an articulated arm that works like a focused vacuum cleaner, positioned directly over a workspace. This method, called source capture, is designed to remove hazardous fumes, chemical vapors, and dust right where they are created. This prevents them from entering your breathing zone or spreading throughout the laboratory.
This direct approach is more effective than relying on general room ventilation to dilute airborne contaminants. A lab fume extraction arm actively removes hazards from the air, ensuring a safer work environment for all personnel.
Your Quick Guide to Fume Extraction Arms
What are they? Articulating arms that capture harmful fumes, dust, and vapors directly at the source before they can spread.
Why are they important? They significantly improve lab safety, protect personnel from inhaling hazardous substances, and help maintain air quality.
What are the main types?
Original: For general purposes like solvents and light dust. Made of anodized aluminum.
ESD (Electrostatic Discharge): For electronics labs to prevent static damage.
Chemical Resistant: For corrosive chemicals like strong acids. Made of polypropylene.
How to choose? Match the arm’s material to the specific contaminants you work with. Consider reach, mounting style, and airflow needs.
Why Your Lab Needs a Fume Extraction Arm
A lab fume extraction arm is a key piece of safety equipment. It moves beyond simply diluting airborne hazards and actively removes them from your workspace. While a general HVAC system circulates air, an articulating fume arm pulls contaminants out of the equation completely. This is critical for protecting your team and preventing cross contamination of sensitive samples.
By capturing fumes the moment they are created, these systems are essential for meeting workplace safety standards like those from OSHA. The goal is to create a cleaner, safer, and more controlled environment. Targeted extraction is a powerful tool for achieving this.
The practical benefits of adding an exhaust snorkel are clear:
Enhanced Personnel Safety: Drastically reduces the inhalation of harmful substances.
Improved Air Quality: Keeps the entire laboratory environment cleaner.
Sample Integrity: Stops airborne particles from compromising experiments.
Regulatory Compliance: Helps satisfy health and safety requirements.
Comparing the Three Types of Fume Extraction Arms
Not all laboratory work is the same, and neither are fume extraction arms. Using a one size fits all approach does not work when dealing with different chemicals, dusts, and sensitive equipment. Choosing the right laboratory exhaust snorkel means matching the tool to the task. Each type is built from specific materials to handle distinct hazards safely.
To make your choice easier, we will break down the three main models available. Think of this as your guide for identifying which articulating fume extraction arm is the perfect fit for your work.
Fume Extraction Arm Model Comparison
Here is a side by side look at the key features of the Original, ESD, and Chemical Resistant fume extraction arms. This table should help you select the ideal model for your laboratory’s needs.
Feature
Original Exhaust Snorkel
ESD Exhaust Snorkel
Chemical Resistant Exhaust Snorkel
Primary Material
Anodized Aluminum
Anodized Aluminum
Polypropylene
Key Feature
General purpose, cost effective
Conductive for static safety
High resistance to corrosives
Common Uses
Solvents, dust, light fumes
Soldering, electronics assembly
Strong acids, aggressive vapors
Best For Labs
Education, general chemistry
Cleanrooms, electronics repair
Pharmaceutical, R&D, chemical
As you can see, the core differences are clear. For common applications like venting solvent vapors or light dust, the anodized aluminum construction of the Original Exhaust Snorkel is a reliable and budget friendly choice. It works well for many general chemistry and educational labs.
However, when your protocols involve aggressive chemicals like strong acids, you need polypropylene. The Chemical Resistant Exhaust Snorkel is built to handle these harsh conditions without breaking down. For any environment where a static spark could destroy expensive components, the ESD Exhaust Snorkel is essential. It provides a critical layer of conductive protection.
Our Lab Fume Extraction Arm Products
Ready to find the right fume extraction arm for your lab? We offer three distinct models to meet specific safety and application needs. Each one is built for performance and durability. Find your perfect match below.
Original Exhaust Snorkel
The dependable workhorse for general lab use. Made from anodized aluminum, it’s perfect for capturing solvents, light dust, and common chemical fumes in educational and industrial settings.
Essential for electronics labs and cleanrooms. This arm is constructed with materials that safely dissipate static buildup, protecting sensitive components from electrostatic discharge while capturing soldering fumes.
Engineered for the toughest jobs. Made from durable polypropylene, this arm withstands highly corrosive acids and aggressive vapors, making it the only safe choice for pharmaceutical and advanced chemical research labs.
Picking the perfect lab fume extraction arm does not have to be complicated. When you have a clear plan, the process is straightforward. Making the right choice from the start ensures your equipment performs safely and meets the demands of your specific tasks. We have put together a simple five step checklist to guide you.
5-Step Checklist for Selecting Your Fume Arm
Identify Your Contaminants: First, list every chemical, vapor, or dust particle you need to capture. This is the most important step. Always consult your Safety Data Sheets (SDS) to understand the hazards and check for material compatibility.
Determine Reach and Mounting: Measure your workspace. You need to know the length and articulation required to cover all work areas without being an obstacle. This is also when you will decide if a bench, ceiling, or wall mounted model makes the most sense for your lab’s layout.
Verify Material Compatibility: Refer to your contaminant list from Step 1. This list dictates the arm material you need. For general solvents, an aluminum Original Exhaust Snorkel is a solid choice. For strong acids, you will need a polypropylene Chemical Resistant Exhaust Snorkel. For delicate electronics, an ESD Exhaust Snorkel is necessary to prevent static discharge.
Confirm Airflow Requirements: Ensure the arm’s diameter and your building’s ventilation system can generate the necessary capture velocity. This is the air speed at the source needed to pull contaminants into the arm. Check your system’s CFM (cubic feet per minute) capacity to confirm it is adequate.
Review Hood and Accessory Options: The final step is choosing a hood style that fits your application. Different jobs call for different capture patterns, with options like dome, flat, or slotted hoods. Also consider extras like dampers for airflow control or integrated lighting.
Use Cases: Which Fume Arm Fits Your Lab?
To see how this works in the real world, let’s walk through a few common lab environments and see which benchtop extraction arm for sale makes the most sense. These examples should help you visualize what your own space requires.
Scenario 1: University Chemistry Lab
A typical university chemistry lab involves students working with mild solvents and general chemical reagents. The main task is to pull common fumes away from their workspace during routine experiments. For this setting, the Original Exhaust Snorkel is the go to choice. Its aluminum body is durable enough for daily use and cost effective for outfitting multiple workstations.
Scenario 2: Electronics Assembly and Soldering Station
In a cleanroom or on an electronics repair bench, the biggest invisible threat is electrostatic discharge. A small spark can destroy sensitive microchips. The ESD Exhaust Snorkel is non negotiable here. It is built to dissipate static electricity safely, protecting valuable components while removing harmful soldering fumes.
Scenario 3: Pharmaceutical R&D Lab
Labs in the pharmaceutical or high purity chemical sectors often handle aggressive and corrosive substances like strong acids. The Chemical Resistant Exhaust Snorkel is essential for these environments. It is made of polypropylene, a material designed to withstand harsh chemical exposure without breaking down. This is the safest option for personnel working with potent, hazardous materials.
Scenario 4: Art Restoration Studio
An art restoration studio may use various solvents to clean paintings or artifacts. These solvents can release volatile organic compounds (VOCs). The Original Exhaust Snorkel is ideal here. It can be precisely positioned over the work area to capture vapors at the source, protecting the conservator’s health without obstructing their detailed work.
Scenario 5: Dental Lab
Dental laboratories handle materials that create fine dusts and chemical fumes from acrylics and bonding agents. A Chemical Resistant Exhaust Snorkel is often the best choice due to the variety of chemicals used. It effectively removes these airborne particles, ensuring a clean and safe environment for technicians.
Frequently Asked Questions (FAQs)
Lab managers and safety officers often ask us questions when choosing a fume arm supplier. Here are answers to the most common inquiries.
What is the difference between a fume arm and a fume hood?
A fume hood is a large, enclosed cabinet that creates a fully ventilated workspace for hazardous materials. A fume arm is a smaller, flexible device for source capture. It gets right to the point of generation, like a beaker or soldering station, and pulls contaminants away before they escape. This makes it ideal for smaller tasks where a full hood is not practical.
How far can a fume extraction arm reach?
Most articulating arms have a reach between 3 and 10 feet. The key is to match the arm to your workspace. Before you buy, measure the area you need to cover on your workbench to ensure the arm you choose can be positioned correctly.
Why is capture velocity important?
Capture velocity is the minimum air speed needed at the arm’s opening to grab fumes and pull them into the system. If the velocity is too low, contaminants can escape into the lab. Correct capture velocity is critical for safety and air quality.
Can I connect a fume arm to my existing ventilation system?
Yes, in most cases. A benchtop extraction arm can often be tied into an existing HVAC or dedicated exhaust system. However, you must consult a ventilation specialist first. They need to confirm your system can handle the extra airflow demand without affecting other vented equipment.
How often should I inspect my fume extraction arm?
Regular inspections are crucial for performance and safety. We recommend monthly checks of the joints, hoses, and airflow. A quick visual inspection before each use is also a good practice. Always follow the manufacturer’s maintenance guidelines and your facility’s safety protocols.
What are the mounting options for these arms?
Fume extraction arms are versatile and can be mounted in several ways. Common options include bench mounting, wall mounting, and ceiling mounting. The best option depends on your lab’s layout, the location of the work, and the need to keep the bench clear.
Are replacement parts available?
Yes, replacement parts such as hoods, hoses, and joints are available. Using genuine replacement parts ensures your system continues to operate safely and effectively. Contact your fume arm supplier for information on ordering the correct parts for your model.
Get the Right Fume Extraction Arm for Your Lab
Choosing the correct lab fume extraction arm is a critical step in creating a safe and efficient laboratory. By identifying the specific contaminants in your workspace and matching them with the right material, whether it is anodized aluminum, ESD safe aluminum, or chemical resistant polypropylene, you ensure optimal protection for your team.
At Labs-USA, we are experts in laboratory equipment and are committed to helping you find the perfect solution. We offer competitive pricing, the fastest shipping in the industry, and free layout designs with no obligation.
Ready to improve your lab’s air quality and safety?
Labs USA can help you find the right solution. Call (800) 236-5657 or email sales@labs-usa.com to speak with a product specialist. We provide free quotes, layout assistance, and expert recommendations.
Meta title: Chemical Resistant vs ESD vs Original Exhaust Snorkels for Labs
Meta description: Compare Chemical Resistant, ESD, and Original exhaust snorkels by application, material, airflow, hood type, and mounting. Learn how to choose the right source capture arm for your lab.
If you're comparing chemical resistant vs esd vs original exhaust snorkels, you're likely at the point where one wrong choice creates a long list of problems. Weak source capture, corrosion, static risk, hard-to-position arms, or a setup that doesn't match the work. In most labs, the decision is simpler than it looks once you start with the hazard.
The short answer is this. Use the Original model for general fumes, dust, and light-duty source capture where there is little to no static concern and little exposure to aggressive chemicals. Use the ESD model where electrostatic discharge matters, such as electronics, soldering, repair, and some controlled environments. Use the Chemical Resistant model where corrosive vapors, acids, solvents, or harsh chemical exposure can damage standard materials. If the process is too hazardous for open-bench capture, a full laboratory fume hoods approach may be the better answer.
Quick summary
Original snorkels fit general-purpose source capture for fumes, dust, smoke, and non-corrosive vapors.
ESD snorkels are built for static-sensitive work and grounded dissipation in electronics-related settings.
Chemical Resistant snorkels are the safer choice when corrosion resistance matters.
Airflow is only part of the decision. Material, hood style, mounting, and task layout matter just as much.
Positioning is critical. Even a good snorkel performs poorly when the hood is too far from the source.
For a quick product overview, this video helps show how source capture arms fit into lab ventilation planning.
Video caption: A short overview of source capture arms and where they fit in lab ventilation.
Direct capture matters: Snorkels work best when they pull contaminants close to where they are created.
Model choice follows the hazard: General use, static control, and corrosion resistance are different design problems.
Layout affects performance: Reach, hood style, and mounting can make or break usability.
Most buyers start with airflow. That's understandable, but it's rarely enough. A snorkel that moves air well can still be the wrong choice if the arm material doesn't match the vapors, if the hood shape doesn't fit the release pattern, or if static control is part of the process.
The three main snorkel types are built for different risks. The original exhaust snorkel is a general-purpose arm. The ESD exhaust snorkel adds conductive, grounded features for static-sensitive work. The chemical resistant exhaust snorkel focuses on material durability in corrosive environments.
Practical rule: Match the snorkel to the process first, then confirm size, hood, mount, and exhaust capacity.
That order helps avoid a common mistake. Teams buy by product name, but they should buy by contaminant, workstation behavior, and room conditions.
Key Differences Original vs ESD vs Chemical Resistant Snorkels
The biggest differences come down to material, risk type, and where the arm will be used. Standard models are typically lightweight anodized aluminum with composite friction joints for general work. Chemical-resistant models use double anodized aluminum profiles or polypropylene for more aggressive environments. ESD-safe variants use conductive materials and anodized metal hoods to control static discharge in electronics or spark-sensitive work, as described in this feature comparison of exhaust snorkel models.
Model
Best use
Materials
Airflow range by size
Typical environment
Hood considerations
Mounting notes
Planning note
Original exhaust snorkel
General fumes, dust, smoke, non-corrosive vapors
Anodized aluminum
FX50 30 to 65 CFM, FX75 65 to 140 CFM, FX100 120 to 265 CFM
Schools, general labs, light industrial benches
Choose hood style based on how the contaminant spreads
Wall or ceiling mounted, 360-degree articulation
Planning tool only. Final review should confirm task fit.
Conductive materials with grounded parts and metal hood options
FX50 30 to 65 CFM, FX75 65 to 140 CFM, FX100 120 to 265 CFM
Electronics stations, clean work areas, repair benches
Hood should support close capture without interfering with delicate work
Wall or ceiling mounted, 360-degree articulation
Grounding and task risk review are part of selection.
Chemical Resistant exhaust snorkel
Corrosive fumes, vapors, acids, solvents
Double anodized aluminum or polypropylene, depending on model
FX75 and FX100 options are listed for this model family
Chemical labs, pharma, aggressive wet chemistry
Corrosion-resistant hood options matter as much as arm material
Wall or ceiling mounted, 360-degree articulation
Verify compatibility with the actual chemicals in use.
A useful reference when reviewing electronics workstations is this overview of ESD safe materials. It helps explain why conductive surfaces and controlled dissipation matter beyond just the arm itself.
What each model is really for
Original model: Best for everyday source capture where the contaminants are not highly corrosive and static isn't the main concern.
ESD model: Best when a spark or static event can damage components or create process risk.
Chemical Resistant model: Best when the air stream, splashes, or ambient exposure can attack standard materials over time.
A simple 5-step selection checklist
List the actual contaminants. Check fumes, dust, vapors, and byproducts, then review SDS and internal EHS guidance.
Flag the special hazard. Decide whether the primary risk is general exposure, corrosion, or electrostatic discharge.
Check the task style. Open bench, solder point, acid dish, slide warmer, or sample prep all behave differently.
Match hood and reach. The right arm can still fail if the hood shape or mounting point is wrong.
Review enclosure needs. If the process exceeds open-bench source capture, consider a chemical fume hood instead of a snorkel.
How to Choose the Right Exhaust Snorkel for Your Lab
A facility usually starts asking this question after a problem shows up at the bench. Solder smoke drifts past the operator. Acid vapor starts staining nearby hardware. An electronics station passes airflow checks but still has static-related failures. In each case, the wrong snorkel choice usually came from sizing the arm before defining the hazard, the workstation layout, and the maintenance burden.
A better selection process starts with the task. Identify what is released, where it is released, how often the arm will be repositioned, and whether the bench setup allows the hood to stay close to the source. That produces a better result than comparing arm diameter alone.
Five checks that prevent the wrong buy
Define the process, not just the contaminant class. A light solvent wipe-down, a heated acid bath, and hand soldering all behave differently in open air. The right model depends on release energy, duration, and operator position as much as chemistry.
Check the bench environment before you choose the arm. Supply diffusers, door swings, and cross traffic can pull contaminants away from the hood face. I often see acceptable fan capacity paired with poor capture because the snorkel was mounted where the user cannot keep it close.
Size the arm to the application and mounting geometry. The Labs USA exhaust snorkel product page lists planning ranges for FX50, FX75, and FX100 models. Use those ranges as a starting point, then confirm reach, duct routing, and fan performance against the actual workstation.
Match the hood shape to the way the contaminant spreads. A low-energy release at a fixed point may work with a compact hood. A hotter or more turbulent release often needs a hood that captures a wider plume without forcing the operator to work around it.
Review service life and replacement parts before approval. Material compatibility matters, but so do joint wear, hood cleaning, and whether staff can access the mounting point safely for inspection.
One detail gets overlooked in many comparisons. Installation constraints can eliminate a model that looks correct on paper. Ceiling drops, wall obstructions, shelving, and monitor arms often determine whether users will keep the snorkel in the correct position or park it out of the way.
Procurement teams should also ask how the arm was manufactured, especially for molded plastic parts used in corrosive environments. Material choice and part geometry affect long-term durability, which is why manufacturing methods such as designing for injection molding matter when evaluating housings, hoods, and accessories.
What buyers often miss
The snorkel model is only one part of the control strategy. A corrosive application may need a chemical resistant arm, but it may also need a shorter duct run, easier washdown access, and a hood that tolerates residue buildup. An ESD-sensitive process may require grounding continuity checks during maintenance, not just an ESD-rated arm at installation.
Open source capture also has limits. If the process generates a broad vapor cloud, uses highly hazardous materials, or cannot keep the emission point near the hood, a snorkel is the wrong control and the project should be reviewed as an enclosure application instead.
Understanding Materials Airflow and Hood Options
Material selection affects service life, cleaning effort, and whether the arm stays reliable in the actual process area. Original snorkels are commonly built with anodized aluminum and composite friction joints, which makes them a practical fit for general lab exhaust where the contaminant is not especially corrosive and static control is not part of the risk. They are also often less expensive than specialty models, but price should stay secondary to chemical exposure, grounding needs, and how aggressively the arm will be used day to day.
The material decision usually shows up later in maintenance.
An aluminum arm can hold up well over routine chemistry benches, teaching labs, powder handling stations, and other mixed-use areas where staff need a light arm that repositions easily. In acid service, washdown areas, or processes that leave residue on the hood and joints, a chemical resistant model is usually the better choice because the plastic body and hood options are designed for contact with common lab chemicals. The right call depends on the actual compounds, concentration, temperature, and cleaning method, so compatibility should be checked against the manufacturer’s chemical resistance information before purchase.
For buyers who want to understand why molded plastic parts last in some applications and crack or creep in others, this reference on designing for injection molding gives useful context on wall thickness, part geometry, and stress points.
Airflow planning is simpler if the arm size is treated as a capture tool, not just a duct connection. Published planning ranges for common arm sizes are:
FX50, 2 inch: 30 to 65 CFM
FX75, 3 inch: 65 to 140 CFM
FX100, 4 inch: 120 to 265 CFM
Those numbers help with initial layout, but field performance still depends on hood style, distance from the source, and how operators work. A 4-inch arm mounted too high or parked behind equipment will underperform a smaller arm placed correctly near the release point. Arms that rotate 360 degrees and mount to either wall or ceiling give more layout flexibility, but they also need enough clearance to move without hitting shelving, monitors, reagent racks, or task lighting.
Hood selection has the same kind of practical trade-off. Combi hoods usually work better for lower-energy fumes that stay fairly concentrated near the task. Dome hoods are often a better fit where vapors spread out quickly and the operator needs a larger capture area. In corrosive service, match the hood material to the chemical exposure as carefully as the arm body. Facilities often replace an arm when in fact the problem is a hood that is too small, too far away, or hard to clean.
Bench layout matters here more than many specifications suggest. The arm has to reach the source without blocking hands, instruments, or sample movement. During planning, review nearby laboratory work surfaces at the same time so the snorkel, bench depth, and equipment placement work together instead of competing for the same space.
Decision Scenarios Matching the Snorkel to the Application
A facility manager usually sees this decision after the complaints start. Corroded joints at one bench, solder smoke drifting past a technician at another, and an arm in the corner that nobody uses because it collides with equipment. The right choice comes from the task, the layout, and how people work at the bench.
Scenario 1
A school or university lab runs varied open-bench work with routine chemistry, light fumes, and occasional dust. The hazard profile changes by class period, but it usually stays within general exhaust duty. The original exhaust snorkel is often the practical fit because it handles mixed day-to-day use without adding chemical-resistance or static-control features the room may not need.
Scenario 2
An electronics repair or soldering bench works on static-sensitive assemblies. In that setting, capture alone is not enough. The ESD exhaust snorkel fits better because the work area has to control fumes and reduce electrostatic discharge risk at the same time.
Scenario 3
A chemical prep station handles acids, solvents, or other aggressive vapors several times a day. Start with the chemical resistant exhaust snorkel, then confirm the hood and accessory materials match the exposure. I see premature failures most often at the hood, joints, and hardware, not just the arm body.
Field note: If aluminum parts keep degrading in a process area, the problem is usually material mismatch, not brand or arm size.
Scenario 4
A lab reports weak capture and asks for a larger arm. Check operator position and hood placement first. If the hood sits too far from the source during normal work, a larger snorkel may add airflow capacity without improving real capture at the bench.
Scenario 5
The installed snorkel is technically correct but operators keep pushing it away. That usually points to a layout problem. Review wall versus ceiling mounting, swing path, and whether nearby instruments, shelving, or task lights force the arm out of usable position.
Scenario 6
A project team is choosing between a snorkel and a fume hood for a new process. A snorkel can work for intermittent open-bench tasks with a small, defined release point and good operator discipline. For higher-hazard chemical work, broader vapor release, or tasks that need containment rather than point capture, a hood is the better control. Rowan University guidance states snorkels are "not as efficient as chemical fume hoods" (Rowan University laboratory ventilation guidance). That is the right warning to keep in mind during design review.
Scenario 7
A renovation is still on paper. That is the best point to solve duct routing, mounting height, service access, and conflicts with shelving or overhead utilities. Maintenance access matters here too. An arm that cannot be cleaned, adjusted, or rebalanced easily will lose performance long before the fan fails. For bench planning and operator use, review fume hood safety guidance for laboratory exhaust decisions alongside source-capture layout.
Frequently Asked Questions
What is the difference between Chemical Resistant, ESD, and Original exhaust snorkels
The difference is mostly about the hazard. Original models fit general fumes and dust. ESD models fit static-sensitive work. Chemical Resistant models fit corrosive fumes and vapors.
Which snorkel is best for electronics or soldering
The ESD model is the usual choice for electronics assembly, repair, and soldering because it is designed for environments where electrostatic discharge is a concern.
Which snorkel is best for corrosive fumes
The Chemical Resistant model is the better fit when corrosion resistance matters. That includes strong acids, solvents, and aggressive vapors, subject to compatibility review for the actual chemicals in use.
Is the Original model enough for general lab use
Yes, often. It is meant for general applications, fumes, smoke, and dust where there is little static risk and little exposure to aggressive chemicals.
Do all three snorkels have the same airflow range
Not exactly in how they are listed. The Original and ESD pages list FX50, FX75, and FX100 options. The Chemical Resistant page lists FX75 and FX100. Use those ranges as planning references, then confirm the final design.
How do hood types affect capture
A lot. The wrong hood can make a good arm perform poorly. Rowan University guidance says snorkels are "not as efficient as chemical fume hoods" and that the inlet should be within one half the diameter of the hood opening for adequate capture. For example, that means 5 inches for a 10-inch funnel, according to Rowan local exhaust ventilation safety guidance.
Can I mount these snorkels to a wall or ceiling
Yes. The main product information notes wall and ceiling mounting options, along with 360-degree swivel and rotation capability. The best choice depends on bench layout, reach, and obstruction clearance.
Should an engineer or EHS team review my setup
Yes. Snorkels are planning-sensitive products. Material choice, hood type, duct routing, fan selection, room airflow, and the actual task all affect performance. SDS and internal EHS review should be part of the final decision.
Conclusion
A facility usually gets one chance to choose correctly before the benches are installed, the duct path is fixed, and staff build their routines around the arm they have. At that point, the right question is not which snorkel sounds standard. The right question is which model fits the actual hazard, reach requirement, and maintenance burden in that room.
Original snorkels make sense for general source capture. ESD models belong in static-sensitive work where discharge can damage the process or product. Chemical Resistant models belong where vapors, splash exposure, and routine cleaning can attack standard materials. The better decision often comes from the application details that get missed early, such as hood position, operator reach, obstruction clearance, and how often the arm will be repositioned and wiped down.
If your exhaust snorkel seems to be running but fumes still drift toward the operator, the problem is often position, not just airflow. To improve source capture, place the hood as close to the source as practical, usually within one duct diameter, and aim it so contaminants move away from the user’s breathing zone instead of across it.
Quick summary
Keep it close: A common rule is to place the hood within one duct diameter of the source. For a standard 3-inch snorkel, that means about 3 inches from the emission point, based on guidance in the Labs USA exhaust snorkel guide.
Protect the operator first: Positioning slightly above and behind the source usually helps pull fumes away from the breathing zone.
Match the hood to the task: Hood style, arm diameter, and mount type all affect how easy it is to hold the right position.
Fan performance still matters: A snorkel arm is usually passive and almost always needs an external fan sized for the actual duct path and resistance.
Room air can ruin good placement: Supply vents, doors, and traffic can pull contaminants away from the hood.
Some tasks need more containment: For broader or more hazardous work, a full hood can be the safer choice.
Why Snorkel Position Matters More Than You Think
A snorkel only works well when it captures contaminants near the point where they form. Once fumes or particles spread into the room, capture gets much harder. That is why local exhaust hood design and location matter so much in real labs.
A useful way to think about it is a vacuum nozzle. Put the nozzle near the spill and it picks material up. Hold it too far away and most of the mess stays put. Snorkels behave the same way with vapors, smoke, and light dust.
Guidance for source capture says hoods should achieve 100 feet per minute at a distance of one hood diameter for effective capture, and the hood can be angled up to 45 degrees to pull smoke from the breathing zone, according to Air Quality Engineering.
Distance beats wishful thinking
Many teams assume a stronger fan will fix poor hood placement. In practice, bad geometry often wastes available airflow. If the hood sits too far away, contaminants have time to spread, rise, cool, or drift sideways before the snorkel can grab them.
Practical rule: Put the capture point where the contaminant starts, not where you wish it would go.
The breathing zone is the real target
The main safety goal is simple. Keep the operator from inhaling what the process releases. That means the hood should not pull fumes through the person’s face on the way to the inlet.
If you are reviewing broader air control issues in a facility, resources on Orlando indoor air quality can also help frame how ventilation, room movement, and source control work together. For a wider lab safety view, it also helps to review fume hood safety practices.
A 5-Step Checklist for Positioning Your Exhaust Snorkel
Good positioning is easier when you follow a repeatable process. This checklist works well for lab managers, EHS staff, and project teams during setup and retraining.
Step 1 Check the hazard
Start with the process, not the hardware.
Identify the contaminant: Is it vapor, smoke, mist, or light dust.
Check how it moves: Hot fumes rise. Some particles fall. Forced emissions can shoot outward.
Review SDS and EHS input: If the hazard is significant, confirm the setup with your safety team.
Step 2 Match the arm and hood
Pick a snorkel that fits the task and the bench layout. A good overview of available configurations is on the exhaust snorkel product page.
Choose the right material: General use, chemical resistant, or ESD-safe.
Choose the right reach: The arm has to reach the source without being stretched into an awkward angle.
Choose the right hood shape: Hood style changes how air enters and how forgiving the position will be.
Step 3 Set the hood close and clear
Move the hood near the source and keep the opening unobstructed. Avoid placing bottles, tools, or hands between the hood and the emission point.
The best capture setups are usually the simplest ones. Short path. Clear path. Stable position.
Step 4 Verify capture in real use
Don’t stop after installation.
Watch actual work: A setup can look good when idle and fail when users lean in.
Use smoke visualization if your safety team allows it: This shows whether the plume enters the hood cleanly.
Check for room drafts: Doors, diffusers, and passing carts can change the result fast.
Step 5 Train users to reset it every time
Even a good arm fails if nobody repositions it. Show users where the hood should sit for each common task and make that part of the normal setup routine.
Key Positioning Rules Distance Angle and Placement
A common failure looks like this. The snorkel is on, the fan is running, and the user still smells solvent because the hood is six inches away and slightly off line from the plume. Position caused the miss, not fan capacity.
Keep the hood within one duct diameter
Use the one-duct-diameter rule as your starting point. If the arm is 3 inches in diameter, place the hood about 3 inches from the point where vapor, mist, or dust is released. Labs USA explains that rule in its snorkel positioning article.
That distance matters because capture falls off fast as you move away from the source. A hood that looks close on a crowded bench can still be too far to control the plume.
Set the angle to pull contaminants away from the user
The best position usually puts the hood slightly above the source and slightly behind it relative to the operator. That gives the contaminant a short path into the hood without pulling it through the breathing zone first.
Use the source behavior to fine-tune the angle:
Rising fumes from warm vessels: Keep the hood just above the release point so the natural upward plume feeds into the opening.
Bench work with the user standing in front: Shift the hood behind the source so airflow moves away from the face.
Tasks that need overhead access: Place the hood to the side, but keep the opening aimed across the plume, not past it.
Good placement has to survive real use. If the arm blocks a pipette path, hides a balance display, or sits over the only place a user can load glassware, it will get pushed aside.
I look for three clearances during setup. Keep the hood out of the hand path, out of the sight line, and off the controls. If you cannot do that and still stay close to the source, the task may need a different hood style or a different mounting point.
That is the trade-off on snorkels. They work well when the inlet is close, clear, and stable. They lose value fast when convenience forces the hood out of position.
How Hood Style Diameter and Mounting Affect Positioning
Not every snorkel behaves the same way. Hood style, arm diameter, and mount location all change how you should place the inlet.
Hood style changes the capture pattern
Labs USA notes that different hood styles fit different contaminant behavior.
Combi hood: Better suited to low-energy contaminants.
Dome hood: Better for high-dispersion contaminants.
Metal hood: Better for aggressive fumes, high temperatures, and dust splatter.
That means hood choice affects placement strategy. A dome hood can be helpful where the plume spreads. A more targeted opening works better where you want tighter source capture. If your project includes multiple enclosure types, compare them with other hoods and enclosures.
Diameter affects airflow and velocity
Arm diameter also changes positioning needs. Labs USA lists these airflow capacity ranges for common snorkel sizes:
FX50 2 inch:30 to 65 CFM
FX75 3 inch:65 to 140 CFM
FX100 4 inch:120 to 265 CFM
In general, smaller diameters help create higher velocity at the opening, which can help with heavier particles. Larger diameters move more air and often suit lighter rising fumes better. That does not mean bigger is always better. It means the diameter has to match the process.
Wall mount versus ceiling mount
Mounting affects reach, adjustability, and user habits.
Wall mounted arms: Often make sense for benches against a wall and can keep movement predictable.
Ceiling mounted arms: Usually work well over island benches or where bench clearance matters.
Rotation matters: Labs USA notes snorkels can rotate 360 degrees, which helps users reach the source without twisting the arm into poor positions.
Common Positioning Mistakes and How to Fix Them
Most weak snorkel setups fail in familiar ways. The hood is too far away, placed in front of the operator, or fighting room airflow. Sometimes the arm is fine, but the task has slowly shifted across the bench and the hood never moved with it.
Exhaust Snorkel Positioning At-a-Glance
Positioning Choice
Capture Quality
User Impact
How to Correct
Hood too far away
Poor to inconsistent
Fumes spread before capture
Move the hood closer to the source and shorten the open travel path
Hood close to source
Generally strong
Better control with less room contamination
Keep the opening clear and maintain the same setup during use
Hood above and behind source
Often the most practical
Helps pull contaminants away from the breathing zone
Adjust arm joints so the inlet does not block the task
Hood in the user’s breathing path
Misleading and risky
Can pull fumes across the operator’s face
Reposition the hood so flow moves away from the user
Cross-draft interference
Unstable
Plume wanders or escapes capture
Check supply vents, doors, and traffic patterns, then relocate or shield the work area
Fan performance and room airflow still count
A snorkel arm is usually passive and almost always needs an external fan. If the fan is undersized, if duct runs are long, or if bends add resistance, the hood may not get the airflow the design assumed.
Make-up air also matters. If the room is pulling hard in one direction, the plume may never rise into the hood as intended.
Watch supply vents: A diffuser aimed at the bench can break capture.
Watch doors and aisles: Opening traffic creates short bursts of cross-draft.
Watch clutter: Tall equipment near the source can redirect the plume.
If your task really needs a more enclosed capture zone, a bench-top fume hood may be easier to control than an open snorkel setup.
Five decision scenarios
Soldering or electronics work: Keep the hood close, slightly above the joint, and out of the line of sight.
School chemistry bench task: Use a simple repeatable hood position that students can reset quickly.
Light powder handling: Avoid aggressive placement that disturbs the material. Test capture while the powder is handled.
Draft trouble near a door: If capture improves when the door stays shut, room airflow is part of the problem.
Hot vessel releasing vapors: A hood slightly above the source usually works better than side placement.
Task keeps moving around the bench: Reconsider mount point and arm reach so users don’t overextend the arm.
When to Choose a Chemistry Hood Instead of a Snorkel
A snorkel is a targeted source capture tool for smaller open-bench tasks. It is often a good fit where contaminants are localized and the user needs access around the work.
A full chemistry hood is usually the better choice when the hazard is broader, less predictable, or needs physical containment. That includes work with larger quantities, splash risk, or processes that generate contaminants across a wider area.
Choose the tool that matches the hazard, not the one that is easiest to place on the bench.
One source for equipment selection is Labs USA, which offers snorkels, chemistry hoods, and related lab ventilation products. For significant hazards, final setup details should still be confirmed with the project team, ventilation engineer, or EHS staff.
Frequently Asked Questions about Snorkel Positioning
A snorkel that looks close enough on paper can still miss the plume in daily use. I see this after bench moves and equipment swaps. The fan capacity stayed the same, but capture got worse because the hood ended up a few inches too high, too far off center, or directly in the user's reach path.
How close should an exhaust snorkel be to the source
Start with the hood opening about one duct diameter from the point of release. A 3-inch snorkel usually works best at roughly 3 inches from the source, then adjusted based on heat, plume strength, and how the operator handles the task.
Should the hood be above or in front of the source
Slightly above and just behind the source is usually the better starting position. That pulls contaminants away from the user's face instead of drawing them across the breathing zone.
Does a bigger snorkel always capture better
No. Larger hoods can move more air across a wider area, but they also spread that airflow over a bigger opening. Smaller hoods often give stronger local capture at the source. The better choice depends on whether the task produces a tight plume, a broad vapor cloud, dust, or splatter.
Can poor capture be fixed just by increasing fan power
Usually no. More airflow helps only after the hood is in the right place. If distance, angle, or bench obstructions are wrong, extra fan capacity often wastes energy and still leaves exposure at the work area.
Do room drafts affect snorkel performance
Yes. Supply diffusers, open doors, passing carts, and people walking behind the operator can pull the plume off course. If capture seems inconsistent from one day to the next, check the room air pattern before adjusting the arm.
Do I need a dedicated fan for a snorkel system
In many installations, yes. The snorkel arm does not create suction by itself. It depends on the exhaust fan, duct layout, and system losses to produce usable capture at the hood.
Which hood style works best for my task
Match the hood to the release pattern. Combi hoods are often a good fit for lower-energy fumes. Dome hoods work better where the contaminant disperses more broadly. Metal hoods are a better choice for aggressive chemicals, higher temperatures, or work that can throw dust or residue onto the hood face.
Does hazard type change how close the hood should be
Yes. Fast-evaporating solvents and weak, drifting plumes usually need tighter positioning than heavier dust or more directional releases. This is one of the most missed setup variables in labs. Staff often focus on fan CFM and forget that placement decides whether that airflow reaches the contaminant stream at all.
The practical rule is simple. Put the hood as close as the task allows, keep it out of the operator's path, and verify that room airflow is not breaking capture.
If you want help comparing snorkel types, hood styles, or layout choices, contact Labs USA to compare options.
If you’re planning a new bench, renovation, or replacement setup, request guidance early so you can avoid layout conflicts and keep your project schedule moving.
If you're comparing an exhaust snorkel vs ductless fume hood, you're probably trying to solve a very practical problem. You need to control fumes at the bench, protect staff, stay within budget, and avoid buying the wrong equipment for the job.
That choice matters more than many teams expect. These two systems can both improve air quality, but they do it in very different ways. One is built for targeted source capture. The other is built for enclosed containment with filtration.
Pick the right one, and your lab runs smoother. Pick the wrong one, and you may end up with poor capture, workflow issues, higher lifetime cost, or a safety gap that shows up during daily use.
Summary
Exhaust snorkels work best for low-hazard fumes, odors, and heat at a defined source.
Ductless fume hoods work best when you need an enclosed workspace and the chemicals are approved for the filter system.
Snorkels depend on placement. If the source moves too far away, capture drops.
Ductless hoods depend on filter fit. If the filter does not match the chemical, the hood is not the right choice.
Operating cost can favor ductless hoods over ducted hoods in the right application, but filter replacement remains part of the lifecycle cost.
The safest buying decision starts with your chemical list, task type, room conditions, and maintenance plan.
Choosing Your Lab's Air Filtration Solution
Most buyers don't need a feature list. They need a clear answer to one question. Which system fits the actual work happening at the bench?
An exhaust snorkel is often the better fit when staff need open access and the task creates a small, localized plume. A ductless fume hood makes more sense when the process needs enclosure and the chemical use falls within a verified filter range.
The mistake I see most often is simple. Teams compare price first and hazard second. That usually leads to rework later.
Use this article to sort the decision by what really matters:
Hazard level: Low nuisance fumes are not the same as volatile chemical work.
Task style: Fixed point work favors a snorkel. Multi-step handling inside a protected area favors a hood.
Lifetime cost: Purchase price is only one piece of the budget.
Operational discipline: Both systems need correct use, but a snorkel is far more dependent on user positioning.
Understanding the Core Technologies
How an exhaust snorkel works
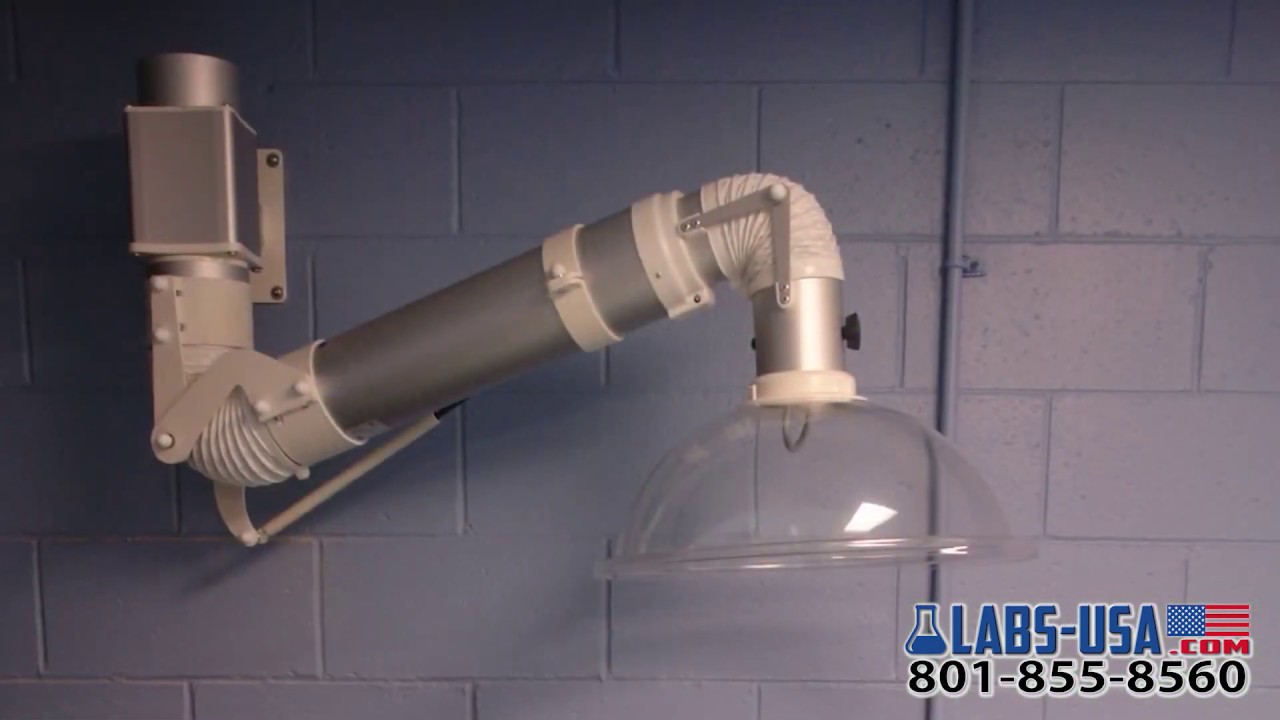
An exhaust snorkel is a local exhaust device with an articulated arm and capture hood. It pulls fumes, odors, or heat away from a specific point before they spread into the room.
Its strength is precision. You move the arm close to the source and collect contaminants where they form. In practice, snorkels serve low-volume capture tasks well. Typical air volumes are under 500 CFM, and capture velocities at the source are 100 to 200 LFM according to Labs USA's exhaust snorkel guide.
That design gives you flexibility, but not containment. There is no sash, no enclosed chamber, and no physical splash barrier.
How a ductless fume hood works
A ductless fume hood is a self-contained enclosure. Air is pulled through the hood opening, contaminants are captured by filtration, and the cleaned air is recirculated back into the room.
This changes how the unit behaves in daily use. The enclosure helps control the work area, and the airflow pattern is designed to keep contaminants inside the hood while the operator works at the face opening. Ductless hoods usually run at 200 to 800 CFM with face velocities of 70 to 120 FPM, as noted in the same Labs USA comparison article.
Filter choice is the key limit. Carbon and HEPA systems only work when the contaminants are known and approved for that filtration setup.
A ductless hood is not a universal substitute for a ducted hood. It is a filtered enclosure for specific, approved applications.
Why room airflow still matters
Even with the right equipment, the room can help or hurt performance. Supply air, door swings, and traffic patterns affect capture and containment. If you're reviewing lab airflow during design, this Covenant Aire Solutions air change guide is a useful general resource for understanding how room ventilation is calculated.
Exhaust Snorkel vs Ductless Hood A Direct Comparison
A side-by-side review makes the trade-offs easier to see. The key is not which product has more features. The key is which one matches the task.
Feature
Exhaust Snorkel
Ductless Fume Hood
Basic function
Point-source capture at the work area
Enclosed filtration and air recirculation
Containment style
Open capture
Enclosed workspace
Typical airflow
Under 500 CFM
200 to 800 CFM
Air speed metric
100 to 200 LFM at the source
70 to 120 FPM face velocity
Best use
Low-hazard fumes, odors, heat, and small localized tasks
Approved chemical work needing enclosure
User access
Very open and flexible
More controlled work position inside hood opening
Physical barrier
None
Yes, enclosure provides operator separation
Maintenance
Mechanical inspection and airflow checks
Filter replacement every 6 to 12 months at $200 to $500 per filter
The snorkel wins when the task is narrow and repeatable. Think soldering, nuisance vapor control, or pulling heat off a bench process. Staff can move the arm where needed and keep the bench open.
The ductless hood wins when the process needs a defined work chamber. If users are handling approved solvents or powders and need better containment, the enclosed design is a major advantage.
Where buyers often get tripped up
Procurement teams sometimes compare these systems as if they are direct substitutes. They aren't. They solve different exposure problems.
A good way to think about it is this:
Choose a snorkel when the source is small, stable, and low hazard.
Choose a ductless hood when the process needs enclosure and filter compatibility is documented.
Choose neither without review if the chemical hazard is broad, unknown, or highly toxic.
For facility teams also dealing with building-level mechanical issues, even non-lab systems need the right service support. This general example of reliable ductless AC repair from Comfort Experts is a reminder that any air-handling equipment performs best when maintenance responsibility is clearly assigned.
Safety Containment and Regulatory Factors
Safety is where the exhaust snorkel vs ductless fume hood decision becomes very clear. The question isn't whether both improve air conditions. The question is how much protection each system gives when something goes wrong.
Why snorkels depend on operator behavior
Exhaust snorkels are proximity-dependent. They need to sit within inches of the source to work effectively, as explained in Labs USA's comparison of laboratory exhaust snorkels and fume hoods. If the operator moves the process away from the capture point, fumes can spill into the room.
That limitation matters in busy labs. Open benches are flexible, but they also allow the work to drift. A heat source gets repositioned. A vessel is turned. A task grows larger than planned. Once that happens, capture can drop fast.
Why ductless hoods depend on chemical approval
A ductless hood solves the open-containment issue by enclosing the process. But it has a different limit. It is only suitable for pre-approved chemical lists because the filters must be able to capture the contaminants without breakthrough.
That means the safety review cannot stop at the hood spec sheet. You need to match the exact chemical use to the exact filter media and replacement plan.
Practical rule: If the chemical list is uncertain, changing often, or broader than the filter approval, pause the purchase and review the application with EHS and the manufacturer.
Standards and compliance questions to ask
You don't need every buyer to become a ventilation engineer, but you do need a short compliance checklist.
Check the SDS: Confirm hazard class, volatility, and any ventilation requirements.
Review task conditions: Heating, splashing, agitation, and open transfers raise risk.
Ask about testing: Ductless hoods should have defined performance and filter management procedures.
Confirm training: Snorkels are simple to use, but correct positioning is not optional.
Document maintenance: Filter changes, alarms, and inspections need assigned ownership.
In practical terms, a snorkel is usually easier to misuse. A ductless hood is usually easier to overestimate. One fails when the source moves. The other fails when the filter choice is wrong.
Cost Analysis Installation Energy and Lifetime Value
The price on the quote is only the starting point. Facility managers usually need a lifecycle view that includes operation, maintenance, and likely changes in workflow.
Upfront cost is not the whole story
An exhaust snorkel is often attractive because it is simpler. It takes less space, creates less disruption at the bench, and is usually easier to add during a renovation. If your application fits a snorkel, that simplicity can keep the project moving and reduce planning friction.
A ductless hood often costs more upfront than a simple snorkel because you're buying an enclosed system with blower, controls, and filtration. Still, it can avoid the cost and disruption of adding full ducted exhaust infrastructure.
Operating cost can favor ductless over ducted systems
The strongest cost data available here compares ductless hoods to ducted hoods, not to snorkels. That comparison matters because many teams evaluating a ductless hood are really deciding whether they can avoid installing a ducted hood.
According to AirClean Systems, ductless fume hoods can be up to 18 times more energy-efficient than ducted systems. Their example shows a 6-foot ductless hood operating at about $3,109 annually, including electricity and filters, while a comparable ducted hood's energy and HVAC costs exceed $12,786 annually. That is an annual savings of over 75% in that example.
Where snorkels fit in the ROI discussion
A snorkel can be a cost-effective answer when the work does not require a hood at all. That is the important condition. If the task is low hazard and tightly localized, a snorkel may deliver the needed control with less installation burden and less disruption to the lab layout.
If the task really needs enclosure, though, a lower-priced snorkel is not a savings. It is a mismatch.
The cheapest system to buy can become the most expensive system to justify if EHS later requires replacement.
A practical way to compare lifetime value
Use a simple review framework with your team:
Application fit: Is the system safe for the actual chemicals and task?
Infrastructure impact: Will installation delay the project or require room changes?
Maintenance burden: Who owns inspections, filter tracking, and replacement?
Energy profile: Is the alternative a ducted hood with higher HVAC demand?
Workflow stability: Will this task stay the same, or will chemical use expand?
For procurement teams, this is usually the strongest business case. Buy the least complex system that still fully fits the hazard and the process. That keeps capital cost, operating cost, and future rework in balance.
Practical Application Scenarios
The easiest way to choose is to look at real tasks. Here are common situations where one option clearly fits better than the other.
Scenario 1 low-hazard bench soldering
A technician solders small components at a fixed station for part of the day. The fumes rise from a very small point, and the worker needs open hand access.
An exhaust snorkel is usually the better fit. The source is localized, and the open bench matters more than enclosure.
Scenario 2 solvent work with approved chemicals
A lab handles low-volume solvent tasks that fall within a verified filter list. The process benefits from a controlled work chamber and a more defined operator position.
A ductless fume hood is usually the better fit. The enclosure improves containment, and the filter system can be managed as part of routine maintenance.
Scenario 3 equipment that throws off heat or nuisance vapor
Some stations do not present a major chemical hazard but still need extraction. Small process equipment, hot plates in light-duty use, or odor-generating steps often fall into this category.
An exhaust snorkel is often enough, provided the emission point is stable and staff can keep the arm close.
Scenario 4 multi-user teaching or training lab
In teaching spaces, operator consistency is often the weak point. People rotate through the room, and work habits vary.
A ductless fume hood often makes more sense than a snorkel when the approved chemicals fit the filter system. The enclosure reduces dependence on perfect positioning.
Scenario 5 acid or unknown chemical work
If the process involves corrosive fumes, unknown combinations, or chemicals outside the approved filter range, this comparison changes. At that point, you may need a different class of ventilation solution entirely.
Neither a simple snorkel nor a standard ductless hood should be chosen without a formal review.
Scenario 6 retrofit projects with tight space
Renovation projects often have limited room for new infrastructure. Bench space is tight. Schedule pressure is real. Procurement wants a faster answer.
A targeted evaluation helps in this scenario. An exhaust snorkel can be easier to integrate for low-hazard capture, while a ductless hood can support approved chemical tasks without full building exhaust work. Teams planning healthcare or clinical spaces often look at broader medical lab exhaust systems at the same time so the ventilation plan stays coordinated.
Scenario 7 changing workflows
Some labs start with one task and expand later. That should affect the purchase now, not after installation.
If the work will stay narrow: A snorkel may remain the right long-term tool.
If chemical use may expand: A ductless hood may offer a safer path, but only if future chemicals remain within approved filtration.
If the process is still undefined: Slow down and complete the hazard review before buying.
Buying too early without a stable process definition is one of the most common reasons labs replace ventilation equipment sooner than expected.
How to Choose A 5 Step Decision Checklist
A good ventilation decision is usually straightforward once the right people answer the right questions. Use this checklist before requesting final pricing or layout approval.
Step 1 review every chemical and byproduct
Start with the SDS and your actual process notes. Don't just list the main reagent. Include vapors, heated byproducts, dusts, and cleaning agents.
If the contaminants are unknown or change often, that is a warning sign.
Step 2 define the task, not just the material
Two labs can use the same solvent and need different equipment. Why? Because the task changes the risk.
Open, fixed-point work: Often points toward a snorkel.
Transfers, mixing, or splash-prone work: Often points toward a hood.
Hands-on, multi-step manipulation: Usually benefits from enclosure.
Step 3 check room and utility conditions
Look at the bench layout, traffic, supply diffusers, doors, and electrical service. A system that fits on paper can still perform poorly if room airflow disrupts capture or if the work area is too crowded.
If you're comparing broad options, reviewing available laboratory fume hoods alongside your room plan can help narrow the shortlist.
Step 4 assign maintenance ownership
This step gets skipped too often. Decide who will inspect the unit, document performance, and replace filters when required.
If no one owns maintenance, the selection is incomplete.
Step 5 plan for the next use, not just today's use
Ask one simple question. Will this workstation be doing the same job a year from now?
If the answer is no, build that into the selection now. It is far easier to plan for moderate change than to retrofit after procurement, commissioning, and training are done.
Frequently Asked Questions
Can an exhaust snorkel replace a ductless fume hood
Sometimes, but only for the right low-hazard task. A snorkel can work well for localized fumes, odors, or heat. It does not provide enclosure or a physical barrier.
Is a ductless fume hood safer than a snorkel
For approved applications that match the filter system, a ductless hood usually provides stronger containment because the work takes place inside an enclosure. The trade-off is that chemical compatibility must be verified.
How close does a snorkel need to be
Very close. Snorkels are proximity-dependent, so they need to sit within inches of the source to stay effective.
How often do ductless filters need to be replaced
Filter replacement depends on the application, but available guidance states every 6 to 12 months for ductless fume hoods in typical use ranges covered earlier in this article.
Are ductless hoods cheaper to run than ducted hoods
In the cited AirClean Systems example, yes. The ductless system had much lower annual operating cost than a comparable ducted setup because recirculation reduced HVAC demand.
Which option is easier to install in an existing lab
That depends on the room, but snorkels are often simpler for low-hazard source capture because they take less space and can be easier to integrate into an existing bench area. Ductless hoods can also simplify renovation compared with full ducted exhaust.
What should procurement ask vendors before buying
Ask for:
Chemical suitability documentation
Airflow and performance data
Filter replacement requirements
Installation needs
Service responsibilities
Expected lead times
When should EHS be involved
At the start. EHS should review the chemical list, process conditions, operator use pattern, and maintenance plan before the order is placed.
Plan Your Lab's Ventilation with Confidence
The right answer in an exhaust snorkel vs ductless fume hood decision comes down to application fit. Snorkels are practical for targeted, low-hazard source capture. Ductless hoods are practical when you need enclosure and the chemicals are approved for the filter system.
If you're still weighing safety, cost, and layout impact, it helps to review the decision before equipment lead times affect your schedule. One option some teams compare during planning is the product range available through Labs USA for snorkels and fume hoods, along with layout support.
Compare options that match your workflow, hazard level, and room conditions.
Request a quote, plan a layout, or call 801-855-8560 to discuss your lab ventilation project. You can also Contact Us or email Sales@Labs-USA.com.
Related Resources
Chemistry Fume Hoods — Full-size ducted hoods when exhaust snorkels or ductless hoods aren’t enough
Lab Casework — Lab casework to complement your ventilation setup