
What Is a Fume Hood and How Does It Work?
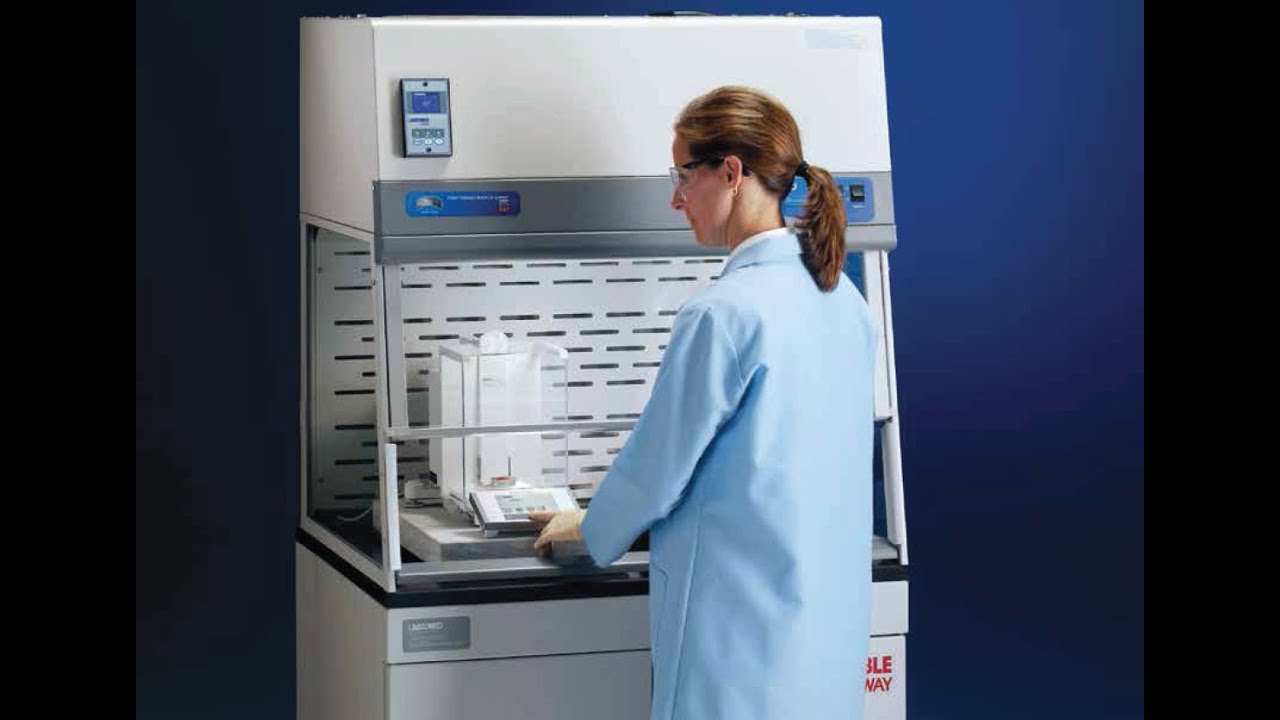
If you have ever stepped into a laboratory, you have likely seen a fume hood. It is a large, boxy enclosure with a sliding glass window. A fume hood is a critical piece of safety equipment in any lab. Think of it as a specialized exhaust system designed to create a safe work area for handling hazardous materials.
A fume hood serves as the primary defense against inhaling dangerous fumes, vapors, and dust. By pulling contaminated air away from the user and safely venting it, it prevents harmful substances from escaping into the lab environment.
Fume Hoods Explained
- What It Is: A fume hood is a ventilated enclosure that protects lab workers from hazardous fumes, vapors, and dust.
- How It Works: It pulls contaminated air from the work area and either vents it outside (ducted) or cleans it with filters (ductless).
- Why It’s Important: It prevents inhalation of toxic substances, contains spills, and shields users from minor chemical reactions.
- Key Types: The main options are ducted hoods, which vent air outdoors, and ductless hoods, which filter and recirculate air.
- Core Safety Rule: Always work with the sash at the lowest practical height to ensure maximum protection and proper airflow.
What Is the Purpose of a Fume Hood?

A laboratory fume hood is an engineering control built to contain and remove airborne contaminants. Its main function is to protect the user from breathing in toxic materials. It also helps keep those substances from spreading into the general lab environment. A fume hood is a key part of a comprehensive safety plan for any laboratory and fits into the broader safety supplies needed for a secure workplace.
The effectiveness of a fume hood lies in its ability to maintain a constant, inward flow of air. This airflow captures any hazardous fumes generated on the work surface and pulls them away from the user’s breathing zone. From there, the contaminated air is either vented safely outside the building or filtered and recirculated.
Core Functions and Benefits
The main goal of a fume hood is to minimize chemical exposure. A properly functioning hood achieves this through several key actions:
- User Protection: It creates a physical barrier between the lab worker and chemical fumes, vapors, or dust.
- Spill Containment: The enclosed design and dished work surface help contain minor spills, keeping them from spreading across the lab bench.
- Explosion Protection: The glass window, called the sash, is often made of safety glass and can shield users from splashes or minor reactions.
- Environmental Control: By capturing contaminants at the source, it prevents harmful substances from entering the shared lab air.
How a Fume Hood Creates a Zone of Safety

A fume hood is an engineered system where every component has a specific job. While designs vary, most models share essential parts that work together to create a safe environment.
The Key Parts That Make It Work
- Hood Body: The main structure that encloses the work area.
- Sash: A movable window, usually vertical or horizontal, that acts as a physical barrier.
- Baffles: Panels at the back of the hood that create smooth, even airflow and eliminate dead spots where fumes could collect.
- Airfoil: An angled piece at the front edge that helps air flow smoothly into the hood with minimal turbulence.
- Exhaust Duct and Blower: The system that pulls air out of the hood and vents it away from the lab.
These parts work together to achieve a specific face velocity, which is the speed of air moving into the hood opening. This steady draft, typically maintained between 80 and 120 feet per minute, is what draws contaminants into the hood and safely into the exhaust duct. The position of the sash directly affects face velocity, which is why proper use is critical for fume hood safety.
The Main Types of Fume Hoods

Laboratory work varies, and so do fume hoods. Selecting the right type is essential for safety and compliance. The first major decision is choosing between a ducted or ductless model.
Ducted Fume Hoods
A ducted fume hood is connected to a building’s HVAC system and vents contaminated air directly outside. These units are the standard solution for labs that handle a wide or unpredictable variety of chemicals. They can safely remove almost any airborne contaminant generated within them. A common example is the bench top fume hood.
Ductless Fume Hoods
A ductless fume hood is a self-contained air purification system. Also known as recirculating hoods, these units draw contaminated air through carbon and HEPA filters. The filtered, clean air is then returned to the lab. They are useful when installing ductwork is not feasible. They are also a good fit for work involving a known, specific set of chemicals that the filters can effectively capture.
Comparison of Ducted vs. Ductless Fume Hoods
| Feature | Ducted Fume Hood | Ductless (Recirculating) Fume Hood |
|---|---|---|
| Airflow Path | Vents contaminated air outside the building | Filters air and returns it to the room |
| Chemical Use | Suitable for a broad, unknown range of chemicals | Best for a known, specific set of chemicals |
| Installation | Requires ductwork, more complex installation | Simpler installation, no ductwork needed |
| Mobility | Fixed in place once installed | Often mobile and can be moved easily |
| Operating Costs | Higher energy costs (HVAC); lower filter costs | Lower energy costs; requires regular filter replacement |
| Best For | Heavy chemical use, research, diverse applications | Light-duty work, labs with no duct access, teaching labs |
Ducted hoods offer the broadest protection. In contrast, ductless hoods provide flexibility and are ideal for targeted applications where mobility and easy installation are priorities.
Specialized Fume Hoods
Beyond the two main categories, specialized hoods exist for specific tasks.
- Walk-In Fume Hoods: Large, floor-mounted units for bulky equipment.
- Powder Containment Hoods: Designed with low airflow to avoid disturbing fine powders.
- Canopy Hoods: Hang over an area to capture non-hazardous fumes like steam or heat.
How to Choose the Right Fume Hood
Selecting the right fume hood requires a careful analysis of your lab’s specific needs. A poor choice can compromise safety and lead to unnecessary costs. This checklist will guide you through the process of selecting from various chemical fume hoods.
A 5-Step Checklist for Selecting a Fume Hood
- Assess Your Chemical Use:
- List all chemicals you will use inside the hood.
- Note their toxicity, volatility, and quantity.
- For a wide, changing range of chemicals, a ducted hood is usually necessary. For a small, consistent list of low-toxicity chemicals, a ductless hood might be an option.
- Evaluate Your Facility and Infrastructure:
- Can your building accommodate new ductwork?
- Is your HVAC system capable of handling the air volume a ducted hood will exhaust?
- If ducting is not possible or is too expensive, a ductless hood is the logical alternative.
- Determine the Required Size and Type:
- What size of equipment needs to fit inside the hood?
- Will procedures require a standard benchtop model, a large walk-in hood, or another specialized type?
- Consider both current and future needs to avoid selecting a hood that is too small.
- Consider Long-Term Operating Costs:
- Ducted hoods have higher energy costs due to the constant exhausting of conditioned air.
- Ductless hoods have ongoing filter replacement costs.
- Calculate the total cost of ownership for both options over a 5 to 10-year period.
- Review Safety and Compliance Standards:
- Check with your organization’s Environmental Health and Safety (EHS) department.
- Ensure the selected hood meets all relevant standards, such as ASHRAE 110.
- Confirm the chosen model provides adequate protection for the specific hazards present in your lab.
5 Use-Case Scenarios for Fume Hood Selection
- University Chemistry Lab: A teaching lab uses small amounts of various common solvents. A ductless fume hood is a good choice because it offers flexibility, is easy to install in older buildings, and can handle the specific, known chemicals used in a curriculum.
- Pharmaceutical Research Lab: This lab synthesizes new, unknown compounds with high toxicity. A ducted, high-performance fume hood is essential to provide the highest level of protection against unpredictable hazards.
- Industrial Quality Control Lab: Technicians perform repetitive acid digestion procedures. A ducted hood with an acid-resistant liner (like PVC or polypropylene) is necessary to withstand the corrosive environment.
- Mobile Environmental Testing Unit: A lab in a trailer needs to analyze air samples on-site. A portable, ductless fume hood is the only practical option, providing necessary containment without requiring permanent infrastructure.
- Histology Lab: Technicians work with formalin and xylene. A ducted hood is the safest choice to continuously remove these hazardous fumes from the workspace. A flexible exhaust snorkel could also be used for smaller, targeted tasks.
Best Practices for Fume Hood Safety
A fume hood is only as safe as the person using it. Following proper procedures is essential for the hood to work as designed. Adhering to a few key rules can prevent accidents and protect the team from chemical exposure.
First, always keep the sash at the lowest possible working height. A mark from the manufacturer usually indicates this level. This simple step maximizes the hood’s containment ability and provides a physical shield.
Second, consider airflow when setting up equipment. Do not crowd items inside the hood. Large objects should be placed on blocks at least six inches away from the back baffle to allow air to move freely. Never use the hood for chemical storage, as this obstructs airflow and introduces unnecessary hazards.
Conclusion
A fume hood is more than just a piece of lab equipment. It is the most important engineering control for protecting your team from airborne chemical hazards. Understanding what a fume hood is, how it works, and the different types available is the first step toward creating a safer workspace.
Its effectiveness depends on choosing the right model for your applications, using it correctly, and following a consistent maintenance schedule. By following established safety standards, you ensure this vital equipment provides the protection your team relies on.
Ready to improve your lab’s safety and efficiency? Compare our complete range of fume hood options. If you need assistance, our specialists are here to help you plan the perfect lab layout.
Frequently Asked Questions (FAQs)
Here are answers to some of the most common questions we receive about fume hoods.
1. What is the difference between a fume hood and a biosafety cabinet?
A fume hood protects the user from chemical fumes. A biosafety cabinet protects the user, the environment, and the sample from biological contaminants. Fume hoods vent air out, while biosafety cabinets use HEPA filters to clean the air and often recirculate it in a specific pattern to create a sterile work area.
2. What is face velocity and why is it important?
Face velocity is the speed at which air is pulled into the opening of the fume hood. It is important because it creates the air barrier that contains fumes. If the velocity is too low, contaminants can escape. If it is too high, it can create turbulence that also allows fumes to escape.
3. How often should a fume hood be certified?
Fume hoods should be tested and certified at least once a year. Certification should also occur after installation, relocation, or major repairs. This testing, often following the ASHRAE 110 standard, confirms the hood is providing adequate protection. Always consult local regulations and your EHS department.
4. Can I use a standard fume hood for handling fine powders?
It is generally not recommended. Standard fume hoods create airflow that can disturb fine powders, making them airborne. A specialized powder containment hood, or balance enclosure, is designed with gentle airflow to keep powders contained on the work surface.
5. Why should I not store chemicals in a fume hood?
Storing chemicals, especially in large quantities, inside a fume hood disrupts proper airflow. This can create dead spots where fumes are not captured effectively. It also increases the risk of spills and reactions and clutters the workspace. Chemicals should be stored in appropriate safety cabinets.
6. What maintenance does a fume hood require?
Regular maintenance includes daily visual checks, cleaning spills immediately, and ensuring the sash moves smoothly. Annual certification by a qualified technician is also required to test airflow and check mechanical parts. For ductless hoods, a strict filter monitoring and replacement schedule is critical.
7. What does VAV mean in a fume hood?
VAV stands for Variable Air Volume. A VAV fume hood system automatically adjusts the amount of air it exhausts to maintain a constant face velocity as the sash is raised or lowered. This makes it more energy-efficient than a Constant Air Volume (CAV) system, which exhausts the same amount of air regardless of sash position.
Related Resources
Explore more solutions and guides that complement this topic:
Ready to Get Started?
Labs USA helps laboratories create better working environments through expert design, quality furniture, and the fastest delivery in the industry. Our team provides free lab design services, professional installation, and ongoing support for every project.
Get a free quote today:
- Call: 801-855-8560
- Email: Sales@Labs-USA.com
- Online: Request a Free Quote
Whether you’re planning a new lab, renovating an existing facility, or just need to replace a few pieces of furniture, we’re here to help you find the right solution — fast.
Related Resources
Need Help? Get a Free Quote
Labs USA can help you find the right solution. Call (800) 236-5657 or email sales@labs-usa.com to speak with a product specialist. We provide free quotes, layout assistance, and expert recommendations.


 cleanroom.” />

