Lab Fume Extraction Arm: A Guide to Source Capture Safety

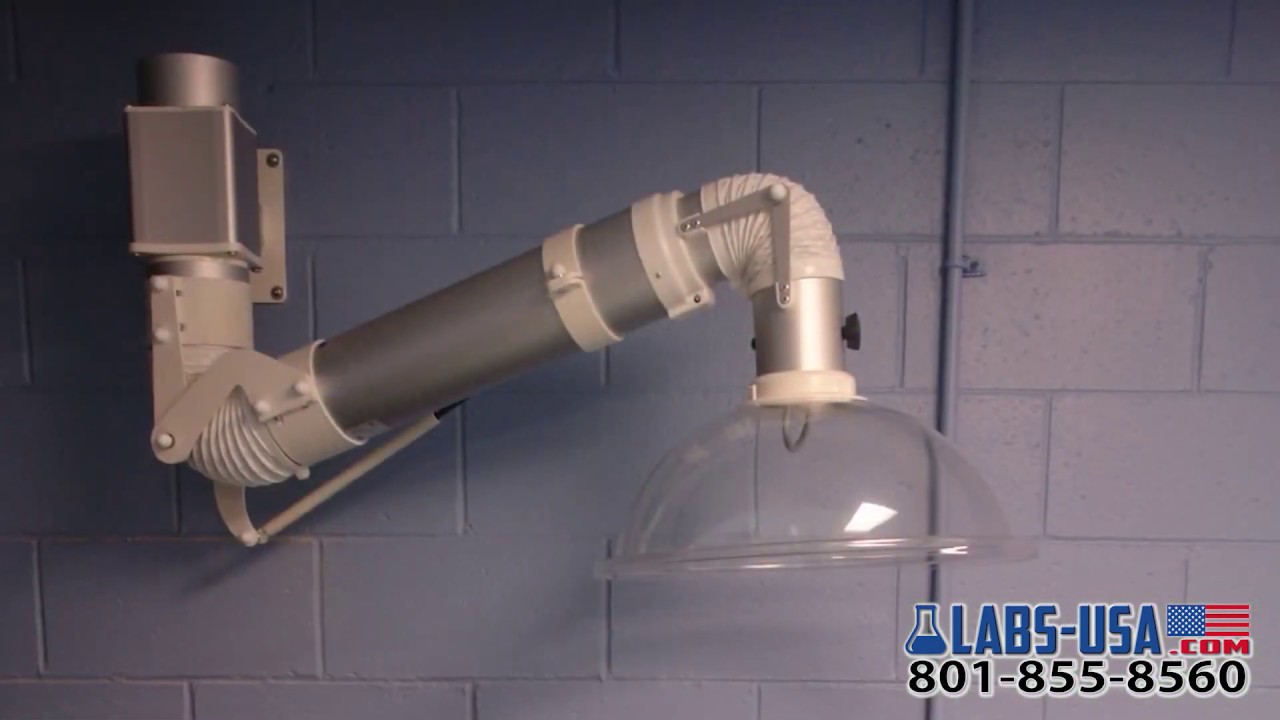
A lab fume extraction arm, also known as an exhaust snorkel, is a vital tool for laboratory safety. It is an articulated arm that works like a focused vacuum cleaner, positioned directly over a workspace. This method, called source capture, is designed to remove hazardous fumes, chemical vapors, and dust right where they are created. This prevents them from entering your breathing zone or spreading throughout the laboratory.

This direct approach is more effective than relying on general room ventilation to dilute airborne contaminants. A lab fume extraction arm actively removes hazards from the air, ensuring a safer work environment for all personnel.

Your Quick Guide to Fume Extraction Arms

  • What are they? Articulating arms that capture harmful fumes, dust, and vapors directly at the source before they can spread.
  • Why are they important? They significantly improve lab safety, protect personnel from inhaling hazardous substances, and help maintain air quality.
  • What are the main types?
    1. Original: For general purposes like solvents and light dust. Made of anodized aluminum.
    2. ESD (Electrostatic Discharge): For electronics labs to prevent static damage.
    3. Chemical Resistant: For corrosive chemicals like strong acids. Made of polypropylene.
  • How to choose? Match the arm’s material to the specific contaminants you work with. Consider reach, mounting style, and airflow needs.

Why Your Lab Needs a Fume Extraction Arm

A lab fume extraction arm is a key piece of safety equipment. It moves beyond simply diluting airborne hazards and actively removes them from your workspace. While a general HVAC system circulates air, an articulating fume arm pulls contaminants out of the equation completely. This is critical for protecting your team and preventing cross contamination of sensitive samples.

By capturing fumes the moment they are created, these systems are essential for meeting workplace safety standards like those from OSHA. The goal is to create a cleaner, safer, and more controlled environment. Targeted extraction is a powerful tool for achieving this.

The practical benefits of adding an exhaust snorkel are clear:

  • Enhanced Personnel Safety: Drastically reduces the inhalation of harmful substances.
  • Improved Air Quality: Keeps the entire laboratory environment cleaner.
  • Sample Integrity: Stops airborne particles from compromising experiments.
  • Regulatory Compliance: Helps satisfy health and safety requirements.

Comparing the Three Types of Fume Extraction Arms

Not all laboratory work is the same, and neither are fume extraction arms. Using a one size fits all approach does not work when dealing with different chemicals, dusts, and sensitive equipment. Choosing the right laboratory exhaust snorkel means matching the tool to the task. Each type is built from specific materials to handle distinct hazards safely.

Three white lab fume extraction arms of different types are compared on a wooden workbench.

To make your choice easier, we will break down the three main models available. Think of this as your guide for identifying which articulating fume extraction arm is the perfect fit for your work.

Fume Extraction Arm Model Comparison

Here is a side by side look at the key features of the Original, ESD, and Chemical Resistant fume extraction arms. This table should help you select the ideal model for your laboratory’s needs.

Feature Original Exhaust Snorkel ESD Exhaust Snorkel Chemical Resistant Exhaust Snorkel
Primary Material Anodized Aluminum Anodized Aluminum Polypropylene
Key Feature General purpose, cost effective Conductive for static safety High resistance to corrosives
Common Uses Solvents, dust, light fumes Soldering, electronics assembly Strong acids, aggressive vapors
Best For Labs Education, general chemistry Cleanrooms, electronics repair Pharmaceutical, R&D, chemical

As you can see, the core differences are clear. For common applications like venting solvent vapors or light dust, the anodized aluminum construction of the Original Exhaust Snorkel is a reliable and budget friendly choice. It works well for many general chemistry and educational labs.

However, when your protocols involve aggressive chemicals like strong acids, you need polypropylene. The Chemical Resistant Exhaust Snorkel is built to handle these harsh conditions without breaking down. For any environment where a static spark could destroy expensive components, the ESD Exhaust Snorkel is essential. It provides a critical layer of conductive protection.

Our Lab Fume Extraction Arm Products

Ready to find the right fume extraction arm for your lab? We offer three distinct models to meet specific safety and application needs. Each one is built for performance and durability. Find your perfect match below.

Original Exhaust Snorkel

The dependable workhorse for general lab use. Made from anodized aluminum, it’s perfect for capturing solvents, light dust, and common chemical fumes in educational and industrial settings.

Buy Original Exhaust Snorkel Now

ESD Exhaust Snorkel

Essential for electronics labs and cleanrooms. This arm is constructed with materials that safely dissipate static buildup, protecting sensitive components from electrostatic discharge while capturing soldering fumes.

Buy ESD Exhaust Snorkel Now

Chemical Resistant Exhaust Snorkel

Engineered for the toughest jobs. Made from durable polypropylene, this arm withstands highly corrosive acids and aggressive vapors, making it the only safe choice for pharmaceutical and advanced chemical research labs.

Buy Chemical Resistant Exhaust Snorkel Now

How to Choose the Right Fume Extraction Arm

Picking the perfect lab fume extraction arm does not have to be complicated. When you have a clear plan, the process is straightforward. Making the right choice from the start ensures your equipment performs safely and meets the demands of your specific tasks. We have put together a simple five step checklist to guide you.

5-Step Checklist for Selecting Your Fume Arm

  1. Identify Your Contaminants: First, list every chemical, vapor, or dust particle you need to capture. This is the most important step. Always consult your Safety Data Sheets (SDS) to understand the hazards and check for material compatibility.
  2. Determine Reach and Mounting: Measure your workspace. You need to know the length and articulation required to cover all work areas without being an obstacle. This is also when you will decide if a bench, ceiling, or wall mounted model makes the most sense for your lab’s layout.
  3. Verify Material Compatibility: Refer to your contaminant list from Step 1. This list dictates the arm material you need. For general solvents, an aluminum Original Exhaust Snorkel is a solid choice. For strong acids, you will need a polypropylene Chemical Resistant Exhaust Snorkel. For delicate electronics, an ESD Exhaust Snorkel is necessary to prevent static discharge.
  4. Confirm Airflow Requirements: Ensure the arm’s diameter and your building’s ventilation system can generate the necessary capture velocity. This is the air speed at the source needed to pull contaminants into the arm. Check your system’s CFM (cubic feet per minute) capacity to confirm it is adequate.
  5. Review Hood and Accessory Options: The final step is choosing a hood style that fits your application. Different jobs call for different capture patterns, with options like dome, flat, or slotted hoods. Also consider extras like dampers for airflow control or integrated lighting.

Use Cases: Which Fume Arm Fits Your Lab?

To see how this works in the real world, let’s walk through a few common lab environments and see which benchtop extraction arm for sale makes the most sense. These examples should help you visualize what your own space requires.

Scenario 1: University Chemistry Lab

A typical university chemistry lab involves students working with mild solvents and general chemical reagents. The main task is to pull common fumes away from their workspace during routine experiments. For this setting, the Original Exhaust Snorkel is the go to choice. Its aluminum body is durable enough for daily use and cost effective for outfitting multiple workstations.

Scenario 2: Electronics Assembly and Soldering Station

In a cleanroom or on an electronics repair bench, the biggest invisible threat is electrostatic discharge. A small spark can destroy sensitive microchips. The ESD Exhaust Snorkel is non negotiable here. It is built to dissipate static electricity safely, protecting valuable components while removing harmful soldering fumes.

Scenario 3: Pharmaceutical R&D Lab

Labs in the pharmaceutical or high purity chemical sectors often handle aggressive and corrosive substances like strong acids. The Chemical Resistant Exhaust Snorkel is essential for these environments. It is made of polypropylene, a material designed to withstand harsh chemical exposure without breaking down. This is the safest option for personnel working with potent, hazardous materials.

Scenario 4: Art Restoration Studio

An art restoration studio may use various solvents to clean paintings or artifacts. These solvents can release volatile organic compounds (VOCs). The Original Exhaust Snorkel is ideal here. It can be precisely positioned over the work area to capture vapors at the source, protecting the conservator’s health without obstructing their detailed work.

Scenario 5: Dental Lab

Dental laboratories handle materials that create fine dusts and chemical fumes from acrylics and bonding agents. A Chemical Resistant Exhaust Snorkel is often the best choice due to the variety of chemicals used. It effectively removes these airborne particles, ensuring a clean and safe environment for technicians.

Frequently Asked Questions (FAQs)

Lab managers and safety officers often ask us questions when choosing a fume arm supplier. Here are answers to the most common inquiries.

What is the difference between a fume arm and a fume hood?

A fume hood is a large, enclosed cabinet that creates a fully ventilated workspace for hazardous materials. A fume arm is a smaller, flexible device for source capture. It gets right to the point of generation, like a beaker or soldering station, and pulls contaminants away before they escape. This makes it ideal for smaller tasks where a full hood is not practical.

How far can a fume extraction arm reach?

Most articulating arms have a reach between 3 and 10 feet. The key is to match the arm to your workspace. Before you buy, measure the area you need to cover on your workbench to ensure the arm you choose can be positioned correctly.

Why is capture velocity important?

Capture velocity is the minimum air speed needed at the arm’s opening to grab fumes and pull them into the system. If the velocity is too low, contaminants can escape into the lab. Correct capture velocity is critical for safety and air quality.

Can I connect a fume arm to my existing ventilation system?

Yes, in most cases. A benchtop extraction arm can often be tied into an existing HVAC or dedicated exhaust system. However, you must consult a ventilation specialist first. They need to confirm your system can handle the extra airflow demand without affecting other vented equipment.

How often should I inspect my fume extraction arm?

Regular inspections are crucial for performance and safety. We recommend monthly checks of the joints, hoses, and airflow. A quick visual inspection before each use is also a good practice. Always follow the manufacturer’s maintenance guidelines and your facility’s safety protocols.

What are the mounting options for these arms?

Fume extraction arms are versatile and can be mounted in several ways. Common options include bench mounting, wall mounting, and ceiling mounting. The best option depends on your lab’s layout, the location of the work, and the need to keep the bench clear.

Are replacement parts available?

Yes, replacement parts such as hoods, hoses, and joints are available. Using genuine replacement parts ensures your system continues to operate safely and effectively. Contact your fume arm supplier for information on ordering the correct parts for your model.

Get the Right Fume Extraction Arm for Your Lab

Choosing the correct lab fume extraction arm is a critical step in creating a safe and efficient laboratory. By identifying the specific contaminants in your workspace and matching them with the right material, whether it is anodized aluminum, ESD safe aluminum, or chemical resistant polypropylene, you ensure optimal protection for your team.

At Labs-USA, we are experts in laboratory equipment and are committed to helping you find the perfect solution. We offer competitive pricing, the fastest shipping in the industry, and free layout designs with no obligation.

Ready to improve your lab’s air quality and safety?

Compare Our Fume Extraction Arms

Request a Free Quote Today or call us at (801) 855-8560 for expert advice.

A Practical Guide to Fume Hoods for Industrial Labs

Fume hoods for industrial labs are key pieces of safety equipment. They are designed to capture and remove hazardous vapors, dust, and fumes from your workspace. A fume hood protects your team from chemical exposure by pulling contaminated air away from them and venting it safely outside.

TL;DR: Key Takeaways

  • Primary Function: A fume hood is an engineering control that protects users from inhaling hazardous substances.
  • Ducted vs. Ductless: Ducted hoods vent air outside and handle a wide range of chemicals. Ductless hoods filter and recirculate air, suitable for specific, known chemicals.
  • Specialized Types: Different tasks require different hoods, such as walk-in hoods for large equipment or powder hoods for weighing fine particles.
  • Safety Standards: Always choose hoods that meet ASHRAE 110 for performance and SEFA standards for durability.
  • Placement is Critical: Install hoods away from doors, high-traffic areas, and HVAC vents to prevent drafts that can compromise safety.
  • Maintenance is Mandatory: Regular cleaning, inspections, and annual professional certification are required to ensure proper function.

Why Fume Hoods Are Critical in Industrial Labs

A man wearing safety gear stands next to a large lab fume hood with a 'LAB AIR SAFETY' sign.

In settings like pharmaceutical manufacturing or chemical processing, a fume hood is a required part of your safety system. Choosing the right one is a direct investment in your team's safety, regulatory compliance, and the quality of your work.

With a growing focus on workplace safety, the demand for these systems has increased. The global market for fume hoods is expected to reach $1.72 billion by 2032. The industrial sector makes up over 42% of that demand. This growth shows that labs see high-performance fume hoods as essential. You can learn more about these market trends to see where the industry is headed.

Understanding the Core Components

To understand how a fume hood works, it helps to know its main parts. Each piece has a specific job in containing and exhausting hazardous materials.

Key components include:

  • The Sash: This is the movable glass window at the front. It acts as a physical shield to protect the user from splashes. Lowering the sash also increases the speed of the air flowing into the hood, which improves fume containment.
  • The Baffle: This slotted panel is at the back of the hood. It helps create a smooth, even airflow. It removes dead spots by making sure air is pulled evenly from the top, middle, and bottom of the hood opening.
  • The Airfoil: This is the curved piece at the bottom front edge of the work surface. The airfoil helps lift the air smoothly into the hood. This stops turbulent air from forming that could let contaminants escape.

The Importance of Proper Airflow

A fume hood is only as good as its airflow. The air speed at the opening of the hood is called face velocity. This is the most important measure of performance. It must be fast enough to capture contaminants but not so fast that it creates turbulence inside the hood.

A properly working fume hood creates a protective zone that separates the user from the chemicals inside. Any disruption to the airflow can weaken this containment. This includes fast movements or placing large equipment near the opening.

The right fume hoods for industrial labs depend on the chemicals you use and the work being done. Understanding these basics is the first step toward making a smart choice. Given current lead times for manufacturing and installation, planning your lab needs in advance can help you avoid project delays.

Choosing Between Ducted and Ductless Fume Hoods

A clean industrial laboratory interior with beige cabinets, black countertops, and green ventilation ductwork.

When you select a fume hood, your first big decision is choosing a ducted or ductless system. This choice will affect your lab's setup, long-term costs, and daily flexibility. Each system has clear advantages and is built for different kinds of lab work.

A ducted fume hood connects to your building’s HVAC system. It pulls hazardous fumes out of the room and vents them outside. This makes it the best choice for labs that handle many different chemicals or high-volume reactions.

A ductless fume hood works more like an air purifier. It draws contaminated air through filters, such as activated carbon or HEPA. Then it recirculates the cleaned air back into the lab. This design offers great mobility and avoids costly ductwork installation.

Key Differences in Functionality

The biggest difference between the two is what they do with contaminated air. A ducted system removes it completely. A ductless system traps it in filters.

This single difference has a large impact on your work. Ducted hoods can handle almost any chemical. Ductless hoods are more specialized. They only work for specific chemicals that their filters can capture. This means you must perform a chemical safety review before you consider a ductless model.

To learn more about their capabilities, you can explore our ductless fume hood options and see their specifications.

Market Trends and Industrial Preferences

Market data shows clear preferences in industrial labs. Ducted units are the leaders, making up 62.45% of projected revenue for 2025. Their ability to handle a wide range of chemicals makes them a trusted solution.

However, ductless hoods are projected to grow at a faster rate, with a 6.65% compound annual growth rate through 2031. This growth comes from labs that need flexible, mobile, and cost-effective solutions. You can read more about fume hood market trends to see a full picture of these industry shifts.

Choosing the right system is not just about the initial price. It is about matching the equipment's abilities to your lab's chemical workflow and long-term safety strategy.

Ducted vs. Ductless Fume Hoods: A Comparison

To make an informed decision, it helps to compare these two systems side-by-side. The right choice depends on your lab's specific needs.

Feature Ducted Fume Hoods Ductless Fume Hoods
Installation Requires complex ductwork and connection to HVAC. No ductwork needed; plugs into an electrical outlet.
Chemical Use Suitable for a wide range of chemicals, including unknowns. Limited to specific, low-volume chemicals compatible with filters.
Mobility Fixed in place; a permanent installation. Mobile and can be relocated easily within the lab.
Upfront Cost High, due to equipment, ductwork, and installation. Lower, as it avoids complex infrastructure work.
Operating Cost High energy use due to exhausting conditioned air. Low energy use; requires periodic filter replacement.
Maintenance Requires inspection of ducts, fans, and mechanical systems. Requires regular monitoring and replacement of filters.

Ducted hoods offer strong protection for diverse work. Ductless hoods provide flexibility and cost-efficiency for more predictable applications.

Matching Fume Hood Types to Industrial Tasks

A row of modern laboratory fume hoods with blue cabinets and a polished floor in a lab.

After you decide between a ducted or ductless system, the next step is to look at specialized models. Not all lab work is the same. Using a general-purpose hood for a specialized task can be unsafe.

It is safer and more effective to use equipment designed for the job. Choosing the right hood aligns your safety gear with your daily workflow. This ensures proper containment for all your processes.

Common Specialized Fume Hoods

Different industrial processes need different containment strategies. For instance, a hood designed for liquid chemicals might fail to contain airborne particles. Understanding these differences is key to a safe lab.

Here are some common specialized fume hoods for industrial labs:

  • Benchtop Fume Hoods: These are common in most general chemistry labs. They sit on a standard lab bench and can handle a wide variety of routine experiments.

  • Walk-In Fume Hoods: When you work with large equipment or drum storage, you need a walk-in hood. These are large, floor-mounted enclosures that provide total containment for bulky items.

  • Powder Weighing Hoods: Handling fine powders requires special care to prevent inhalation. These hoods have unique airflow patterns that reduce turbulence, keeping small particles from getting into the air. You can explore the specs of a powder weighing fume hood.

5 Use Cases for Specialized Industrial Fume Hoods

Matching the right hood to the job is essential for safety and efficiency. Here are five common scenarios in industrial labs and the best fume hood for each.

  1. Scenario: Quality Control Testing

    • Task: A pharmaceutical lab performs routine analysis of liquid samples using solvents like methanol and acetonitrile.
    • Solution: A standard Benchtop Ducted Fume Hood is ideal. It safely vents a wide range of chemical vapors outside, ensuring operator safety during repetitive testing.
  2. Scenario: Pilot-Scale Chemical Reactions

    • Task: A chemical engineering team needs to run a small-scale reaction using a portable glass reactor on a wheeled cart.
    • Solution: A Walk-In Fume Hood provides the necessary space and containment. The team can roll the entire apparatus inside, ensuring any fumes from the reaction are captured.
  3. Scenario: Handling Potent Pharmaceutical Powders

    • Task: A technician must accurately weigh a few milligrams of a potent active pharmaceutical ingredient (API).
    • Solution: A Powder Weighing Hood (or Balance Enclosure) is required. Its specialized design creates gentle, laminar airflow that prevents fine powders from becoming airborne, protecting the technician from inhalation.
  4. Scenario: Acid Digestion of Metal Samples

    • Task: A metallurgy lab uses strong acids like nitric and perchloric acid at high temperatures to dissolve metal samples for analysis.
    • Solution: A Perchloric Acid Fume Hood is necessary. These hoods are built with corrosion-resistant materials and include a wash-down system to prevent the buildup of explosive perchlorate salts in the ductwork.
  5. Scenario: Flexible Workstations for Light-Duty Tasks

    • Task: An electronics lab needs a soldering station that can be moved as production lines change. The soldering process releases fumes from flux.
    • Solution: A Ductless Fume Hood with the appropriate filter is a great fit. It offers mobility, requires no ductwork, and effectively captures the specific contaminants from soldering, providing a flexible and safe workstation.

High-demand labs often need a mix of hood types. Planning ensures that every workspace has the right solution. Given current manufacturing and installation timelines, mapping out your needs early can prevent significant delays.

How to Select the Right Fume Hood in 5 Steps

Choosing the right fume hood for your industrial lab is an important decision. By breaking it down into a clear process, you can find the perfect system for your safety, compliance, and workflow needs.

This 5-step checklist will guide you through everything you need to consider.

Step 1: Analyze Your Chemical Inventory

First, review every chemical you plan to use inside the hood. This audit will guide almost every other decision, from the hood's material to whether you need a ducted or ductless system.

Make a detailed list of all chemicals, their concentrations, and usage amounts. Check the Safety Data Sheets (SDS) for each one to understand the hazards. This information tells you which liner material you need, such as epoxy resin or stainless steel.

Step 2: Evaluate Your Facility and Space

Next, assess your lab space. Measure the available footprint for the fume hood, making sure there is enough clearance on all sides to avoid disrupting airflow.

The hood's location is also important. Keep it away from high-traffic areas, doors, windows, and HVAC vents. Any of these can create cross-drafts that pull contaminants out of the hood. You also need to consider your building's HVAC system. A ducted fume hood removes large volumes of conditioned air, and your HVAC system must be able to replace it.

Step 3: Define Your Primary Lab Applications

What will you be doing in the hood? Your daily tasks will determine if a standard model is enough or if you need one of the more specialized fume hoods for industrial labs.

  • General Chemistry: For most routine work with liquids, a standard benchtop hood works well.
  • Large Equipment: If you need to roll equipment inside, you will need a walk-in fume hood.
  • Powder Handling: Weighing fine powders requires a powder containment hood with specialized airflow.
  • High-Heat Processes: Work involving hot plates may call for a hood with a heat-resistant liner.

Defining your applications upfront ensures you invest in equipment built for your workflow. You can learn more about our range of chemical fume hoods.

Step 4: Review Safety and Compliance Standards

Industrial labs must follow strict safety rules. Your fume hood selection must meet established standards to protect your team and pass inspections.

In the U.S., the key performance standard is ASHRAE 110. This is a rigorous test that proves a fume hood's ability to contain hazardous fumes. Only consider manufacturers who certify that their hoods pass ASHRAE 110 tests. Also, look for compliance with SEFA standards for construction quality.

A fume hood is a critical piece of safety equipment. Verifying its compliance with industry standards is a fundamental step.

Step 5: Consider Long-Term Operational Costs

Finally, look beyond the initial price and think about the total cost of ownership. This includes energy bills, maintenance, and future needs.

Ducted hoods can use a lot of energy. A variable air volume (VAV) system can lower these costs by adjusting airflow based on sash height. Ductless hoods have low energy costs but require regular filter replacements. Think about growth and whether your chemical use might change. Planning for the future can save you from a costly replacement later.

Best Practices for Fume Hood Installation and Maintenance

A technician installs or maintains equipment in an industrial laboratory while writing notes on paper.

A fume hood's performance depends on where you put it and how well you care for it. Proper installation and consistent maintenance are the foundation for long-term safety and reliability.

The process starts with picking the right spot. A fume hood's location has a large impact on its ability to contain contaminants. Placing it in a low-traffic area is critical to keep the airflow stable.

Strategic Installation for Optimal Airflow

The main goal during installation is to create calm, stable air around the hood. Even small drafts can break containment and pull vapors into your lab.

Keep these placement rules in mind:

  • Away from Doors: The rush of air from an opening door can cause turbulence.
  • Avoid High-Traffic Aisles: People walking past a hood can create cross-drafts.
  • Distance from HVAC Vents: Supply air vents should never blow directly at the fume hood.
  • Steer Clear of Windows: An open window is another source of unpredictable drafts.

For more information on safety, our guide to fume hood safety provides additional details.

Routine Maintenance and User Best Practices

Once your hood is installed, it needs regular attention. A simple maintenance schedule can stop small problems from becoming serious safety hazards. This means daily checks by users and annual professional certifications.

Regular maintenance is a proactive safety measure that ensures the equipment functions correctly every day.

For daily work, users must always follow safe practices. Work at least six inches inside the hood to ensure contaminants are captured. Keep the sash as low as possible to maximize face velocity. Do not clutter the inside of the hood, as this blocks airflow. For smaller tasks, an exhaust snorkel can provide targeted containment.

Here is a basic maintenance checklist:

  1. Daily Visual Inspection: Before each use, check the sash for damage and ensure the airflow monitor is working.
  2. Weekly Cleaning: Wipe down interior surfaces, the sash, and the airfoil to remove chemical residue.
  3. Monthly Baffle Check: Make sure the baffle slots are clear of any obstructions.
  4. Annual Certification: A qualified technician must test and certify the fume hood every year.

Proper installation and maintenance ensure your fume hoods for industrial labs provide solid protection for years. With current high demand, planning your equipment needs early helps secure installation timelines and avoids delays.

Frequently Asked Questions About Industrial Fume Hoods

Here are answers to common questions about choosing, installing, and maintaining fume hoods for industrial labs.

1. How do I know if I need a ducted or ductless fume hood?

The choice depends on your chemicals and work volume. A ducted hood is best if you work with a wide variety of chemicals, large volumes, or unknown substances, as it vents all fumes outside. A ductless hood works well if you handle a consistent, known set of chemicals in small amounts and need mobility. You must verify that its filters are compatible with your chemicals.

2. What is the ideal face velocity for a fume hood?

The ideal face velocity for most industrial labs is between 80 and 120 feet per minute (FPM). This speed is fast enough to contain vapors without creating turbulence. Your facility’s Environmental Health and Safety (EHS) officer will specify the exact rate required for your applications.

3. How often does my fume hood need to be certified?

Fume hoods must be professionally tested and certified at least once a year. This is a requirement by OSHA and other regulatory bodies to ensure the hood is functioning correctly and safely containing contaminants.

4. Can I use a fume hood for storing chemicals?

No. A fume hood should never be used as a chemical storage cabinet. Storing items inside disrupts the airflow, creating dead spots and turbulence that can cause hazardous fumes to escape into the lab. Only keep materials you are actively using inside the hood.

5. Why is fume hood placement so important?

Proper placement is critical for safety and performance. The hood should be located away from doorways, windows, high-traffic areas, and HVAC vents. These can create cross-drafts that disturb the air barrier at the face of the hood, allowing contaminants to escape.

6. What are the key market trends for fume hoods?

The global demand for fume hoods is growing. North America currently has the largest market share at 38.5% in 2024, driven by strong pharmaceutical and research sectors. However, the Asia Pacific region is expected to grow the fastest. You can read the full research about laboratory fume hood trends for more details.

7. What is the difference between CAV and VAV fume hoods?

CAV and VAV systems manage airflow differently. Constant Air Volume (CAV) hoods exhaust the same amount of air 24/7, making them simple but less energy-efficient. Variable Air Volume (VAV) hoods use sensors to adjust airflow based on sash height, saving significant energy and reducing operating costs.

A properly chosen fume hood is the cornerstone of a safe lab. If you have other questions, our team can help. Call us at 801-855-8560 or email Sales@Labs-USA.com.

Ready to find the right fume hood for your industrial lab?

Explore our complete range of fume hoods to compare models and specifications.
Compare Fume Hood Options

Need help with a new build or renovation? Contact us for a free quote and layout design.
Request a Quote or Plan Your Lab Layout

Guide to Fume Extraction Arms For Laboratory Safety

A fume extraction arm for laboratory use acts like a flexible, local vacuum for airborne contaminants. It is a key defense, capturing harmful particles at the source before they can spread. While a large fume hood is great for big areas, it is not always right for smaller, targeted tasks. A fume extraction arm offers a powerful way to keep your team safe in these situations.


Key Takeaways

  • What It Is: A fume extraction arm, or lab snorkel, is a flexible device that captures airborne contaminants like fumes, dust, and vapors directly at their source.
  • Why It’s Needed: It provides targeted “source capture” ventilation, which is more effective than general room ventilation for protecting lab personnel from inhaling hazardous substances.
  • Key Features: Look for the right arm length, airflow capacity (CFM), mounting option (wall, ceiling, or bench), and material construction to match your lab’s specific chemicals and workflow.
  • Best For: The Original Exhaust Snorkel is a reliable, all-around choice for general applications involving fumes and dust where aggressive chemicals or static discharge are not a concern.

Why Your Lab Needs a Fume Extraction Arm

Keeping the air clean in a laboratory is a must for safety. Everyday procedures, from weighing fine powders to working with solvents, can release harmful materials into the air. If not managed properly, these contaminants can pose serious health risks to workers.

This is where the idea of source capture is important. Instead of cleaning the air in a room after it is contaminated, source capture removes the hazard at the point it is created. It is a more effective way to protect your team. The perfect tool for this job is a fume extraction arm for laboratory use, often called a lab snorkel.

The Limits of General Ventilation

A building’s general ventilation system is designed to exchange the air in a room a few times an hour. However, it is not built to handle concentrated plumes of fumes or dust. By the time a chemical vapor reaches a ceiling vent, it has already passed through a lab technician’s breathing zone. This is an unnecessary risk.

A scientist in a lab coat works at a bench with a fume extraction arm capturing vapors from a flask.

A targeted fume extraction arm changes the approach. It creates a small, powerful zone of negative pressure that pulls contaminants directly into the arm and away from the user. The hazardous particles are handled before they can spread into the lab environment.

Key Benefits of Using a Lab Snorkel Arm

Using a source capture strategy in your lab is not just for safety compliance. It has real benefits that create a safer and more productive workspace.

Below is a quick rundown of why a fume extraction arm for laboratory use is so important for modern labs.

Key Benefit Impact on Laboratory Operations
Enhanced Safety Directly protects workers from inhaling harmful substances, reducing health risks.
Improved Air Quality Lowers the overall concentration of hazardous particles in the lab’s air.
Increased Flexibility Arms can be moved and positioned exactly where needed for different tasks.
Energy Efficiency Using a targeted arm is more energy-efficient than ventilating an entire room at a high rate.

The advantages go beyond simple compliance. Targeted fume extraction is a key part of maintaining excellent overall laboratory indoor air quality. It is a proactive approach to health and safety.

Understanding the Parts of a Fume Extraction Arm

A wall-mounted white fume extraction arm extends over a clean lab bench.

A fume extraction arm might look complex, but it is built on a simple idea. Think of it as a flexible snorkel for your workspace. Its job is to get close to the source of contaminants and pull them away before they reach you.

To pick the right one, you need to know its parts. Every piece, from the hood to the mounting bracket, is designed to work together for effective operation.

The Capture Hood

The capture hood is the “mouth” of the system. It is the entry point for contaminated air. Its shape and size are critical for creating an effective capture zone.

For most general lab work, a multi-purpose transparent hood is a great choice. It lets you see your work clearly while pulling fumes away. The closer you can get the hood to your process, the better it works.

Articulating Joints and Tubes

These are the “arm” and “elbow” of the unit. They give the fume extractor its range of motion. High quality arms use smooth tubes and joints that allow for easy, one handed positioning. You can simply push, pull, and pivot the arm to the exact spot you need.

These parts are designed for both movement and stability. Once you position the arm, it needs to stay put without drifting. The Original Exhaust Snorkel is built with durable joints that hold their position reliably.

Mounting Options

The mounting bracket is the anchor for the whole system. It secures the fume extraction arm for laboratory use to a solid surface. A strong, secure mount is essential for safety and proper function.

  • Wall Mount: A wall mount exhaust snorkel is a great option for saving bench space. It is common in labs where workstations are lined up against a wall.
  • Ceiling Mount: When wall space is limited or your work area is in the middle of a room, a ceiling mount exhaust snorkel is the perfect solution. It hangs from above, offering maximum reach.
  • Bench Mount: An arm can be attached directly to the lab bench. This provides a sturdy, fixed point for extraction and is ideal for tasks performed in the same spot.

How to Choose the Right Fume Extraction Arm

A lab technician in a white coat and blue gloves checks a clipboard next to a fume extraction arm.

Picking the right fume extraction arm for laboratory work is an important decision. It directly affects the safety of your team and your budget. This checklist will walk you through a five step process to help you choose the perfect arm for your lab.

5-Step Checklist for Selecting a Lab Snorkel

  1. Assess Your Application: First, what are you trying to capture? Are you dealing with fine powders, solvent vapors, or general fumes? The contaminant determines the airflow and materials you need. For general applications without harsh chemicals, a model like the Original Exhaust Snorkel is an excellent choice.
  2. Measure Your Workspace: Figure out where the arm will be mounted. Will it be on the wall, ceiling, or benchtop? Measure the distance from the mount to the farthest point of your workspace. The arm’s reach must be long enough to cover that area.
  3. Determine Required Airflow (CFM): Airflow, measured in Cubic Feet per Minute (CFM), is about extraction power. More hazardous contaminants need a higher CFM to pull them away effectively. Check with your Environmental Health and Safety (EHS) department for the right CFM for your process.
  4. Verify Material Compatibility: Make sure the arm’s materials can handle the chemicals you use. Standard arms are perfect for general fumes and dust. If you work with corrosive acids, you will need an arm made from materials like polypropylene. Always check the arm’s specs against your lab’s Safety Data Sheets (SDS).
  5. Consider Ease of Use: The best safety equipment is the equipment people use. Look for models with smooth joints that are easy to position and stay put. You should be able to adjust it with one hand.

Comparing Fume Extraction Arm Models

Not every fume extraction arm for laboratory use is the same. Some jobs need special equipment. The table below compares our versatile Original Exhaust Snorkel with models built for more demanding lab environments.

Feature Original Exhaust Snorkel Chemical-Resistant Model Anti-Static (ESD) Model
Primary Use Case General fumes, dust, non-aggressive vapors Highly corrosive chemicals, acids, solvents Electronics soldering, sensitive powders
Tube Material Aluminum or similar durable metal Polypropylene (PP) or Stainless Steel Conductive materials to dissipate static
Joint Material Standard durable plastic or metal Chemical-resistant polymers ESD-safe components
Best For University labs, light industrial tasks Chemical research, wet chemistry labs Electronics assembly, pharmaceutical labs

The Original Exhaust Snorkel is a reliable and cost effective solution for many common laboratory tasks. It offers robust performance for general applications.

Ready to improve your lab’s safety and air quality?

Shop Now

Common Use Cases in Laboratory Settings

To understand how a fume extraction arm for laboratory work is used, it is helpful to look at a few common scenarios. Every lab is different, and the right arm depends on the specific jobs being done.

Scenario 1: University Teaching Labs

University chemistry labs are busy places with many students. Benches are crowded, and experiments produce a variety of fumes.

  • The Challenge: Space is limited. Wall mounted arms cannot always reach island benches, and bench mounted units add to the clutter.
  • The Solution: A ceiling mount exhaust snorkel is a great solution. It hangs from above, freeing up bench and wall space. One long arm can serve several students at a shared bench.
A scientist in a lab coat and safety glasses carefully works with petri dishes under a Nederman fume extraction arm.

Scenario 2: Electronics and Soldering Workstations

Soldering creates smoke filled with flux fumes, which are a respiratory irritant. This delicate work requires a clear view of small components.

  • The Challenge: Solder smoke rises fast and must be captured immediately. The arm must be easy to move and stay in place without drifting.
  • The Solution: A bench mounted fume extraction arm is an excellent choice for a soldering station. For labs with static sensitive components, an anti-static (ESD) model is needed to protect the electronics.

Scenario 3: Quality Control and Sample Weighing

In QC labs, technicians often weigh fine powders or handle dusty samples. These tasks demand precision. Airflow from an extraction arm cannot disturb an analytical balance.

  • The Challenge: Capture fine particles without disrupting the weighing process. The capture velocity needs to be strong enough to pull in dust but gentle enough to not create air currents.
  • The Solution: A small diameter fume extraction arm for laboratory benches, placed slightly above and behind the balance, works well. A dome shaped hood can create a gentle, broad airflow.

Scenario 4: Pharmaceutical Compounding

When pharmacists compound medications, they may work with powders that can become airborne. Protecting the pharmacist from inhaling these active ingredients is critical.

  • The Challenge: The work area is often small, and the process requires careful handling of materials. The extraction solution must be effective but not intrusive.
  • The Solution: A bench mounted arm with a transparent dome hood provides excellent source capture. It contains any airborne powder while allowing the pharmacist a clear view of their work.

Scenario 5: Art Restoration and Conservation

Conservators often use solvents and other chemicals to clean and restore artifacts. These chemicals can release harmful vapors.

  • The Challenge: The work is delicate and may be performed on large or unusually shaped objects. A fixed fume hood is not practical.
  • The Solution: A flexible fume extraction arm for laboratory use, often a ceiling mounted model, can be positioned precisely over the area being treated. This protects the conservator without touching the artifact.

Installation and Maintenance Best Practices

Alt Text: A maintenance worker checks a fume extraction arm against a checklist to ensure proper function.

A fume extraction arm for laboratory use is only as good as its installation and care. Proper setup and regular maintenance ensure it provides reliable protection.

Always check with your facility’s EHS department before installation. They will have specific guidance for your lab. Following the manufacturer’s instructions is also essential for a safe setup.

Installation Tips

  • Anchor Securely: Fasten the mounting bracket to a solid part of the wall, ceiling, or bench. A wobbly mount is a safety hazard.
  • Position for Workflow: Mount the arm where it will not interfere with movement. It should be easy to pull into position and push away.
  • Check Range of Motion: Before final setup, test the arm’s movement. Make sure it can reach all necessary positions without hitting lights or other equipment.

Simple Maintenance Checklist

A little regular attention will keep your fume extraction arm in top working order.

  1. Inspect Joints: Move the arm through its full range of motion. If it is too loose or stiff, adjust the tension according to the manufacturer’s guide.
  2. Clean the Hood: Wipe down the capture hood weekly. Residue can restrict airflow.
  3. Check for Blockages: With the fan running, feel for suction at the hood. If the pull seems weak, check for a blockage in the ductwork.
  4. Examine Hoses: Look at the flexible hoses for any cracks or loose fittings. Leaks can release contaminated air back into the lab.

Frequently Asked Questions

When you decide to laboratory snorkel arm buy online, a few questions often come up. Here are answers to common concerns.

1. What is the difference between a fume hood and a fume arm?

A traditional fume hood is a large, enclosed cabinet that ventilates an entire workspace inside it. It is for large scale work with a high volume of fumes. A fume extraction arm for laboratory use is a flexible “source capture” device. It grabs contaminants right where they are made, making it perfect for smaller tasks at an open bench.

2. How much airflow (CFM) do I need?

The required airflow, measured in CFM (Cubic Feet per Minute), depends on your application. The type of contaminant, how much is produced, and its density all matter. Heavier particles like dust need a higher capture velocity than lighter vapors. Consult your EHS department for specific recommendations.

3. Can multiple arms connect to one fan?

Yes. It is common to connect several fume arms to a single fan in a manifold system. This is an efficient way to equip a lab with multiple workstations. The system must be designed by a professional to ensure every arm has enough suction.

4. What is the Nederman exhaust snorkel price range?

The Nederman exhaust snorkel price varies based on the model, materials, and length. Standard, general purpose models are the most affordable. Specialized arms, such as those made from chemical resistant polypropylene or for anti-static (ESD) environments, will have a higher price. For accurate pricing, it is best to request a direct quote.

5. How do I clean a fume extraction arm?

Cleaning a fume arm is simple. Wipe the exterior tubes and joints with a mild detergent and a damp cloth. The capture hood may need more frequent cleaning with a compatible cleaner. Always turn the fan off before cleaning. Never use abrasive cleaners that can scratch the surfaces.

A detailed shot of a Nederman fume extraction arm's articulating joint, showing its durable construction.

6. Where is the best place to position the extraction hood?

For best results, position the capture hood as close to the source of the fumes as possible, usually within 6 to 12 inches. Place it slightly above and behind the contaminant source to draw fumes away from the user’s breathing zone without disturbing the work process.

The Right Choice for a Safer Laboratory

Choosing the right fume extraction arm for laboratory use is a critical step in creating a safe and efficient workspace. By capturing harmful fumes, dust, and vapors at the source, these flexible arms provide targeted protection that general ventilation cannot match.

From understanding mounting options like the wall mount exhaust snorkel to selecting the right materials for your chemicals, making an informed decision protects your team. The Original Exhaust Snorkel from Nederman is a top choice for general lab applications, offering reliability, durability, and ease of use.

Labs-USA provides quality products with competitive pricing and the fastest shipping in the industry. Let our experts help you find the perfect solution for your lab.

Buy Online Now

Request a Quote

A Complete Guide to Exhaust Snorkels for Manufacturing Labs

Exhaust snorkels are a critical piece of equipment in manufacturing labs. They provide what is called source capture ventilation. They are designed to pull hazardous fumes, particulates, and vapors directly from the spot where they are created. This targeted approach is more effective than relying on general room ventilation. It stops contaminants from reaching an operator's breathing zone or spreading throughout the facility. Proper selection is key for personnel safety and regulatory compliance.


TL;DR: Key Takeaways

  • What they are: Exhaust snorkels are articulated arms that capture fumes, vapors, and dust at the source, before they contaminate the lab air.
  • Why they matter: They are an essential engineering control for protecting employee health, ensuring product quality, and meeting OSHA safety standards.
  • How to choose: Selection depends on the type of contaminant, required airflow (CFM), capture velocity, workspace layout, and chemical compatibility of materials.
  • Key types: Options include articulated arms for flexibility, fixed systems for dedicated equipment, and mobile units for multi-use areas.

Why Exhaust Snorkels Matter in Manufacturing Labs

Exhaust snorkel system actively capturing steam from a small part on a workbench in a manufacturing lab.

Manufacturing labs often generate a mix of airborne hazards. These hazards can put personnel, equipment, and products at risk. Relying on general room ventilation alone is like trying to clear a smoky room by opening a distant window. It is slow and inefficient. An exhaust snorkel works like a vacuum hose held directly over the source, capturing contaminants immediately.

Protecting Personnel and Products

This method of source capture is a fundamental engineering control. It is a cornerstone of modern lab safety and OSHA compliance.

Common contaminants found in manufacturing labs include:

  • Chemical Vapors: Released from solvents, adhesives, and cleaning agents.
  • Fine Particulates: Generated during tasks like weighing powders, soldering, or laser etching.
  • Aerosols: Created when spraying or agitating liquids.

An exhaust snorkel removes these hazards at their origin. This protects the health of lab technicians. It also prevents cross contamination that could impact product quality. By containing these hazards on the spot, you create a safer and more productive workspace.

Meeting Safety and Compliance Standards

Regulatory bodies like the Occupational Safety and Health Administration (OSHA) have strict rules to protect workers. A key concept is the Permissible Exposure Limit (PEL). This sets the legal limit for how much of a substance a worker can be exposed to over time.

Relying on general room ventilation alone makes it difficult to prove that you are staying below the PELs for chemicals used at a specific workstation. Source capture systems, like exhaust snorkels, provide a direct and measurable engineering control to ensure compliance. A proactive ventilation strategy is a non negotiable part of a modern, safe laboratory.

Facilities that plan their ventilation upgrades in advance often secure better project timelines. Starting the evaluation process early provides the time needed to specify the right system without being rushed, helping avoid delays caused by high equipment demand.

Types of Exhaust Snorkels and Related Solutions

Not all exhaust snorkels are the same. Finding the right design for your lab's specific workflow is key to effective ventilation. The choice depends on understanding the different system types and where each performs best.

Articulated, Fixed, and Mobile Snorkels

  • Articulated Snorkels: These are the most common type. They feature multiple joints, like a human arm. This allows precise positioning over a fume or dust source. They are ideal for dynamic workstations where tasks and equipment change. They are typically mounted to a wall or ceiling.
  • Fixed Snorkels: A fixed system is a stationary ventilation point. It is often used for dedicated equipment that consistently produces contaminants in the same spot, such as an automated dispensing machine.
  • Mobile Snorkels: This is a self contained unit on wheels. It includes an extraction arm, fan, and filtration. These systems are useful in labs where installing permanent ductwork is not an option or where ventilation is needed at multiple locations.

Fume Arms and Auxiliary Extraction Options

In certain workflows, other systems can augment or replace snorkels. A fume extraction arm for a laboratory serves a similar function. It provides flexible, targeted source capture. The specific design and materials determine its suitability for different applications.

For processes involving aggressive chemicals, a specialized chemical resistant fume arm is necessary. These are constructed from materials like polypropylene to withstand corrosive vapors that would damage standard metal arms.

To help clarify your options, contact our team for a ventilation consultation. We can help you compare the performance of different systems for your specific needs.

How to Choose the Right Exhaust Snorkel: A 5-Step Checklist

Selecting the correct exhaust snorkel requires a clear process. This checklist provides a framework to define your needs and evaluate options effectively.

1. Identify Your Contaminants

First, you must know exactly what you need to capture. Make a list of every process at the workstation that generates airborne fumes, dust, or vapors. Consult the Safety Data Sheets (SDS) for each chemical to understand its hazards and exposure limits. This step determines material compatibility and required airflow.

2. Determine Required Airflow (CFM)

Next, calculate the necessary airflow, measured in Cubic Feet per Minute (CFM), and capture velocity. Capture velocity is the air speed at the snorkel's opening needed to grab contaminants. A slow moving vapor may only need 100 feet per minute (FPM), but high velocity dust could require 500 FPM or more. Your Environmental Health and Safety (EHS) team can help determine the correct velocity for your application.

3. Map Your Workspace Layout

The physical layout of your lab will dictate the snorkel’s design. Measure the distance from the planned mounting point to the work area to determine the required reach of the arm. Note any obstructions like light fixtures or shelving. The snorkel must move freely without creating an obstacle for your team.

4. Select Appropriate Materials

The snorkel's construction materials must be compatible with your identified contaminants.

  • Anodized Aluminum: A good general purpose choice for dust, smoke, and non corrosive vapors.
  • Polypropylene: The standard for labs working with a wide range of corrosive acids and solvents.
  • ESD-Safe Conductive Materials: Essential for electronics manufacturing or any environment where static discharge is a risk.

5. Plan for System Integration

Finally, consider how the new snorkel will connect to your building’s ventilation system. Your HVAC system must have enough capacity to handle the extra airflow without negatively affecting ventilation in other lab areas. Consult with a ventilation specialist or your facilities manager to assess your current system's capabilities.

Performance and Specification Considerations

Scientist in PPE, including goggles and respirator, works with a balance scale emitting vapor.

Choosing the right exhaust snorkel requires a review of technical specifications. These details determine how well the system will perform and keep your team safe. Getting these specs right upfront is critical for a successful project.

  • Airflow (CFM): This is the volume of air the snorkel moves. Most lab snorkels range from 75 to 125 CFM, but this value must be matched with the correct capture velocity.
  • Capture Velocity: This is the air speed at the snorkel's opening. It is the "pull" that grabs contaminants. The right velocity depends entirely on the process.
  • Reach and Positioning: The snorkel arm must be long enough to comfortably reach the work area. Multiple joints provide greater positioning precision.
  • Chemical Resistance: The materials must withstand the chemicals in use. Polypropylene is standard for corrosives, while ESD safe materials are needed for electronics.
  • Ducting Requirements: The snorkel must connect to your building's main exhaust system. The duct path should be as short and straight as possible to maintain performance.

Exhaust Snorkel Use-Case Scenarios

The best ventilation solution depends on the specific application. Here are five common scenarios to guide your decision.

  1. Electronics Soldering Station: The primary hazard is solder smoke and flux fumes. An ESD safe articulated arm with a fishtail hood is ideal. It provides targeted capture without disturbing small components.
  2. Chemical Weighing Bench: Powders can become airborne easily. A snorkel with a clear cup hood can be positioned directly over the balance. This captures fine particulates before they spread. Moderate airflow is needed to avoid disturbing the measurement.
  3. Adhesive Application Area: Solvents in adhesives release VOCs. A polypropylene articulated snorkel is required for chemical resistance. It can be moved along a bench to follow the application process.
  4. Quality Assurance (QA) Lab: QA testing may involve various small scale chemical processes. A mobile exhaust snorkel unit offers flexibility. It can be moved between stations as needed, providing source capture without permanent ductwork.
  5. Laser Etching Machine: Laser etching creates fine particulates and fumes. A fixed snorkel inlet positioned at the machine's exhaust port provides consistent, dedicated ventilation.

Industry-Specific Applications

Different industries have unique ventilation needs.

  • Dental Labs: An exhaust snorkel for a dentist lab must capture fine particulates from grinding and polishing as well as fumes from monomer liquids. Ergonomic positioning is critical for technician comfort and effectiveness.
  • Nutrition Labs: An exhaust snorkel for a nutrition lab is used to control odors and vapors during sample preparation and analysis. Materials must be easy to clean to prevent cross contamination.
  • Manufacturing Labs: General manufacturing and chemical processing labs face a wide range of hazards. The snorkel system must be robust and often requires chemical resistant materials to handle solvents, acids, and other vapors.

Comparison of Ventilation Solutions

Choosing the right system involves comparing different technologies. Exhaust snorkels provide targeted capture, but other systems may be better suited for certain tasks.

System Type Primary Use Case Flexibility Containment Level
Exhaust Snorkel Targeted fume/dust capture at open benches High Good (at source)
Fume Hood Handling highly hazardous or volatile chemicals Low (fixed) Excellent (enclosed)
Ductless Fume Hood Moderate chemical use where ducting is not possible Moderate (can be moved) Good (filter dependent)
Mobile Extractor Flexible, multi-location fume capture Very High Good (filter dependent)

Each system has a distinct purpose. A snorkel is excellent for a soldering station, but a full fume hood is required for handling large volumes of volatile solvents.

Procurement, Installation, and Maintenance

Maintenance worker on a ladder inspecting industrial exhaust system and pipes with a clipboard.

Evaluating Vendors and Lead Times

When evaluating vendors, look for expertise in lab ventilation and a history of successful installations in manufacturing environments. Ask for references and case studies. Typical lead times for snorkel systems can range from 4 to 8 weeks. Planning your procurement cycle early helps avoid installation delays and ensures equipment availability.

Planning for Installation

Proper installation is critical for performance. Before ordering, confirm ceiling height, identify obstructions, and map out ductwork paths. Ensure your building's HVAC system can handle the additional airflow. A structural assessment may be needed to verify that walls or ceilings can support the mounting hardware.

Performance Validation and Maintenance

After installation, validate the system's performance. Use an anemometer to measure capture velocity at the hood opening to confirm it meets specifications. A consistent maintenance schedule is essential for long term reliability.

  • Monthly: Visually inspect joints, seals, and hoods for wear or damage.
  • Quarterly: Clean the snorkel arms and hoods to remove residue.
  • Annually: Measure capture velocity to ensure ongoing performance and compliance.

Frequently Asked Questions (FAQs)

1. What is the main difference between an exhaust snorkel and a fume hood?
A fume hood is a large, enclosed cabinet that provides a high level of containment for working with volatile or highly hazardous materials. An exhaust snorkel is a flexible arm used for capturing contaminants at the source in an open workspace.

2. How much airflow (CFM) do I need?
Most lab applications require between 75 and 125 CFM. However, the exact amount depends on the type of contaminant and the required capture velocity. A proper assessment is needed to determine the precise specification.

3. Can exhaust snorkels be used in cleanrooms?
Yes, but they must be specifically designed for cleanroom use. These models are made from non shedding materials like stainless steel to prevent introducing particles into the controlled environment.

4. What materials are snorkels made from?
Common materials include anodized aluminum for general purposes, polypropylene for chemical resistance against corrosive fumes, and conductive ESD safe plastics for electronics manufacturing.

5. How do I know if my building's ventilation can support a new snorkel?
Consult with a ventilation expert or your facilities manager. They can assess your HVAC system's capacity to ensure it can handle the additional airflow from the new snorkel without disrupting the building's air balance.

6. What is a typical maintenance schedule?
Perform a visual inspection monthly, clean the unit quarterly, and validate the airflow and capture velocity annually. Always follow the manufacturer's recommendations and your facility's EHS guidelines.

7. What is the average lead time for an exhaust snorkel system?
Lead times typically range from 4 to 8 weeks, depending on the model and any customizations. It is best to confirm current availability with your vendor early in the planning process.

Conclusion

Selecting the right exhaust snorkels for manufacturing labs is a critical decision that impacts employee safety, product integrity, and regulatory compliance. By carefully evaluating your lab's specific processes, contaminants, and physical layout, you can choose a system that provides effective and reliable source capture ventilation. A well planned system is a long term investment in a safer, cleaner, and more productive workspace.

Ready to improve your lab's air quality and safety?

Frequently Asked Questions

What is an exhaust snorkel used for in a manufacturing lab?

An exhaust snorkel captures fumes, vapors, and particulates right at the source. It is positioned directly over or beside the work area and connects to the building exhaust system to remove contaminants before they spread.

How is an exhaust snorkel different from a fume hood?

A fume hood is a fixed, enclosed workspace. An exhaust snorkel is a flexible, repositionable arm that provides local exhaust ventilation at different points in the room. Snorkels are better for processes that move between locations or require open-bench access.

A Guide to Chemical Exhaust Systems for Public Labs

Properly designed chemical exhaust systems are a fundamental part of safety in any public lab. These systems are the first line of defense against hazardous fumes, vapors, and particles common in research. They are engineered to capture, contain, and remove airborne contaminants. This protects both your team and the integrity of your work.

TL;DR: Key Takeaways

  • Primary Function: Chemical exhaust systems protect lab personnel by capturing and removing airborne hazards at the source.
  • System Types: The main options are ducted fume hoods, ductless fume hoods, and local exhaust ventilation (LEV). Each serves a different purpose.
  • Critical Components: A complete system includes a containment device (like a fume hood), ductwork, exhaust fans, and an exhaust stack.
  • Compliance is Key: Systems must comply with standards from ASHRAE, NFPA, and OSHA to ensure safety and avoid penalties.
  • Make-Up Air: For every cubic foot of air exhausted, a cubic foot of fresh air must be supplied back to the lab to maintain balance and performance.
  • Maintenance Matters: Regular inspections and annual professional certification are required to keep the system working correctly.

The Core Function of Laboratory Ventilation

A person in safety glasses and gloves works inside a chemical fume hood labeled "LAB SAFETY".

Effective chemical exhaust systems for public labs are not simple vents. They are engineered solutions built for one main goal: keeping the air safe to breathe. They control exposure to airborne hazards for technicians and researchers. This is a critical function supported by a network of components working together.

The market for this equipment shows its importance. In 2024, the global laboratory exhaust system market was valued between $2.1 billion and $4.85 billion. North America accounted for 38% of that revenue. The market continues to grow due to lab modernizations and increased research activities.

Essential Components and Principles

At the heart of any ventilation system are the primary engineering controls. These controls are designed to capture contaminants at the source. Understanding these parts is the first step in creating a safe, efficient, and compliant lab.

The system breaks down into a few key pieces:

  • Containment Devices: This is where the process begins. These devices include chemical fume hoods, which create a physical barrier and controlled airflow to capture contaminants. For more details, explore our guide on different types of https://labs-usa.com/laboratory-fume-hoods/.
  • Ductwork: Once captured, the contaminated air needs a safe path out of the building. Ductwork is a network of pipes that transports it away from people.
  • Exhaust Fans: These are the engines driving the system. The fans create the negative pressure needed to pull air from the containment device, through the ducts, and out of the lab.
  • Exhaust Stacks: Usually found on the roof, these stacks are the final exit point. They release the diluted contaminants high into the atmosphere at a specific velocity to ensure safe dispersal.

Of course, the best equipment is only part of the solution. A truly safe lab combines strong engineering with smart procedures. This includes the proper use of clear and compliant laboratory hazard signs. When equipment and team practices align, you create a complete safety net.

Comparing Core Types of Chemical Exhaust Systems

Choosing the right chemical exhaust system is a major decision for a public lab. It is not a one-size-fits-all situation. The best choice depends on the specific chemicals you handle, your building's layout, and your team's daily work. Understanding the main differences between systems is the first step to a safe and compliant lab.

A modern laboratory features three blue chemical fume hoods and matching storage cabinets.

Let's look at the primary technologies: ducted fume hoods, ductless models, and local exhaust ventilation. We will also cover the vital role of make-up air. Without it, none of these systems work correctly. Each one has a specific job in protecting your personnel from airborne contaminants.

Ducted Fume Hoods: The Industry Standard

When you picture a lab, you probably imagine a ducted fume hood. They are the most common and robust solution for good reason. They work by capturing contaminated air, pulling it through ducts, and exhausting it safely outside the building. Once the air is outside, it is gone.

Because they completely remove fumes, ducted hoods are the required choice for handling:

  • Highly toxic or carcinogenic chemicals
  • Substances with a low odor threshold
  • A wide and unpredictable mix of different chemicals
  • Experiments that generate significant heat or noxious byproducts

These systems offer the highest level of protection. This makes them the standard for general chemistry, research, and applications involving volatile compounds.

Ductless Fume Hoods: Flexible Filtration

Unlike ducted systems, ductless fume hoods do not vent air outside. Instead, they act as a high-tech filter. They pull contaminated air through specialized carbon and HEPA filters designed to trap specific chemicals. Then, they circulate the clean air back into the lab.

This design is useful in labs where running new ductwork is impossible or too expensive. However, their use is limited. They are only suitable for handling small volumes of known, low-to-moderate hazard chemicals. You must match the filter to the chemicals you use. A serious safety review is necessary. For more information, you can review ductless fume hood options.

Local Exhaust Ventilation for Targeted Capture

Sometimes, you do not need the full enclosure of a fume hood. This is where Local Exhaust Ventilation (LEV), or source capture, is useful. Think of a flexible snorkel arm positioned directly over a specific task. Its job is to remove contaminants at the point they are created.

LEV is ideal for small-scale tasks that generate localized fumes, dust, or vapors. Examples include soldering, weighing powders, or working with histology stains. By capturing contaminants before they mix with room air, these systems provide efficient protection without the large footprint of a full hood.

The Critical Role of Make-Up Air

An exhaust system is only half of the equation. For every cubic foot of air a fume hood pushes out, a cubic foot of fresh replacement air must be brought back in. This replacement air is called make-up air.

If you do not have a dedicated system for this, the lab develops negative pressure. This can cause problems like doors that are hard to open and backdrafts from other vents. Most importantly, it hurts fume hood performance. A balanced system is essential for the equipment to function safely.

Comparison of Chemical Exhaust System Types

This table shows the core features of each ventilation strategy. It helps you understand the strengths and limitations of each one.

System Type Containment Method Best For Key Limitation
Ducted Fume Hood Vents contaminated air outside the building High-hazard, volatile, and unknown chemicals Requires complex and permanent building ductwork
Ductless Fume Hood Filters air and recirculates it into the room Low-hazard, known chemicals in small volumes Filters have a limited lifespan and chemical capacity
Local Exhaust (LEV) Captures contaminants at the source of generation Localized fumes, dust, and specific tasks Does not provide full-body protection or a contained workspace

Choosing the right system means balancing chemical hazards with your facility's limits. Understanding these basics helps you make an informed choice that keeps everyone safe.

How to Select the Right Chemical Exhaust System

Picking the right chemical exhaust system is a major decision. It affects researcher safety, your budget, and the integrity of your work for years. Getting it right means creating a space that is not just compliant, but also suited for your specific science.

Scientist in lab coat checking a selection checklist on a clipboard inside a chemical fume hood.

Let's walk through a practical, five-step checklist to simplify this important choice. Following a structured process ensures you end up with a system that supports your needs and delivers long-term value.

Your 5-Step Selection Checklist

This checklist breaks the process into five manageable steps. Each step builds on the last, helping you gather the information needed to specify the perfect equipment.

1. Start with a Thorough Hazard Assessment

First, you need to know exactly what you are trying to contain. List every chemical you will use. Note its toxicity, volatility, and the quantities involved. Review the Safety Data Sheet (SDS) for each chemical. This will tell you if a robust ducted hood is necessary or if a ductless model or snorkel arm is sufficient.

2. Determine Airflow and Face Velocity Needs

Airflow is the lifeblood of an exhaust system. Your hazard assessment will help determine the required face velocity. This is the speed at which air is pulled into the hood, typically between 80 and 120 feet per minute (FPM). An engineer can then calculate the total air volume (CFM) your system needs to move based on the size and number of hoods.

3. Weigh Energy Efficiency and Control Systems

An exhaust system can use a lot of energy. You can choose between two main types. Constant Air Volume (CAV) systems run at full capacity all the time. Variable Air Volume (VAV) systems are smarter, adjusting airflow based on the sash height. While VAV systems have a higher initial cost, they can reduce utility bills over the long run.

4. Select the Right Construction Materials

The materials of your fume hood and ductwork must resist the chemicals they are exposed to. For example, stainless steel is good for solvents but can be damaged by strong acids. For corrosive environments, polypropylene or epoxy-coated steel are better choices. Matching the material to the hazard is key for system longevity.

5. Plan for Building Integration and Make-Up Air

A fume hood is part of your building’s overall HVAC system and must be integrated correctly. A critical component is the make-up air system. All exhausted air must be replaced. Without it, the lab becomes negatively pressurized, which reduces hood performance and creates a safety hazard. This step requires coordination between lab planners, HVAC engineers, and facility managers.

Common Decision Scenarios for Public Labs

Choosing the right system depends on your lab's specific application. Here are five common scenarios to help guide your decision-making process.

1. University General Chemistry Teaching Lab

  • Scenario: A lab used by hundreds of students for introductory chemistry courses. Work involves a wide variety of common acids, bases, and organic solvents in small quantities.
  • Recommendation: Multiple ducted fume hoods with a Constant Air Volume (CAV) system are a practical choice. They are durable, easy to use, and safely handle a broad range of chemicals. This setup is ideal for high-traffic environments like those found in fume hoods for school districts.

2. Municipal Water Quality Testing Facility

  • Scenario: A lab performing routine tests on water samples. This involves trace metal analysis and sample digestion with strong acids like nitric and perchloric acid.
  • Recommendation: A specialized ducted fume hood made of acid-resistant materials like PVC or polypropylene is required. A dedicated scrubber system may also be necessary to neutralize corrosive fumes before they are exhausted.

3. Public Health Department Microbiology Lab

  • Scenario: The lab handles biological samples and uses small amounts of volatile chemicals like formaldehyde or xylene for tissue fixation.
  • Recommendation: A combination of biological safety cabinets for sample protection and targeted local exhaust ventilation, such as an exhaust snorkel for a chemical lab, is often best. The snorkel can be positioned directly over the staining station to capture chemical fumes at the source.

4. High School Science Classroom Demonstration Area

  • Scenario: A teacher performs occasional, low-hazard chemical demonstrations. The building is older, and installing new ductwork to the roof is not feasible.
  • Recommendation: A ductless fume hood with filters matched specifically to the demonstration chemicals is a viable option. A thorough risk assessment by the school’s safety officer is essential to confirm its suitability.

5. Research and Development Lab in a Leased Space

  • Scenario: A startup R&D lab in a commercial building where modifying the core HVAC system is difficult. The work involves repetitive tasks with known, low-toxicity solvents.
  • Recommendation: Ductless fume hoods offer the flexibility needed in a leased space. They avoid major construction and can be moved if the lab relocates. The chemical usage must be carefully managed to ensure filters are effective.

Because specialized equipment is in demand, planning your project in advance is beneficial. This allows more time to secure the right equipment and schedule installation, helping you avoid supply chain issues or contractor backlogs.

Installation and Maintenance Best Practices

A chemical exhaust system is only as good as its installation and maintenance. Proper setup and consistent upkeep are not optional. They are what keep the system performing as designed and protecting your team.

A maintenance worker on a ladder services a wall-mounted filter or vent, following a 'Maintenance Guide'.

Every step, from integrating with the building’s HVAC to routing ductwork, requires precision. After installation, professional commissioning and certification are crucial final steps to validate performance before the system is used.

Professional Installation and Commissioning

Installing chemical exhaust systems for public labs is a specialized job. It is a coordinated effort between lab planners, HVAC technicians, and building engineers.

Duct routing is a significant part of the process. The goal is to create a direct path to the roof-mounted exhaust fan with minimal bends. Every bend creates resistance and can reduce airflow. Additionally, all joints must be sealed perfectly to prevent hazardous fumes from leaking back into the building.

Once the physical installation is complete, the system needs to be commissioned. This is a formal process with tests to verify that every component works correctly. Commissioning provides documented proof that the system is installed correctly and meets safety standards like ASHRAE 110. This is necessary for both compliance and peace of mind.

A Routine Maintenance Checklist

Like any critical equipment, your exhaust system needs consistent care to extend its life and ensure protection. A solid maintenance plan includes regular checks by lab staff and certified technicians.

Here is a simple checklist to get you started:

  • Daily Visual Checks: Lab users should check the hood for any blockages or damage. A quick look at the airflow monitor to confirm it is on and shows a safe status is also important.
  • Monthly Inspections: A designated safety officer should perform a more thorough check. This includes inspecting the sash for smooth operation and looking for signs of corrosion inside the hood.
  • Annual Certification: At least once a year, a certified technician must test the system. They will measure the face velocity to ensure it is in the required 80-120 FPM range, run smoke tests, and inspect the fan and ductwork.
  • Filter Management (Ductless Units): If you use ductless hoods, filter maintenance is crucial. Monitor the filter saturation and replace filters according to the manufacturer’s schedule. Keep a detailed log of every filter change.

Frequently Asked Questions (FAQs)

Planning a major lab investment like a chemical exhaust system raises questions. Asking the right things upfront helps clarify technical specs, budget, and safety rules. Here are answers to common questions from lab managers and planners.

1. What is the difference between face velocity and CFM?

Face velocity and CFM are related but measure different things. Face velocity is the speed of air entering the fume hood opening, measured in feet per minute (FPM). It needs to be fast enough to capture fumes, typically 80 to 120 FPM. CFM (cubic feet per minute) is the total volume of air the system moves. A larger hood needs a higher CFM to achieve the target face velocity.

2. Can I use a ductless fume hood for any chemical?

No. Ductless fume hoods are not a universal solution. Their performance depends on carbon filters that must be matched to specific chemicals. They are not suitable for highly toxic substances, unknown byproducts, or large volumes of volatile chemicals. Always consult your Environmental Health and Safety (EHS) officer for a risk assessment before choosing a ductless hood.

3. How often do chemical exhaust systems need certification?

Every laboratory fume hood must be professionally tested and certified at least once a year. Certification is also required immediately after installation and after any major repair or modification. A qualified technician must perform these tests. For a deeper look at the principles behind this, review our information on fume hood safety.

4. Is a VAV system worth the higher initial cost?

A Variable Air Volume (VAV) system adjusts airflow based on sash height, while a Constant Air Volume (CAV) system runs at full power continuously. Although VAV systems cost more upfront, their energy savings can provide a significant return on investment, especially in labs where usage varies.

5. What factors influence the total installation cost?

The total cost includes more than just the fume hood. Key cost drivers include the exhaust fan, ductwork, make-up air system, labor for mechanical and electrical installation, and control systems. Be sure to get a comprehensive quote that covers all these components.

6. Do I need special casework with my fume hood?

Yes, the casework and cabinets supporting your fume hood should also be rated for lab use. Choosing SEFA 8 compliant casework ensures that your entire workspace meets industry standards for chemical resistance, durability, and safety.

7. What codes and standards must my system meet?

In the U.S., key standards include ASHRAE 110 for performance testing, NFPA 45 for fire safety, and OSHA 29 CFR 1910.1450 for employee exposure limits. You must also comply with local building and fire codes.

Planning Your Lab's Future

Getting your chemical exhaust systems for public labs right is the foundation of your lab's safety, compliance, and efficiency. Proactive planning helps you secure the right equipment and set realistic installation timelines. This foresight helps projects run smoothly and avoid frustrating delays from supply chain issues.

When you address ventilation needs early, you build a safer, more effective lab from the ground up. Also, consider the entire lifecycle of your lab. It is smart to plan for reliable Nationwide Lab Equipment Disposal Services for your scientific instruments. Proper disposal is as important as the initial purchase.

Thinking ahead today prepares you for the research demands of tomorrow. Bringing in specialists early gives your team an advantage, leading to a well-designed, compliant, and cost-effective ventilation solution. It is the best way to protect your people, research, and investment for years to come.

Ready to build a safer, more efficient laboratory?

Compare Fume Hood Options

Request a Quote or Plan Your Layout